Fusion 360 Exercise 8
Updated: 2026-05*
This article was written before 2020. It is kept here as an archive — the content is outdated and some links may no longer work.
Making a Stool
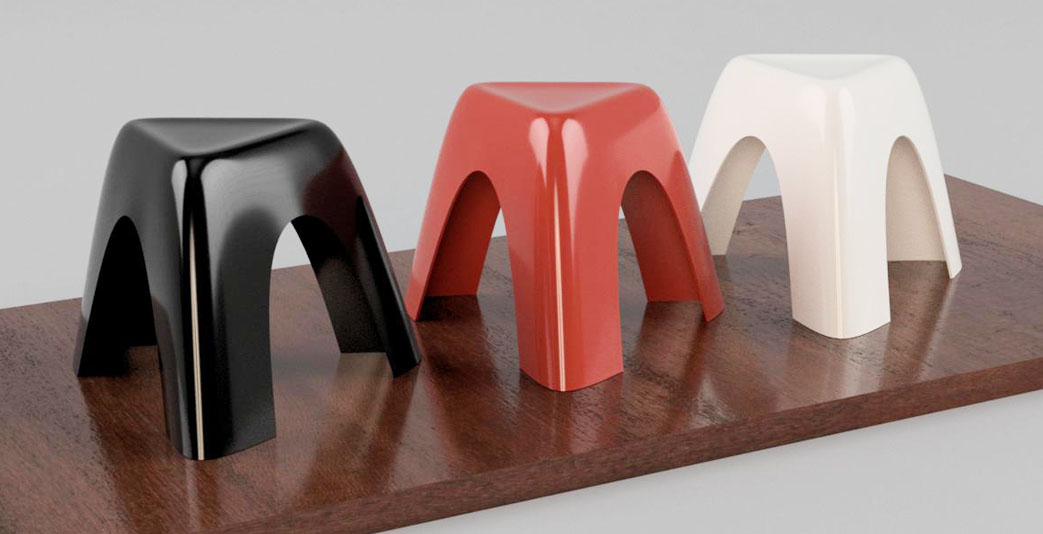
In this exercise, we will create a stool inspired by the Elephant Stool designed by Sori Yanagi. Rather than strictly replicating all aspects of Yanagi’s design, this project is intended to serve as a model for our CAD exercises.
This document was written in October 2017. Functionality has been verified in Fusion 360 version 2.037.
Creating an Equilateral Triangle Sketch
Click the “Create Form” button to enter Sculpt Mode.

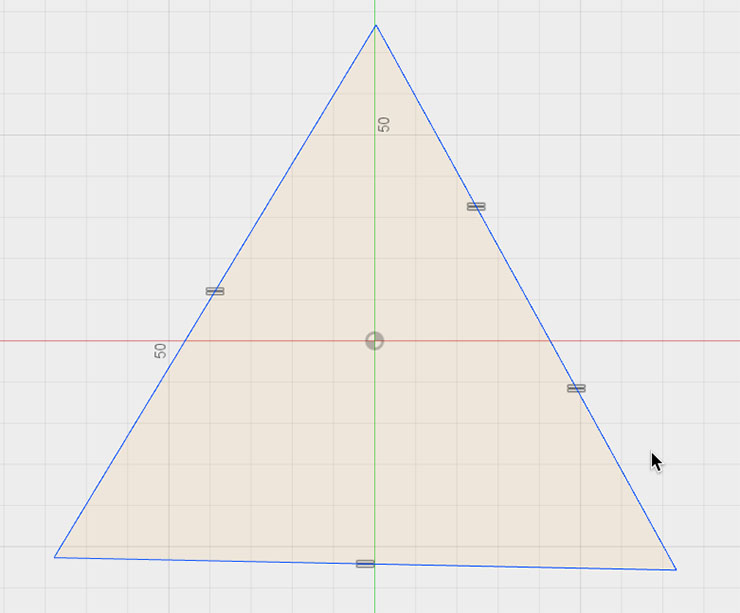
Use the lines in the sketch to draw a triangle in the XZ plane. The positions of the points can be arbitrary.
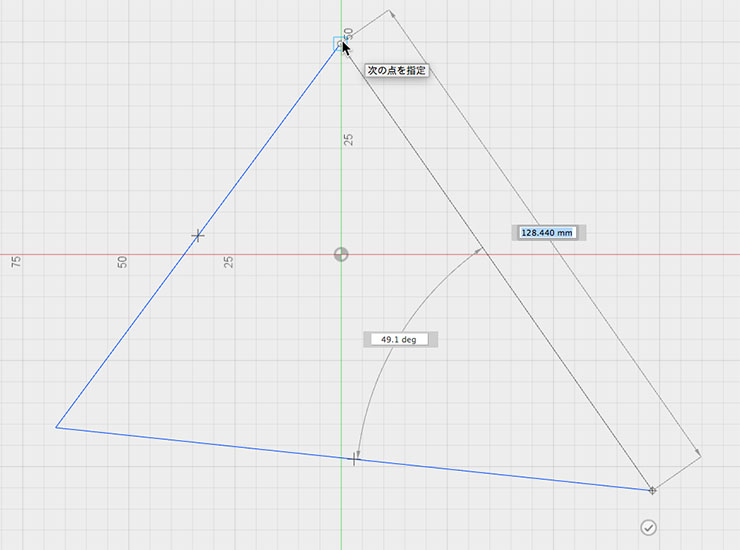
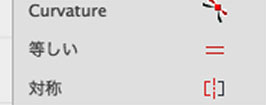
Switch to the Selection tool, and use the “Equal” constraint in the Sketch palette to create an equilateral triangle.
Stop sketching.
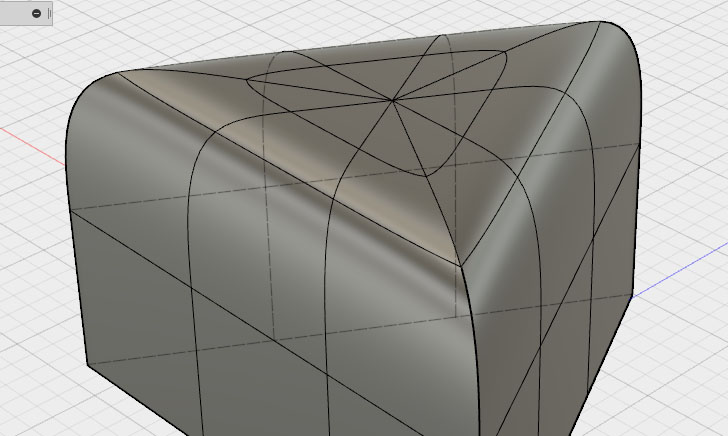
Extrusion
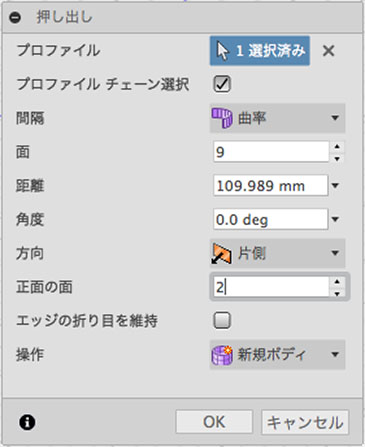
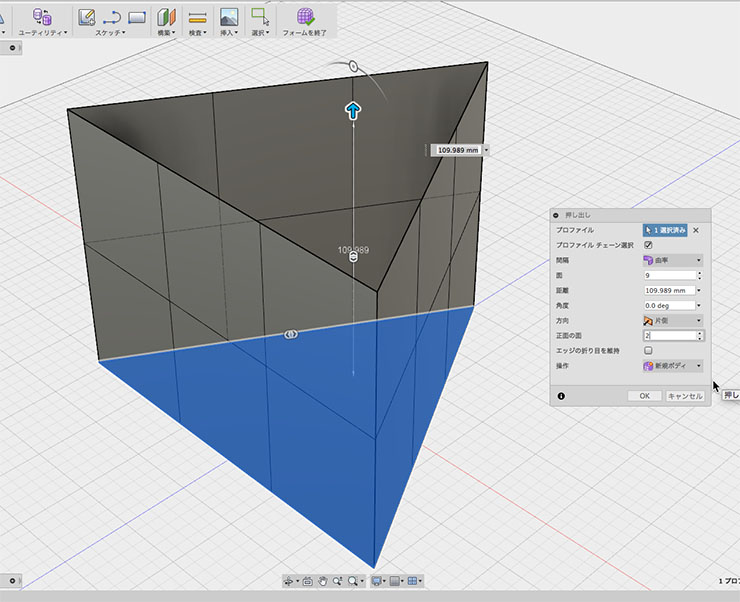
Select Create > Extrude.

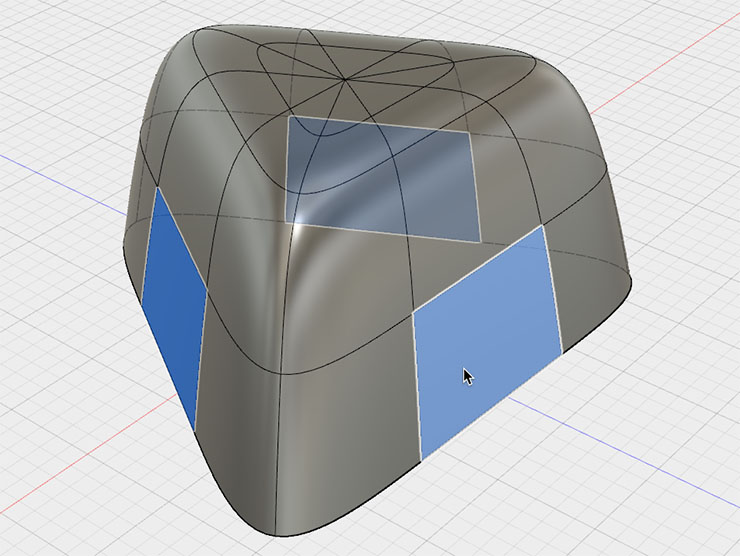
Select the equilateral triangle sketch in the profile. Set the number of faces to 9 and the number of front faces to 2, then click the OK button.
Filling Holes
Double-click the top edge to select it.
Right-click and select “Fill Hole.” Alternatively, click the “Edit” menu and select “Fill Hole.”
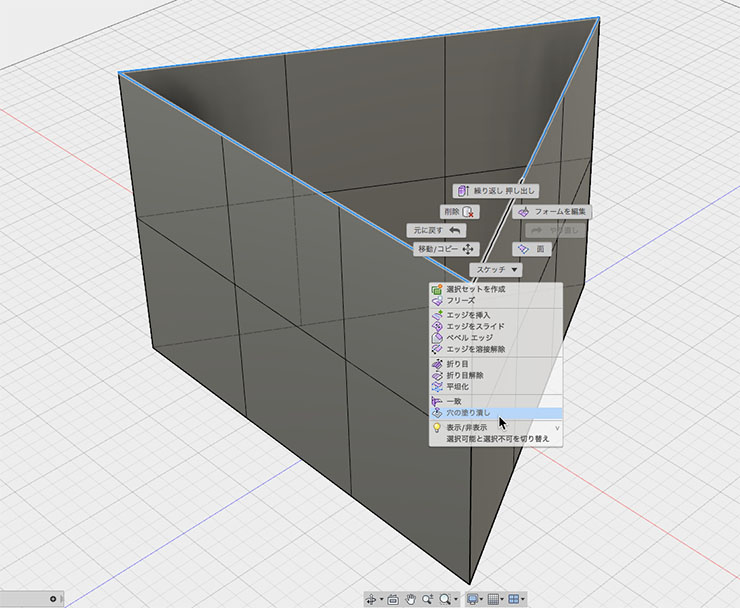

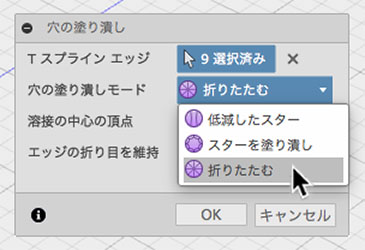
In the Fill Holes dialog box, change the Fill Holes mode to “Collapse,” then click the OK button.
(Do not check the center vertex of the weld. If you do, you will not be able to insert an edge on the seating surface side.)

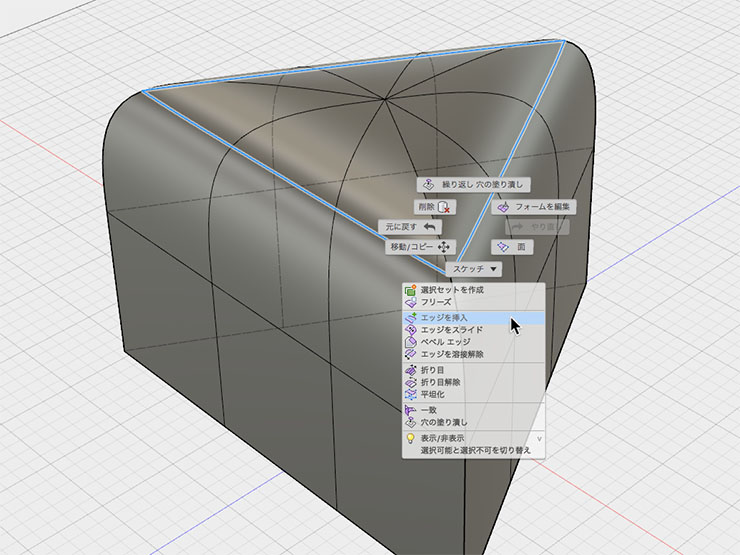
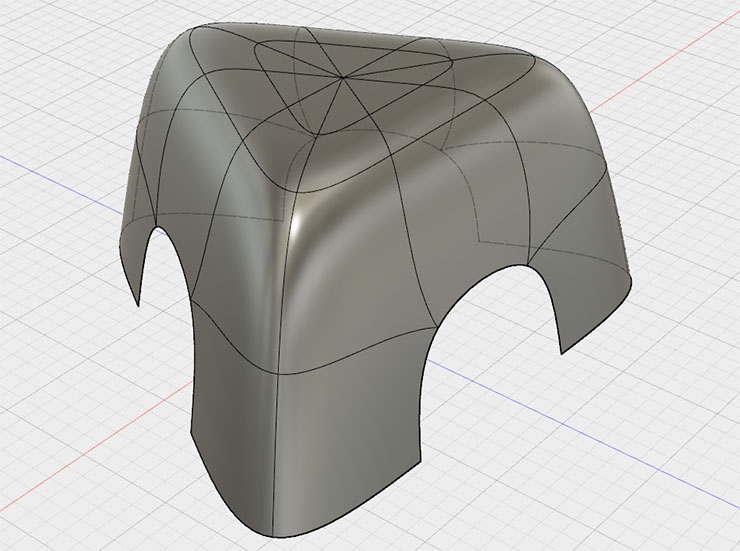
Inserting an Edge
As shown in the figure below, select an edge and right-click. From the menu, click “Insert Edge.”
In the Insert Edge dialog box, click the OK button without making any changes.
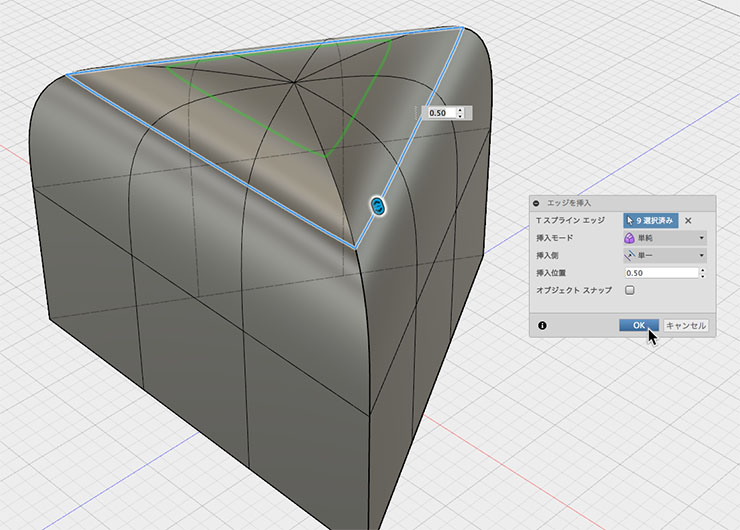
The edge is inserted as shown in the figure below.
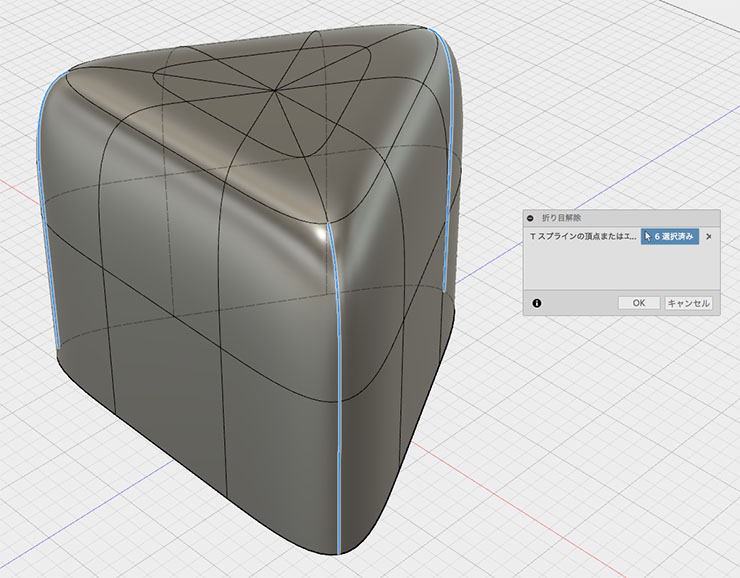
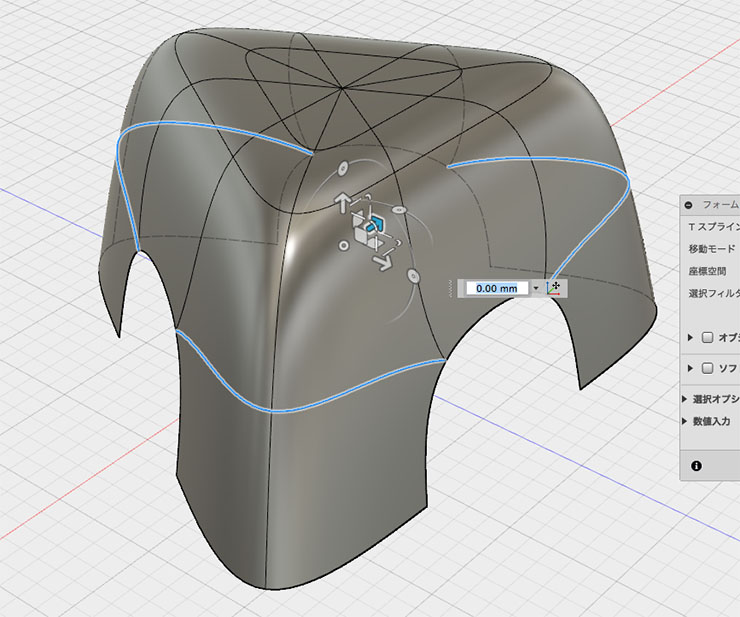
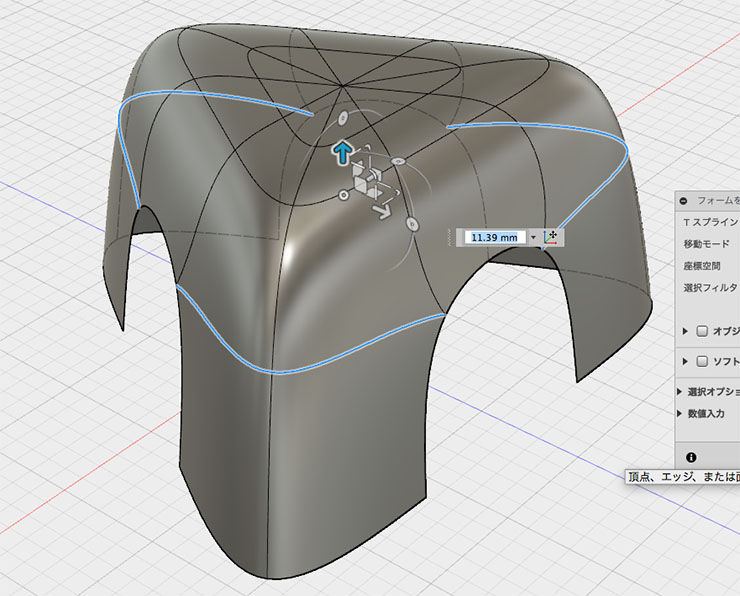
Removing Creases and Correcting Shape
Right-click on the side edge. Click “Unfold” from the menu.

Select all the side edges. Click the OK button in the Unfold dialog box.
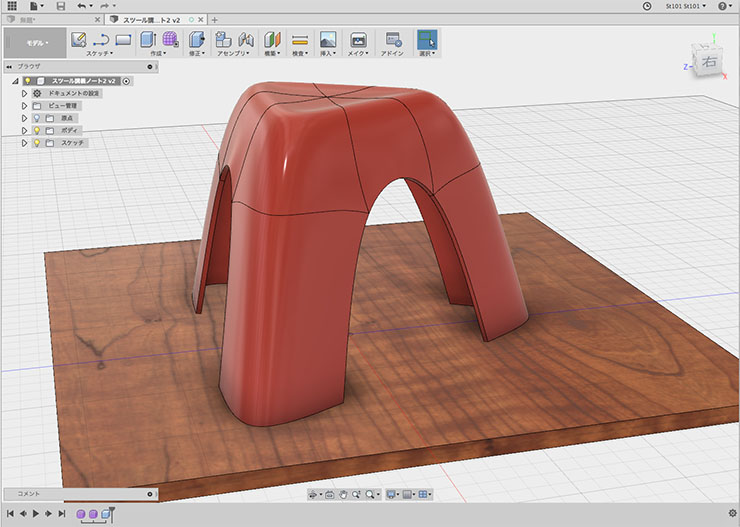
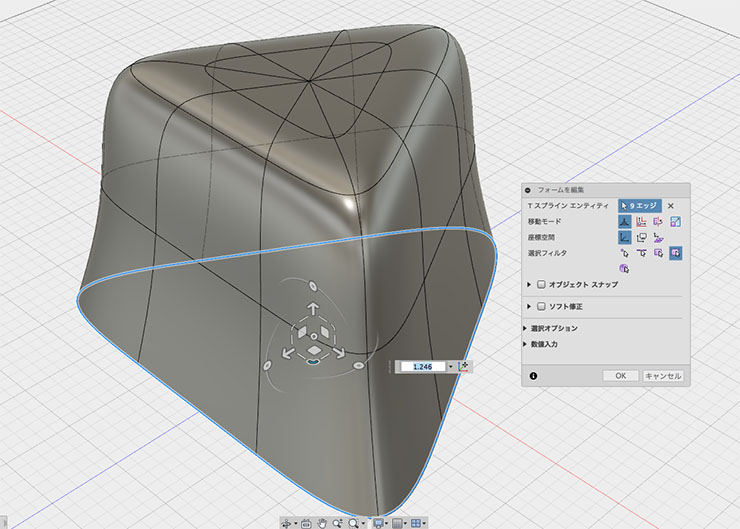
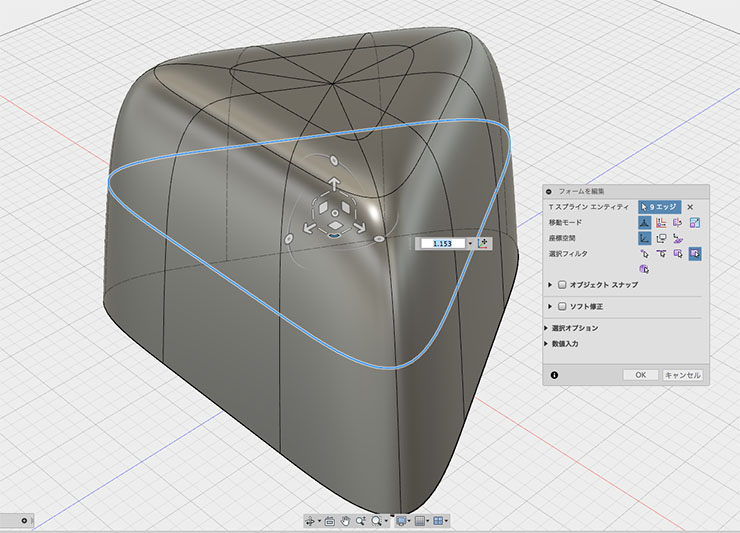
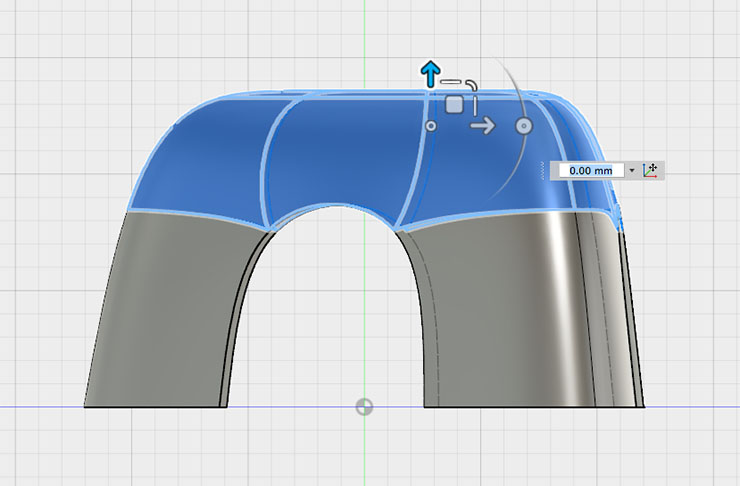
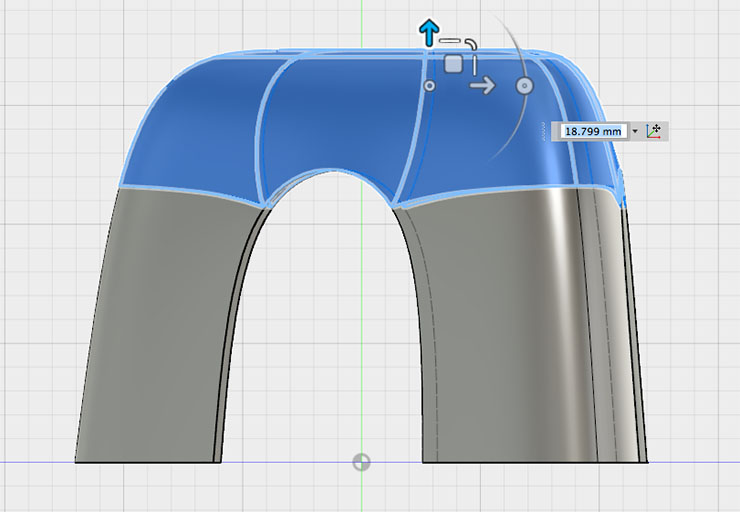
As shown in the figure below, adjust the bottom and middle edges of the form during editing to modify the overall shape so that it tapers outward.
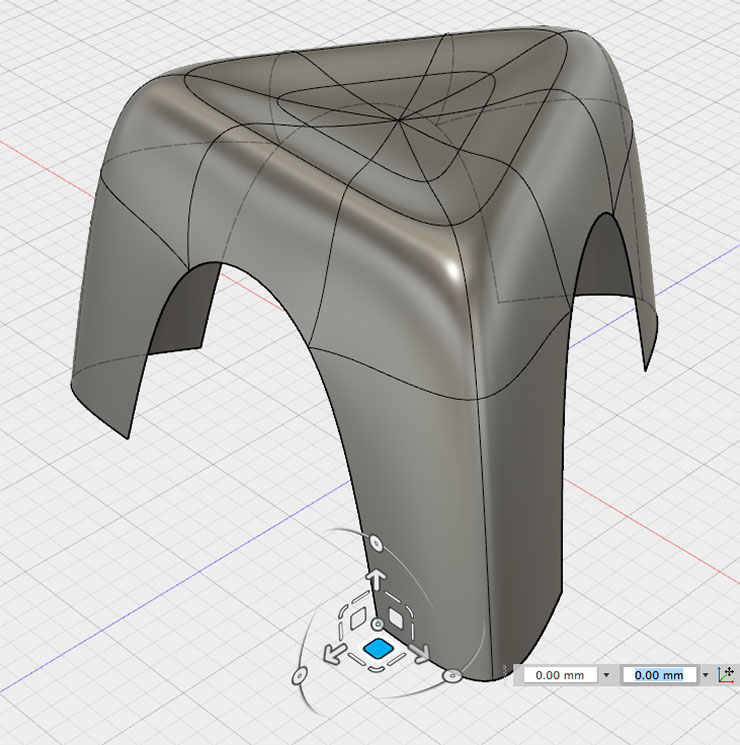
Deleting Faces and Modifying Shapes
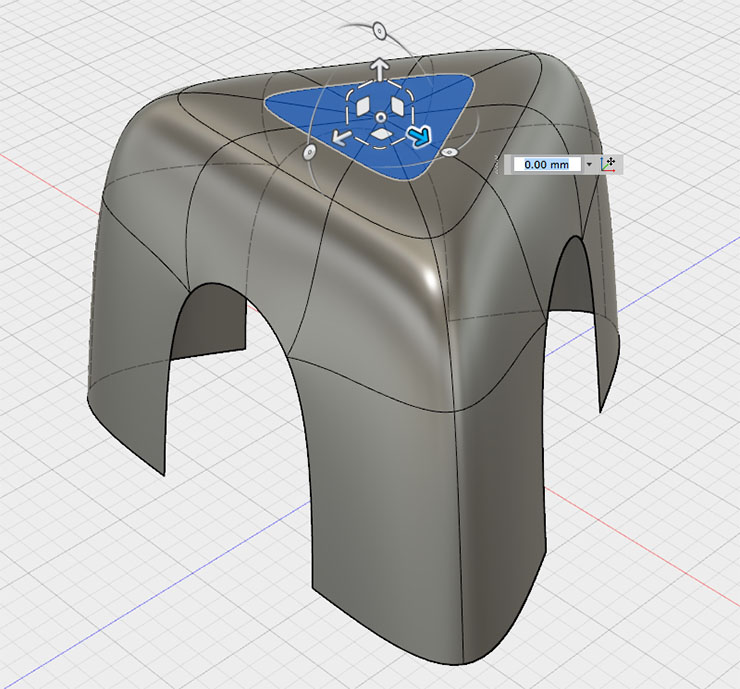
Select the face shown below and delete it.
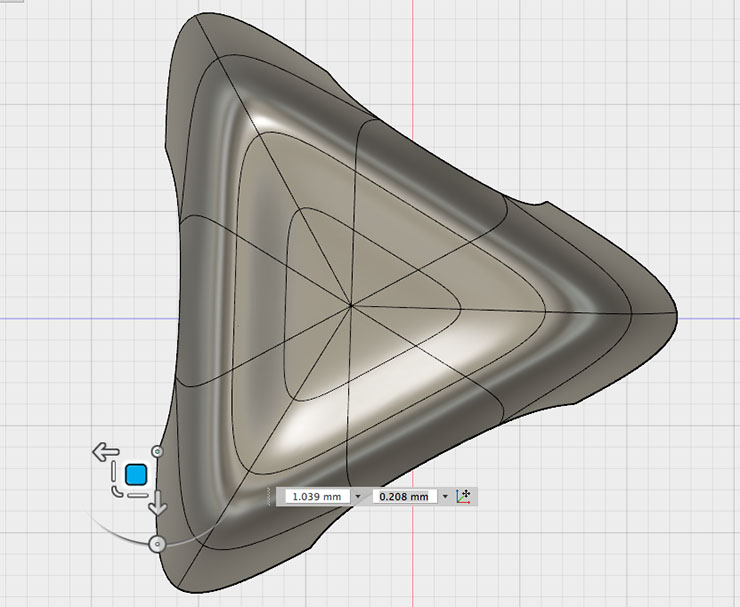
Make various adjustments to suit your preferences.
Adjusting the mid-edge.
Adjusting the height.
Adjusting the seat.

Make your legs slimmer.
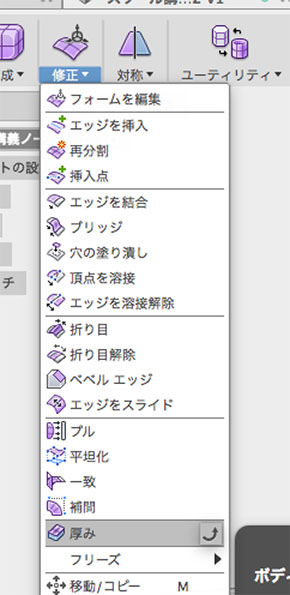
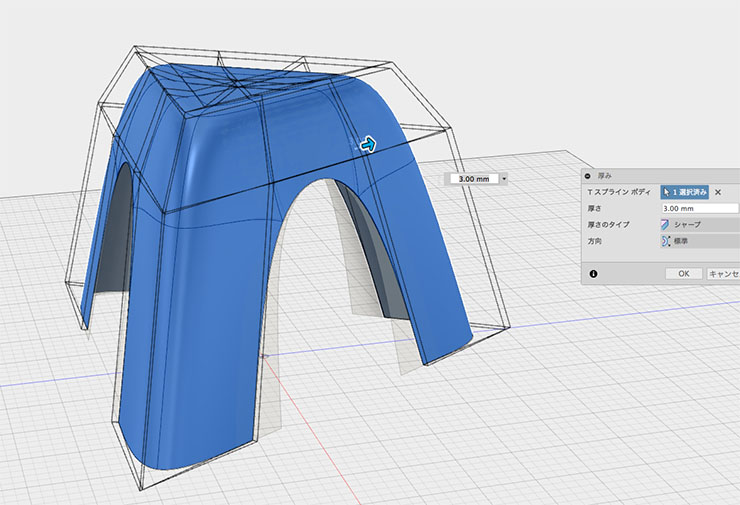
Setting the Thickness
Click “Thickness” under “Modify.” Select the T-spline body.
Set the thickness to 3 mm and click the OK button.
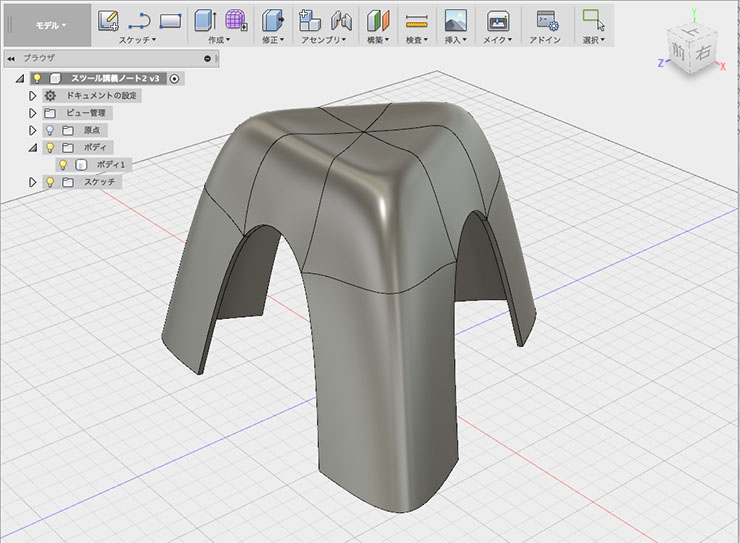
Click the “Close Form” button. The T-spline will be converted to NURBS.
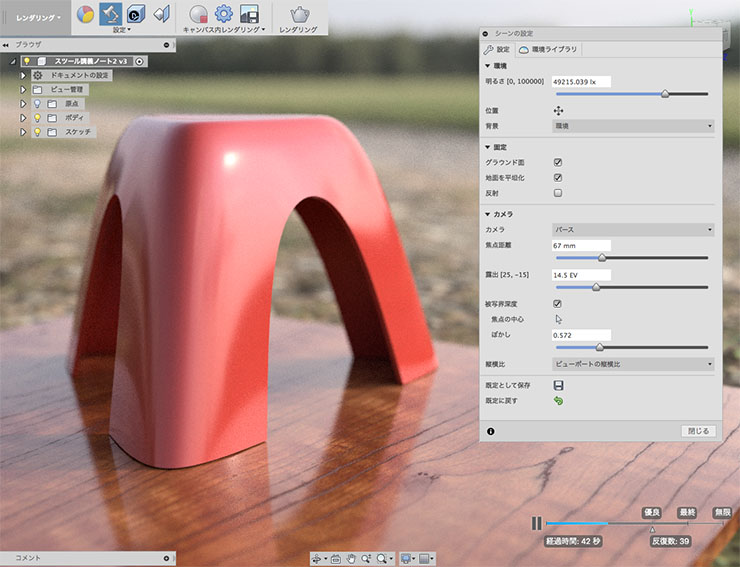
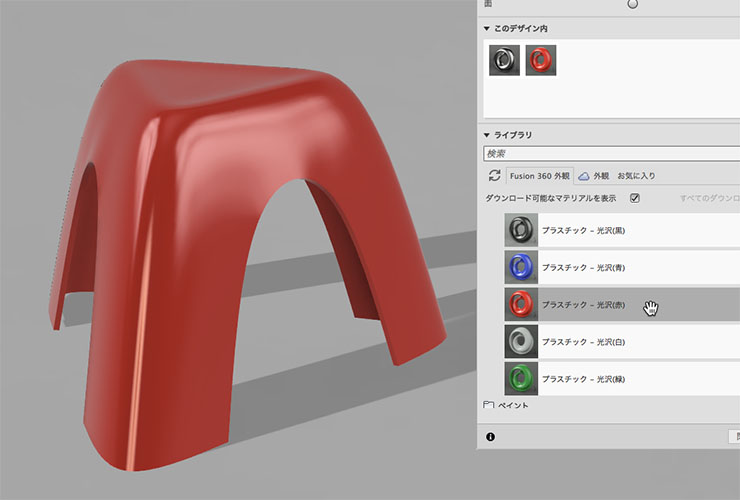
Materials and Rendering
Switch to rendering mode and set the material. In the figure below, “Plastic - Glossy (Red)” is selected.
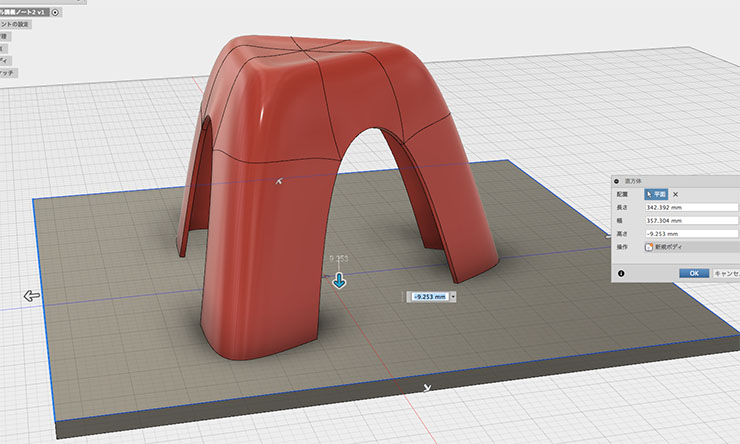
If necessary, return to Model Mode and create the floor.
Select “Cherry Wood - Glossy” for the floor material shown below.
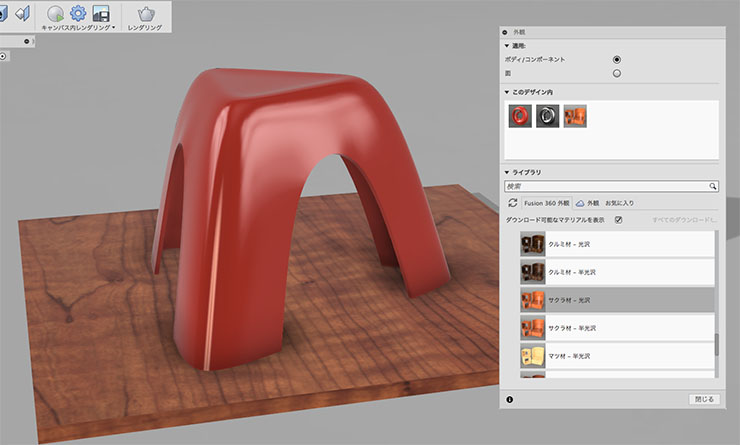
Render it to check the result. You can create realistic images by adding environment maps and other elements.