Arduino + Switch
Updated: 2026-05

This article was written before 2020. It is kept here as an archive — the content is outdated and some links may no longer work.
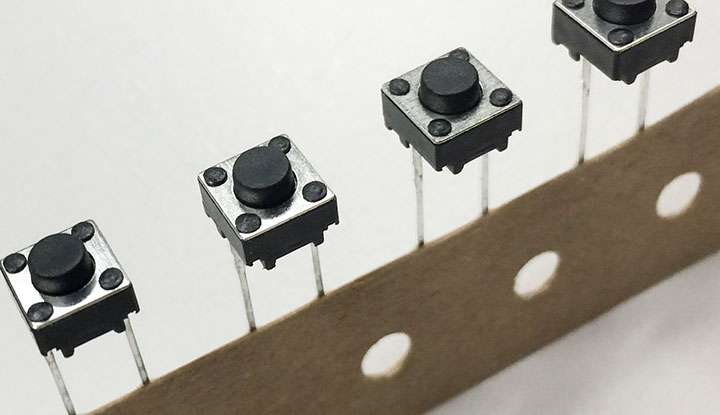
Tactile Switch
Since standard 4-pin tact switches may not fit depending on the quality of the breadboard, we will use a 2-pin tact switch here.
Mounting Tactile Switches and Resistors
Components Used
This implementation builds upon the previous exercise, “Arduino + LED.”
・2-pin tact switch: 1
・Resistor: 1/4W 10kΩ (brown-black-orange-gold) – 1 piece
・Jumper wires: 1 red, 1 white
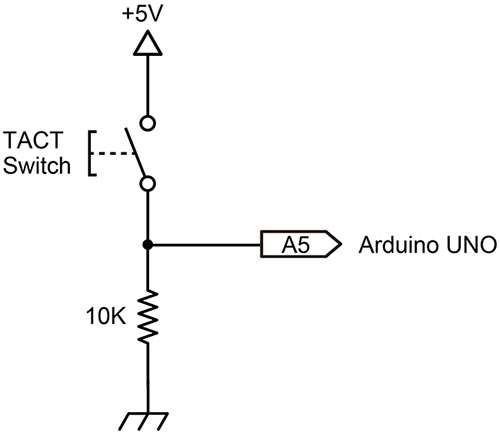
Circuit Diagram
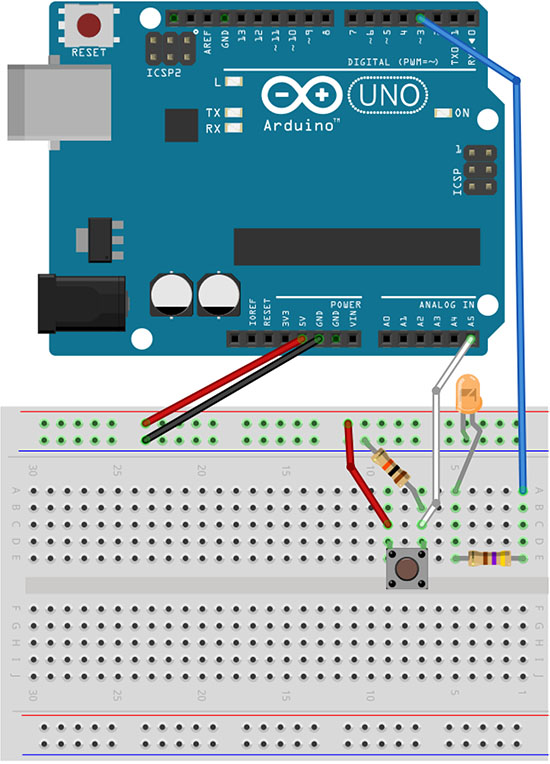
Implementation Diagram
Turn the LED on or off with a switch
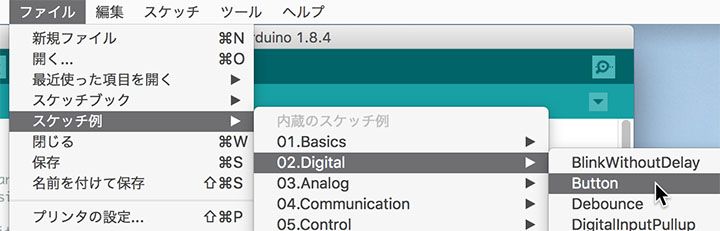
1. Sample Sketch
Open File Menu > Sample Sketches > 02.Digital > Button.
2. Modifying the Sketch
Change buttonPin to 19 and ledPin to 3 as shown below.
const int buttonPin = 19;     // the number of the pushbutton pin
const int ledPin =  3;      // the number of the LED pin
19 is the pin number when using analog pin A5 as a digital pin. For more details, click here.
3. Verify LED Operation
Compile and upload the code, then press the button to verify that the LED lights up.
2. Modifying the Sketch
Change buttonState in the IF statement that determines whether the switch is ON or OFF to LOW to reverse the switch’s behavior.
if (buttonState == LOW) {*You can also achieve this by reversing the HIGH and LOW values in digitalWrite while keeping buttonState set to HIGH.
3. Verify LED Turn-Off
Compile and upload the code, then press the button to verify that the LED turns off.
Blinking an LED with a Switch
① Modifying the sketch
Modify lines 43 and following as shown below.
  // Check if the pushbutton is pressed. If it is, buttonState is HIGH:
  if (buttonState == HIGH) {
    digitalWrite(ledPin, HIGH);   // Turn the LED on (HIGH is the voltage level)
    delay(100);                       // Wait for a second
    digitalWrite(ledPin, LOW);    // turn the LED off by setting the voltage to LOW
    delay(100);                       // wait for a second
  }
}
3. Verify Operation
Compile and upload the code, then press the button to verify that the LED flashes.