Live-Action VFX - Part 2
Updated: 2026-05
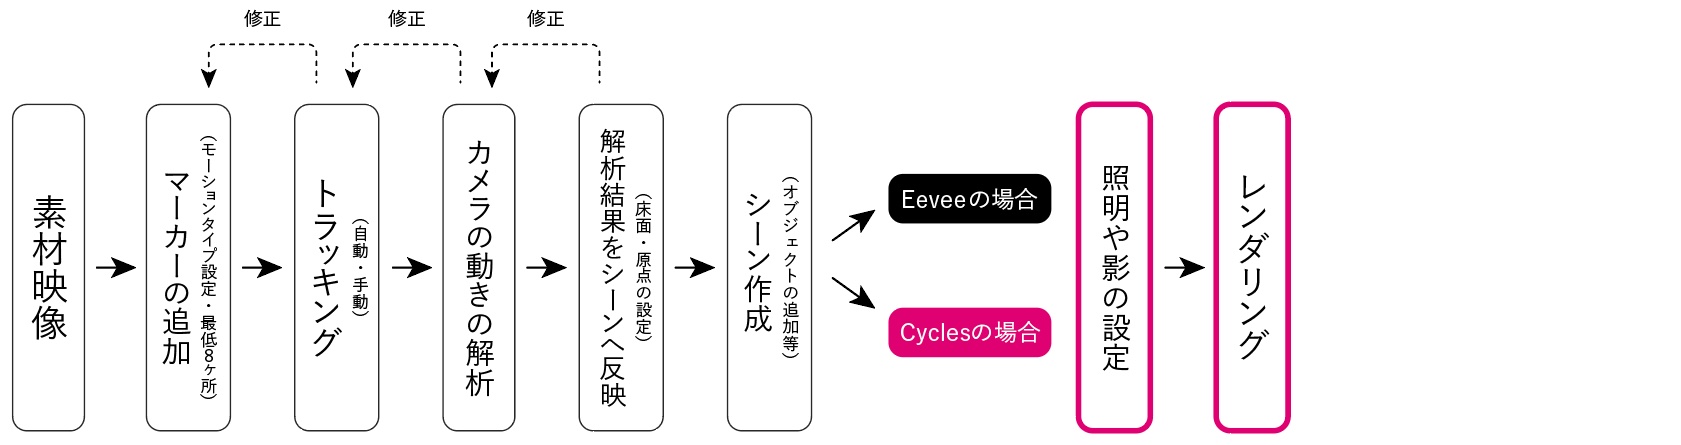
12. Differences Between Eevee and Cycles Rendering
12.1 Features of Eevee Rendering
- Creating a Material node is required to generate shadows
- You can preview the shadows
- While adjustments via compositing are possible in Eevee as well, a method that does not use compositing is likely more suitable for taking full advantage of real-time rendering
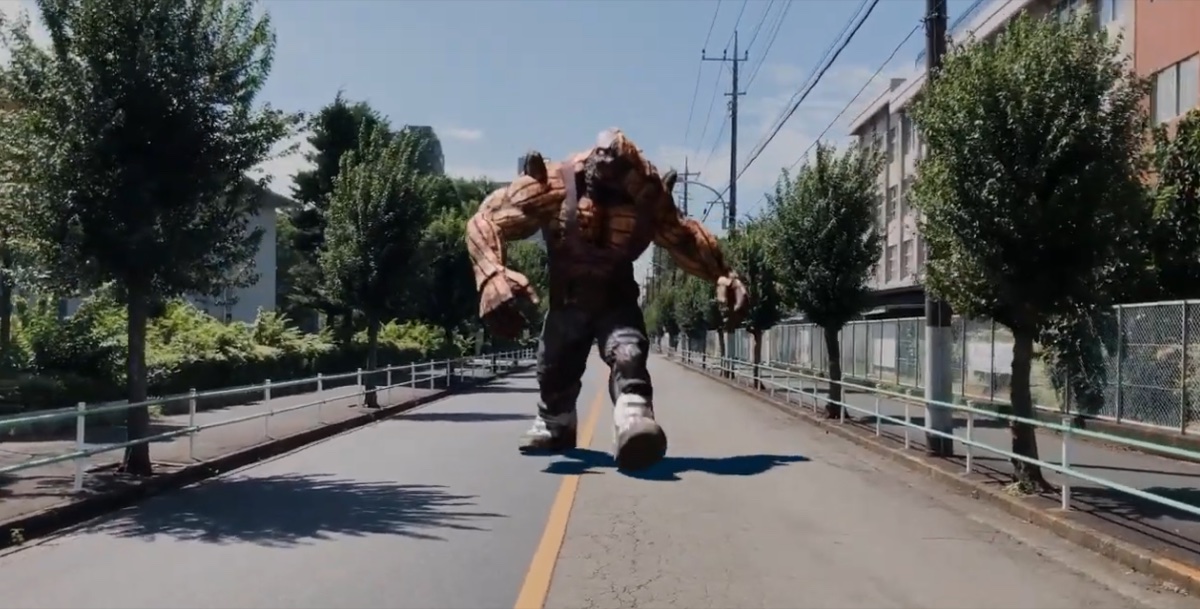
Below is a video of an Eevee rendering. While it’s not possible to make a direct comparison since the quality depends on the rendering settings, Eevee is capable of producing a decent level of quality at this scale.
12.2 Features of Cycles Rendering
- Generate shadows using Shadow Catcher
- Shadows cannot be viewed in preview mode (though they can be temporarily viewed by adjusting the View Layer)
- Use Composite
- It is not possible to check the state of shadows while playing back in real time
The video below was rendered using Cycles.
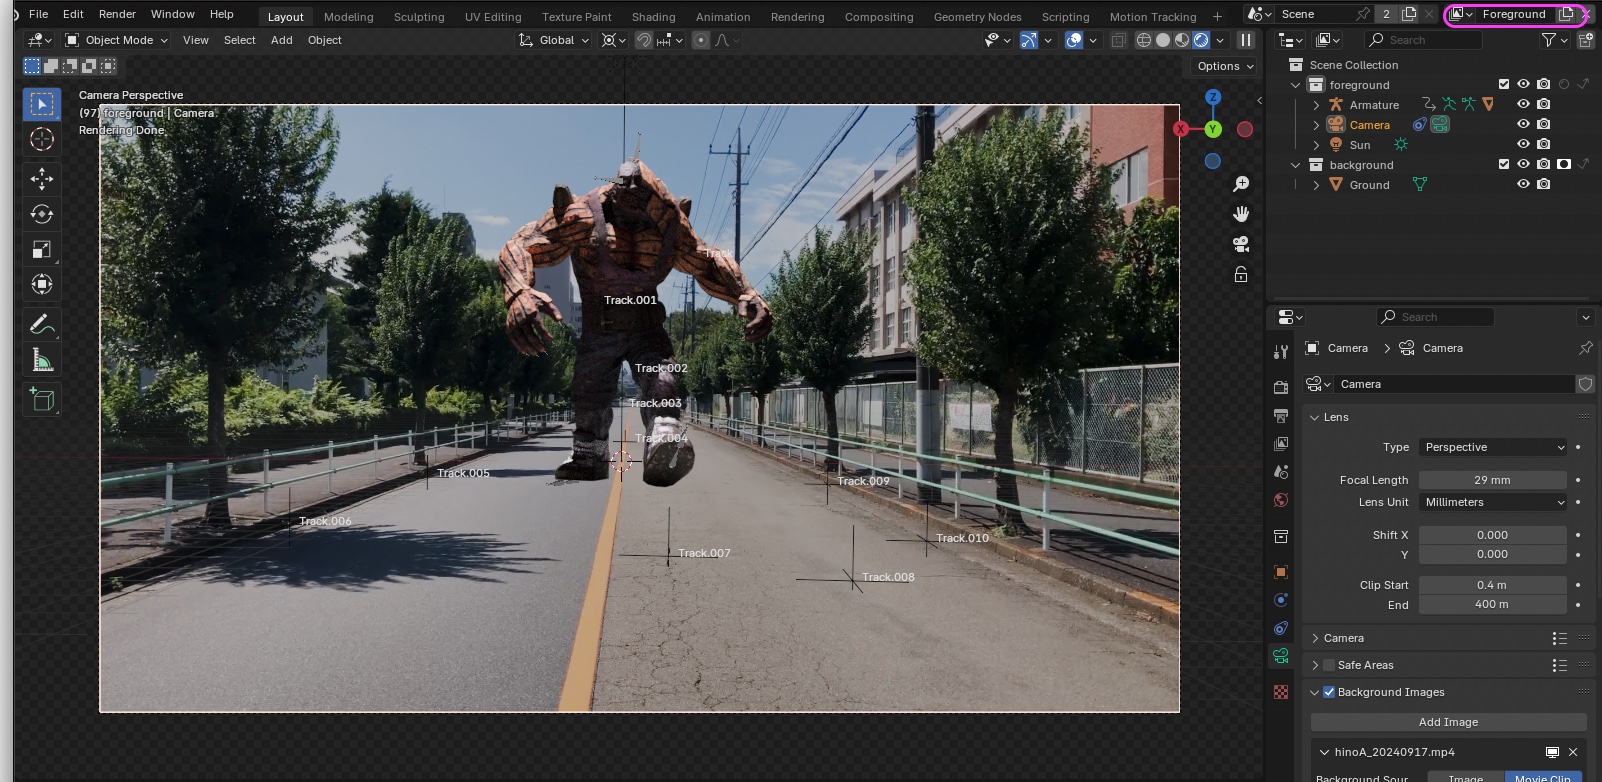
13. Eevee - Lighting and Shadow Settings ~ Rendering
13.1 Scope of Work

Start working from the file in “10. Saving the blend file.”
13.2 Preparation
- Deleting the Cube
- Viewport Shading: Rendered
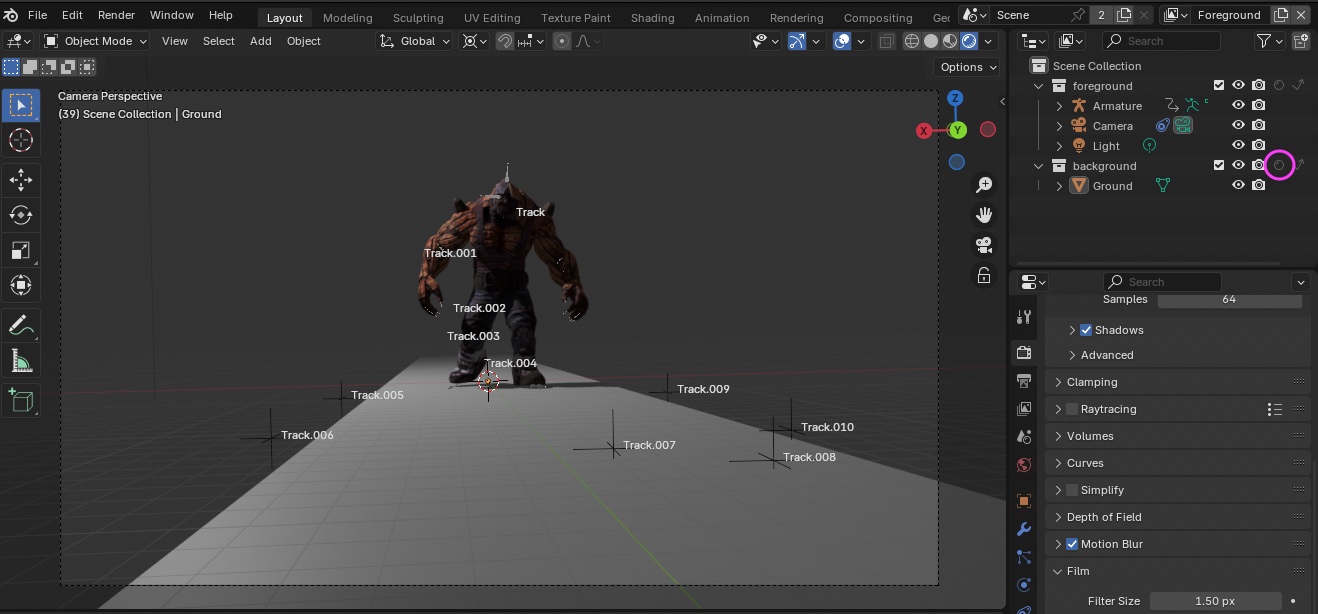
- The reason the captured footage is projected only onto the Ground section at this point is because the background Collection is set to Holdout (masked) and the Transparent option under Film in the Render Properties is turned off.
- You cannot understand this behavior without understanding View Layers and Composites (discussed later).
In the View Layer filters, select “Holdout” (Indirect is optional) and turn it off.
Note: If left as is, shadows will remain on both the Foreground and Background, resulting in double rendering, so set the Fac value of the second Alpha Over in Composite to 0 (see below). Alternative methods
- Move the Ground to the Foreground Collection and do not use the Background Collection.
- Set up Camera Constraints and Camera Composites manually without using the Setup Tracking Scene (requires technical knowledge).
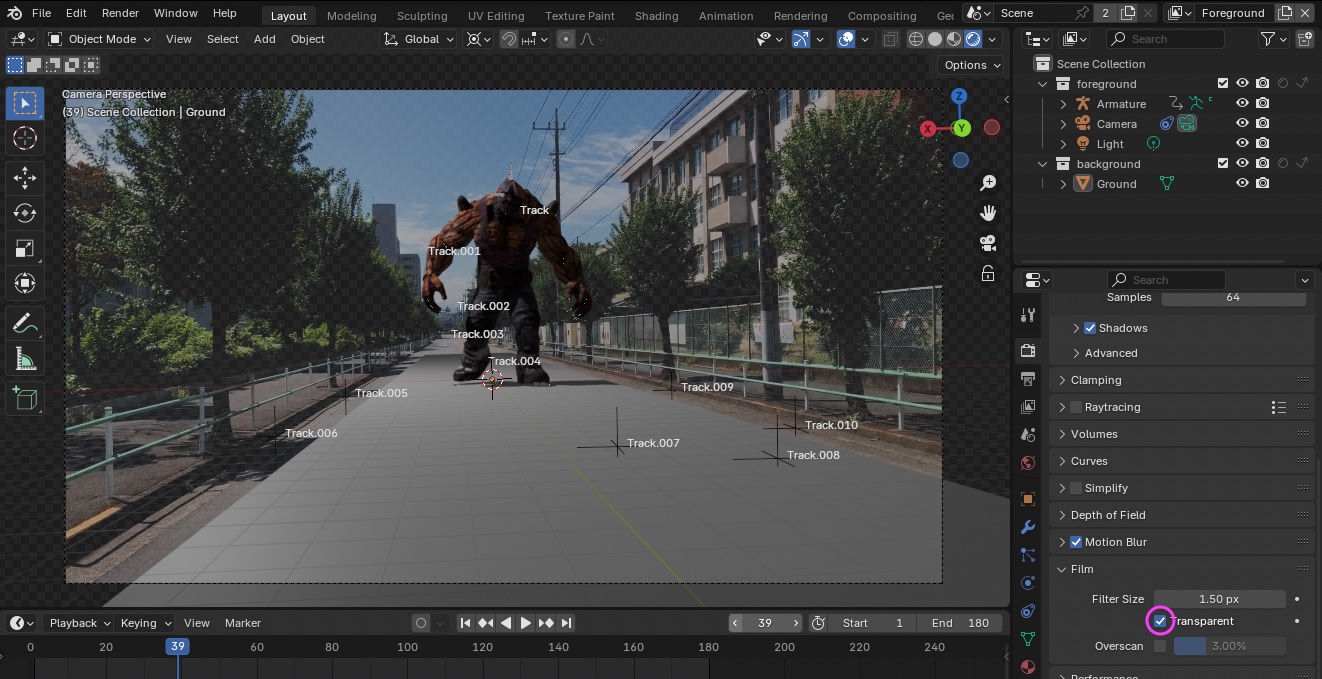
The ground plane becomes opaque. You can see that the shadow is displayed (when the holdout is set to transparent, the shadow is not displayed).
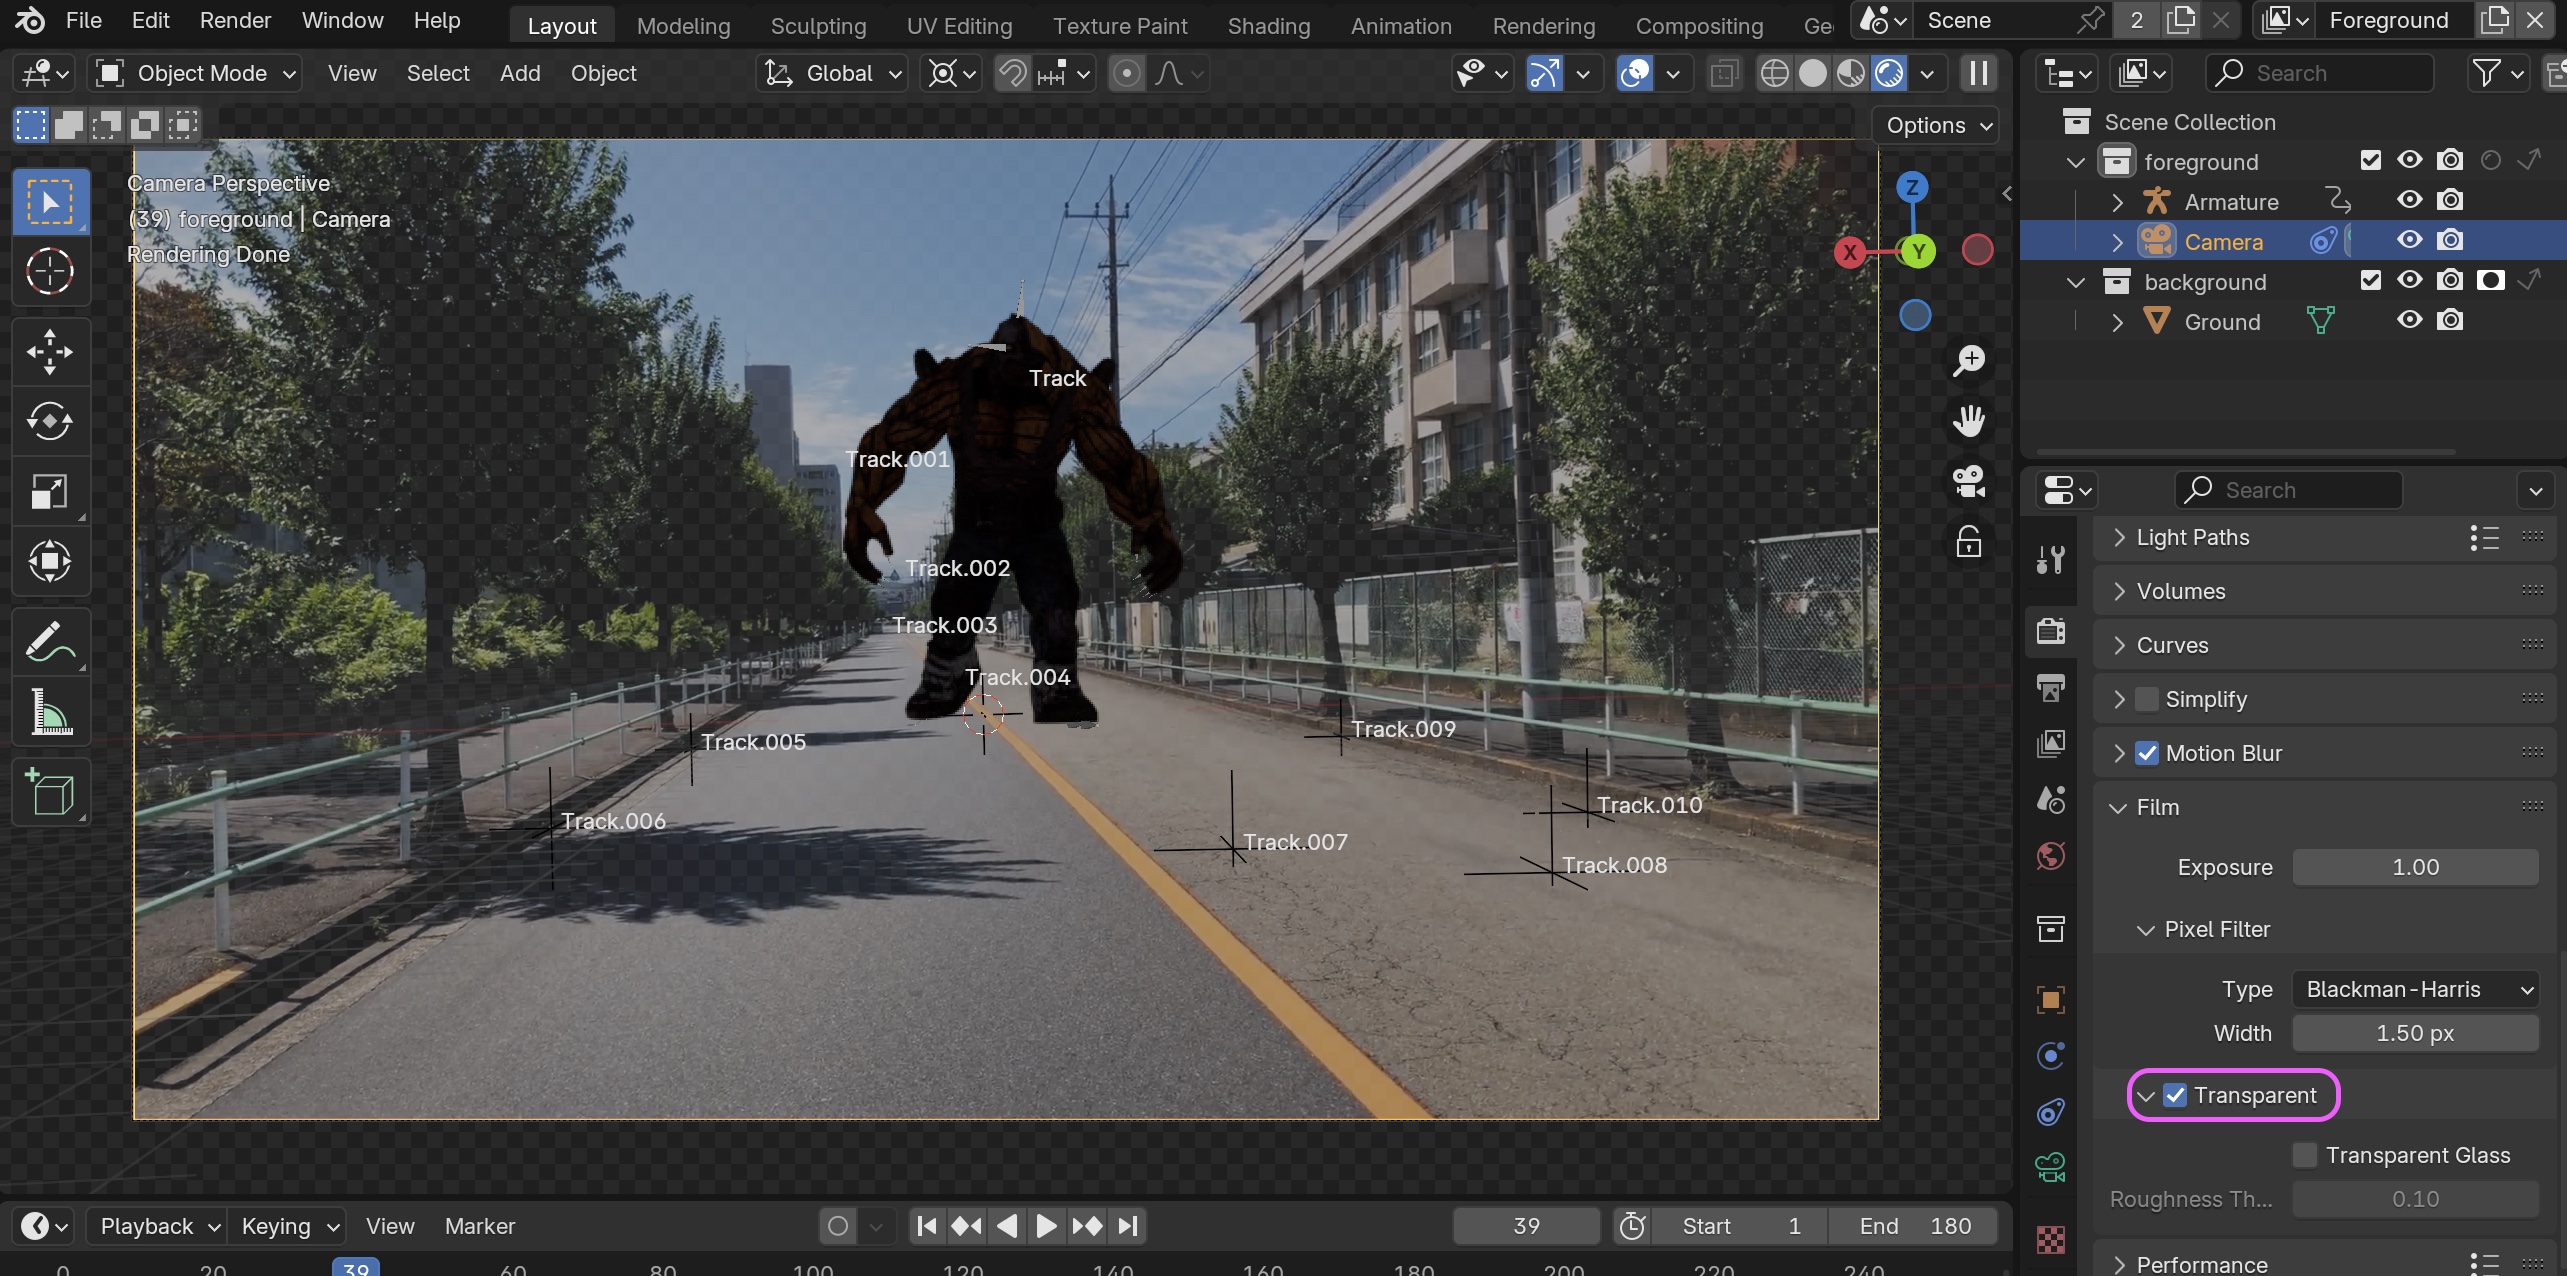
Check the “Transparent” box under Render Properties > Film.
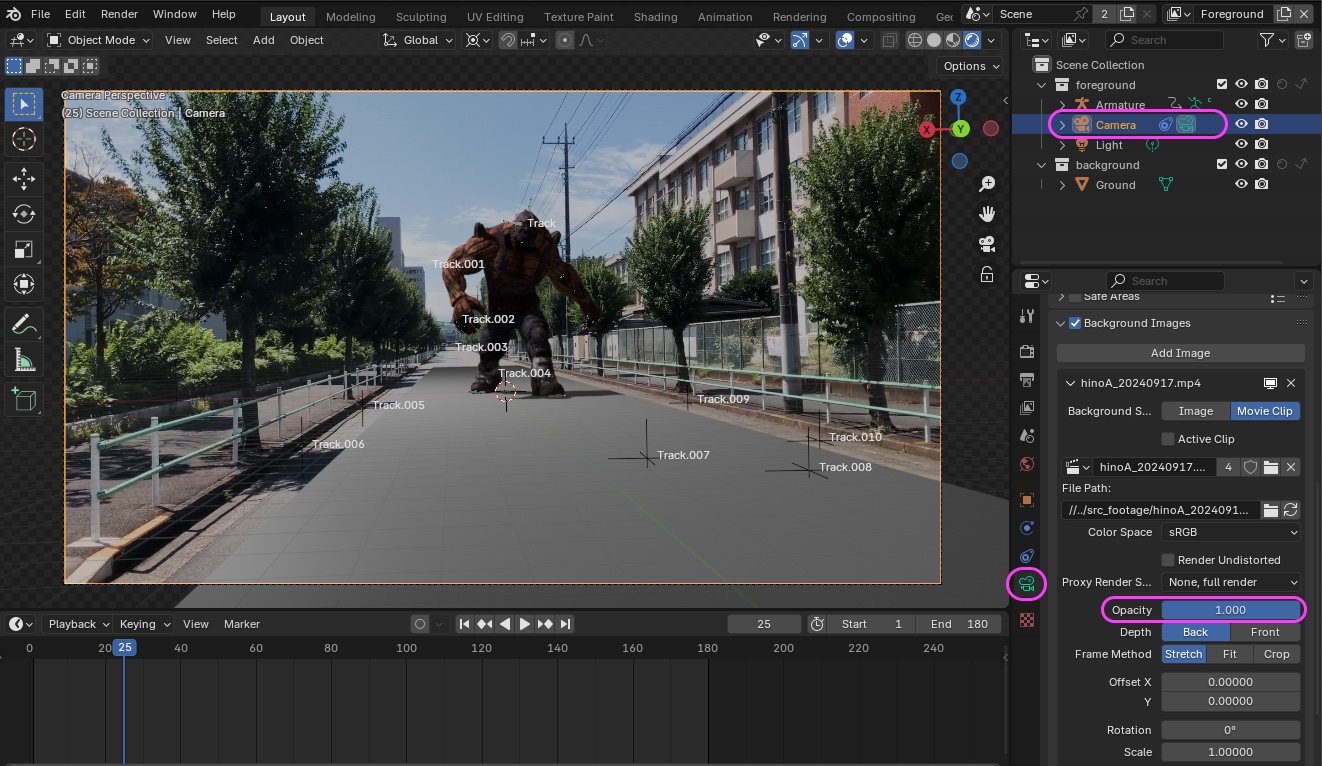
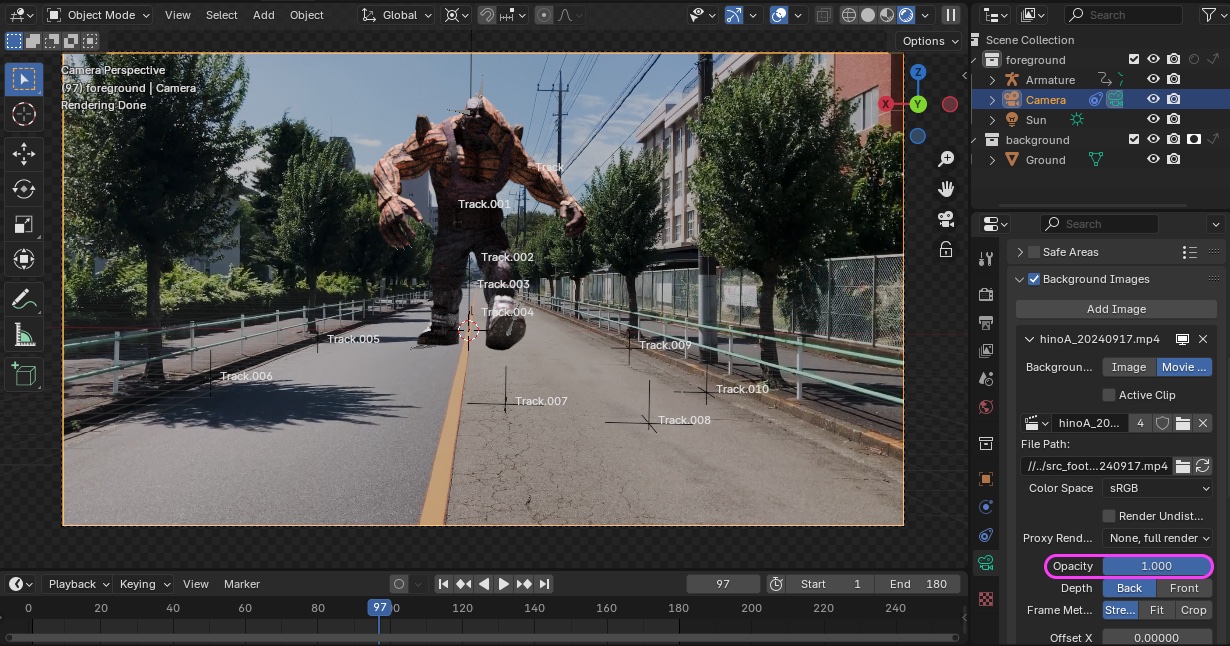
- Select the Camera in the Outliner (or 3D viewport)
- Object Data Properties > Background Images > Change Opacity from 0.5 to 1.0
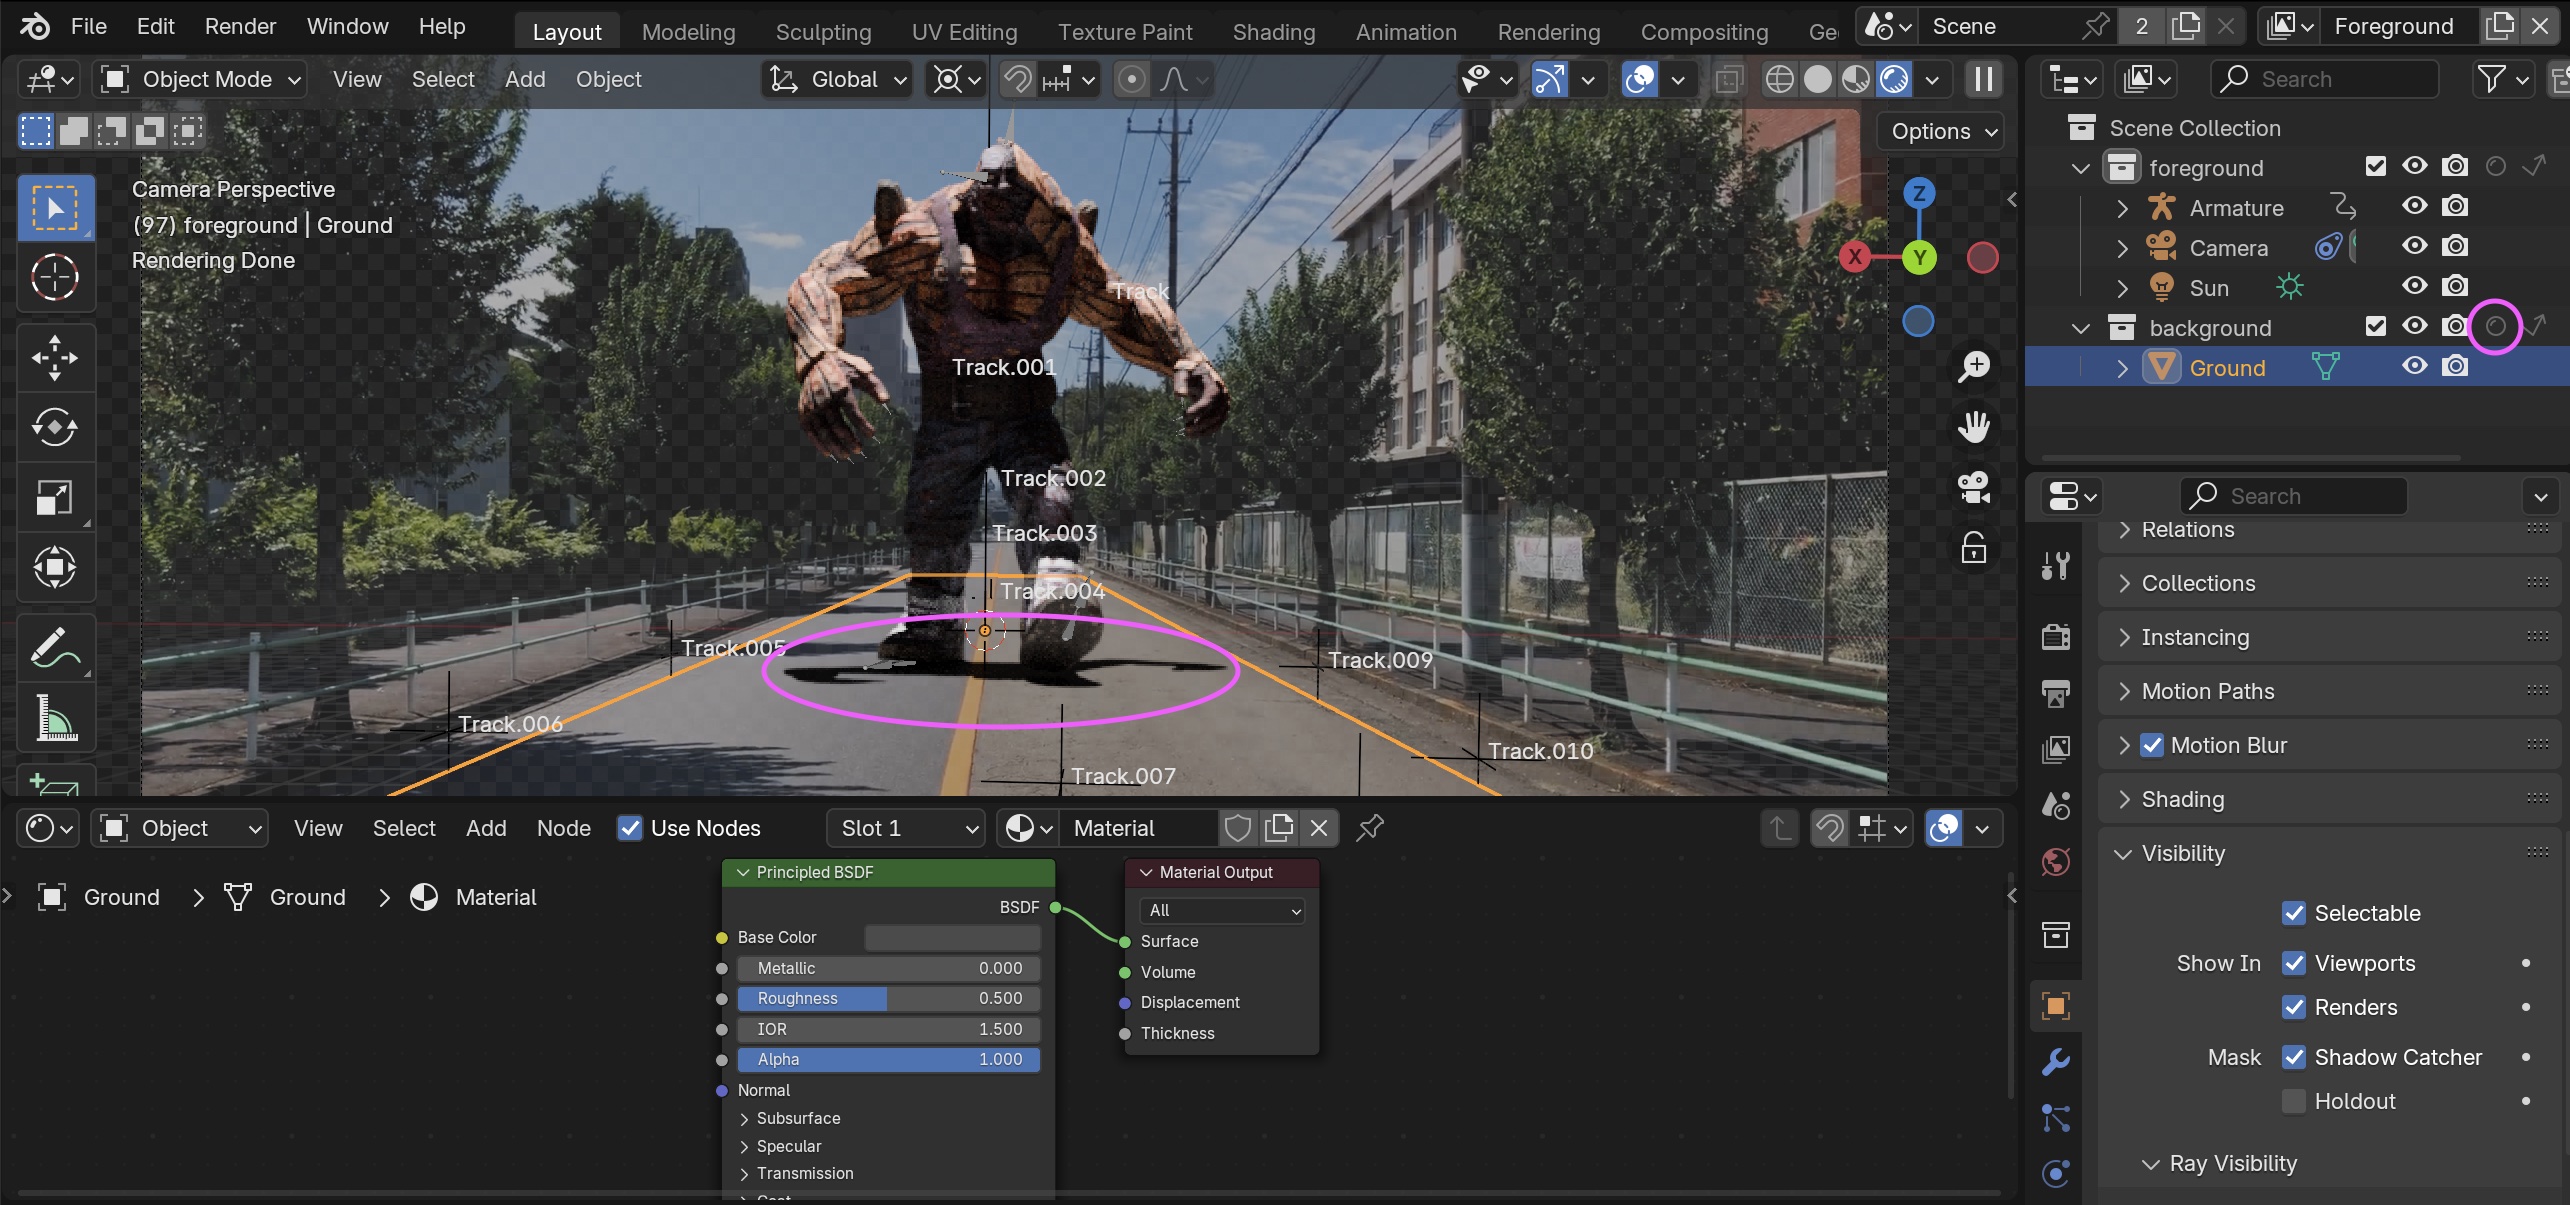
13.3 Shadow Settings
- Select the Ground object
- Open the Shader Editor (It’s best to add a panel in the Layout Workspace so you can view it alongside the Timeline)
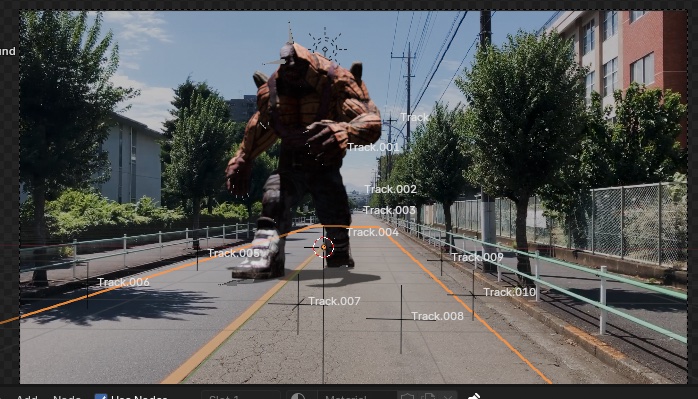
- Move the Timeline’s time indicator to a frame where HULK’s shadow is clearly visible
- Create a material by clicking NEW in the center of the Shader Editor menu
- Pin the Shader Editor
- Delete the existing Light (Point)
- (Nakayasu’s personal note) blender_files_tracking_test3 > hinokaijuA_trackingTest3_w16.blend
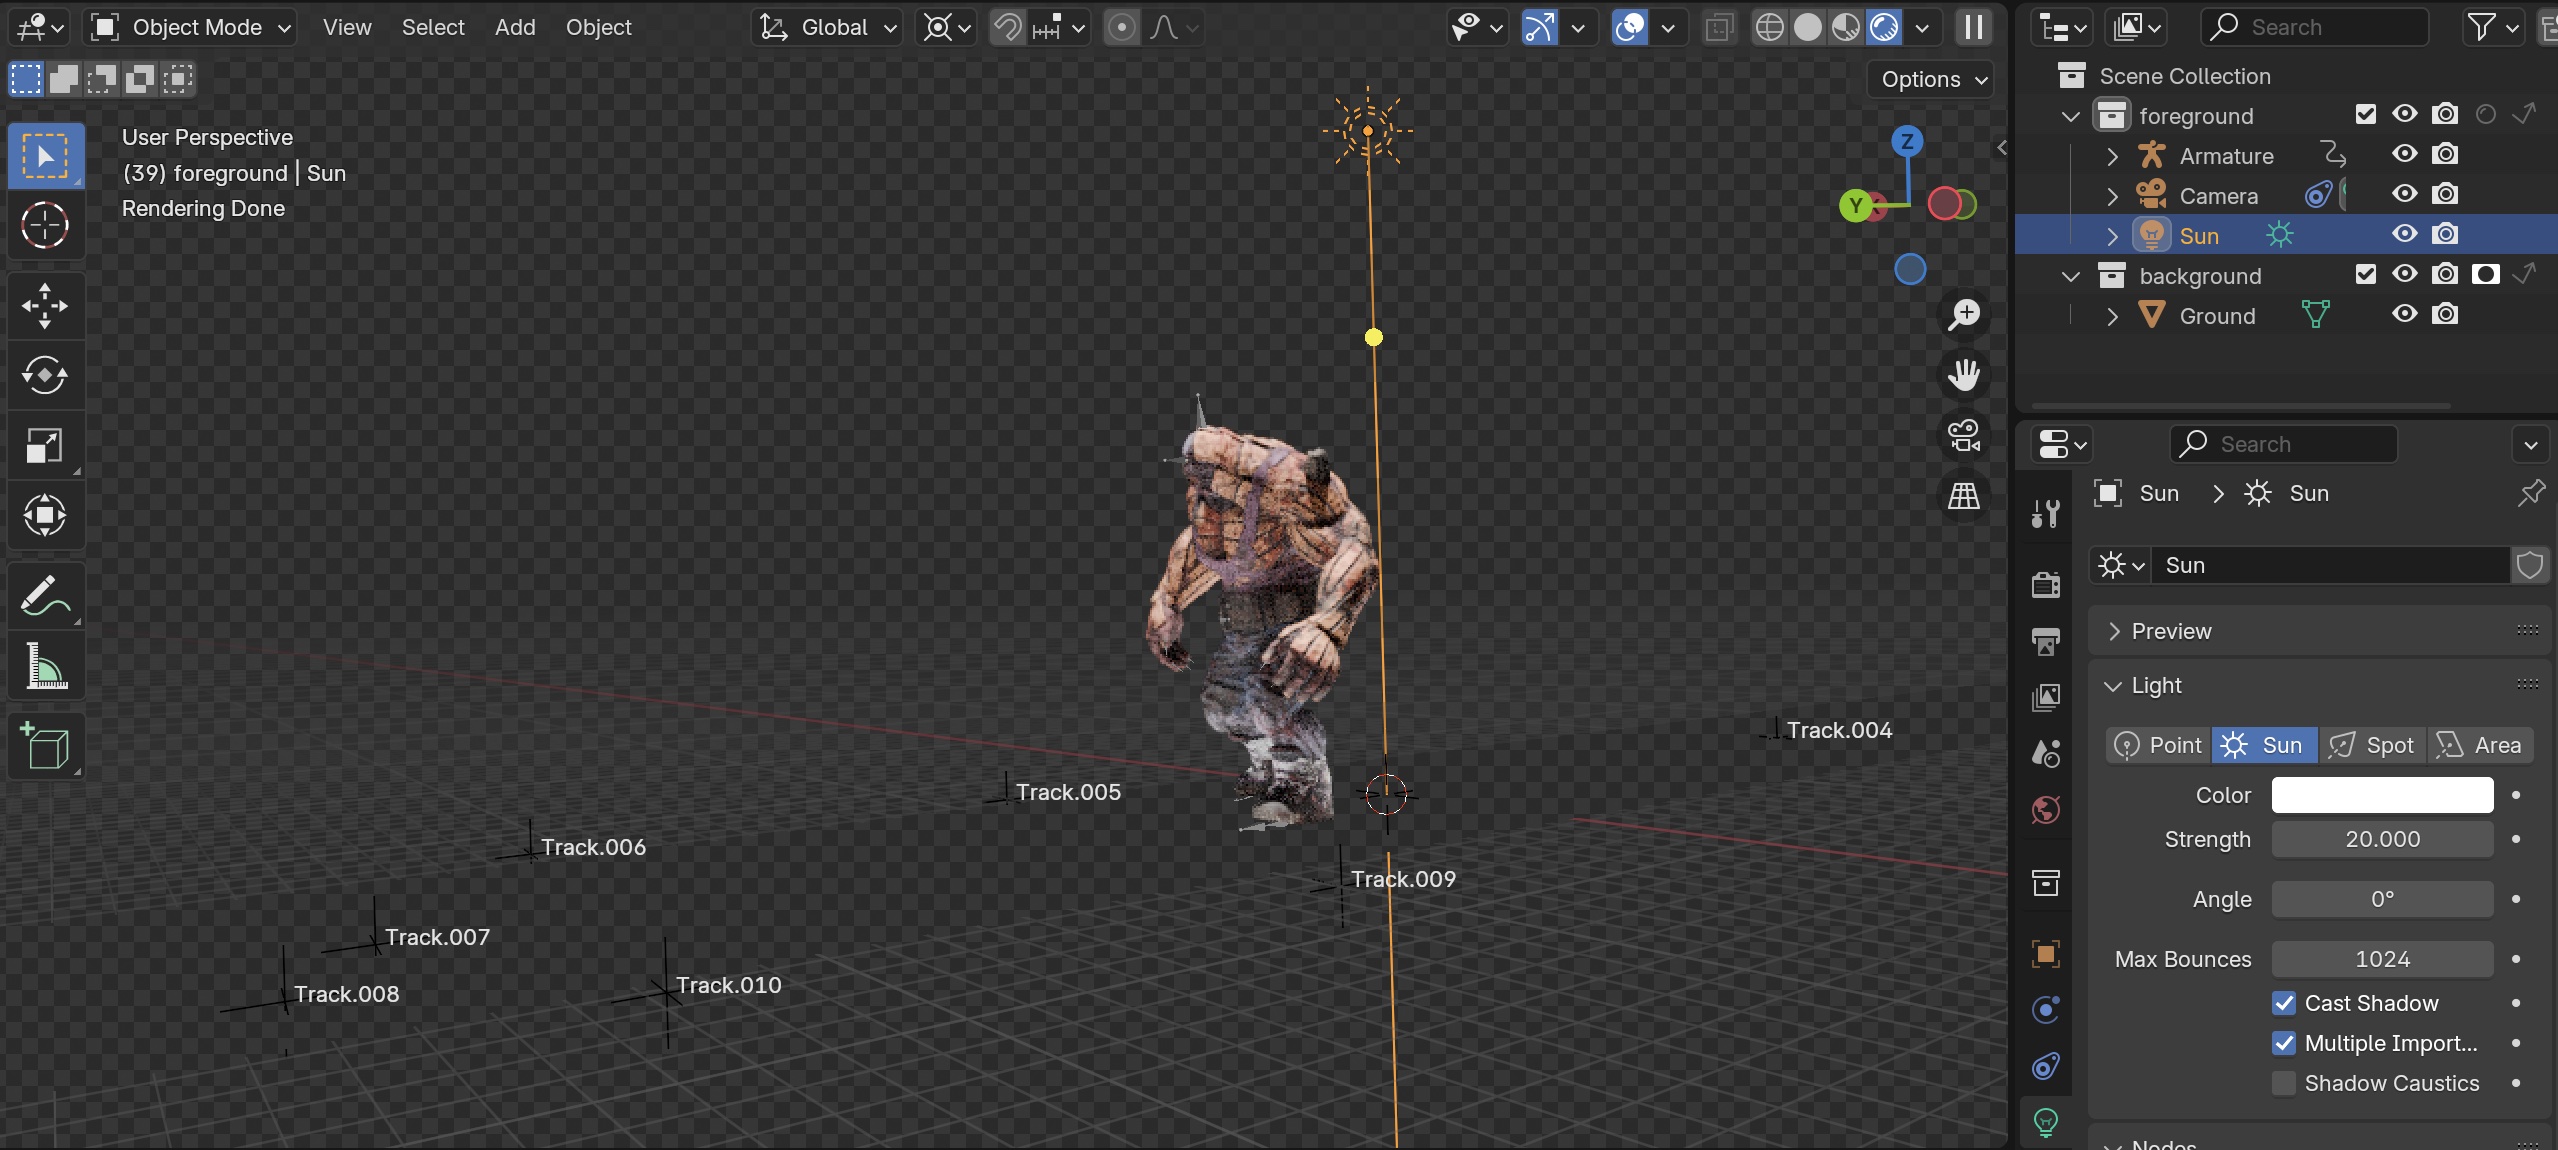
13.4 Adding Sun Light (Part 1)
- SHIFT+A > Light > Add Sun
- Strength: 15
- Angle: 3° (blurred shadows)
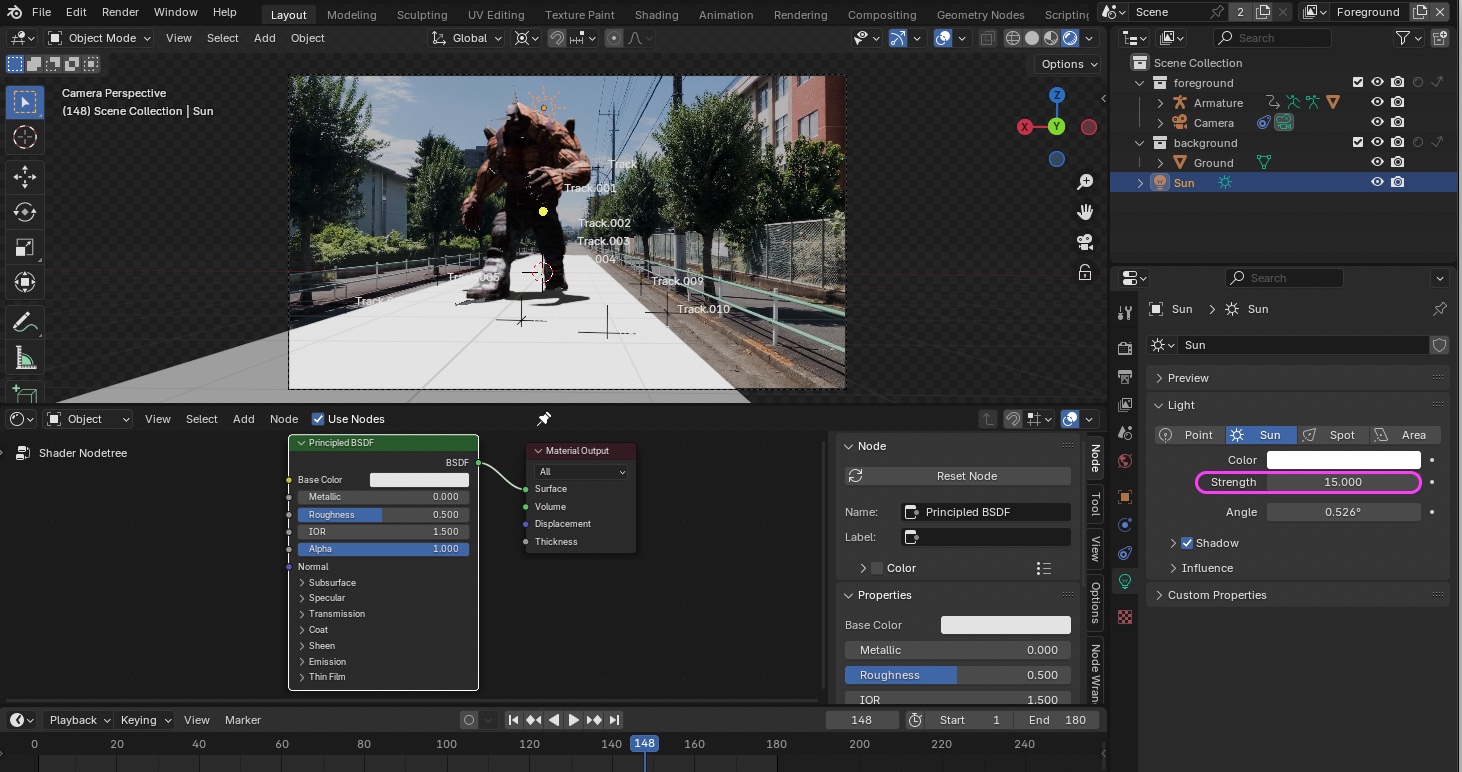
Use the G and Z keys to move the light upward
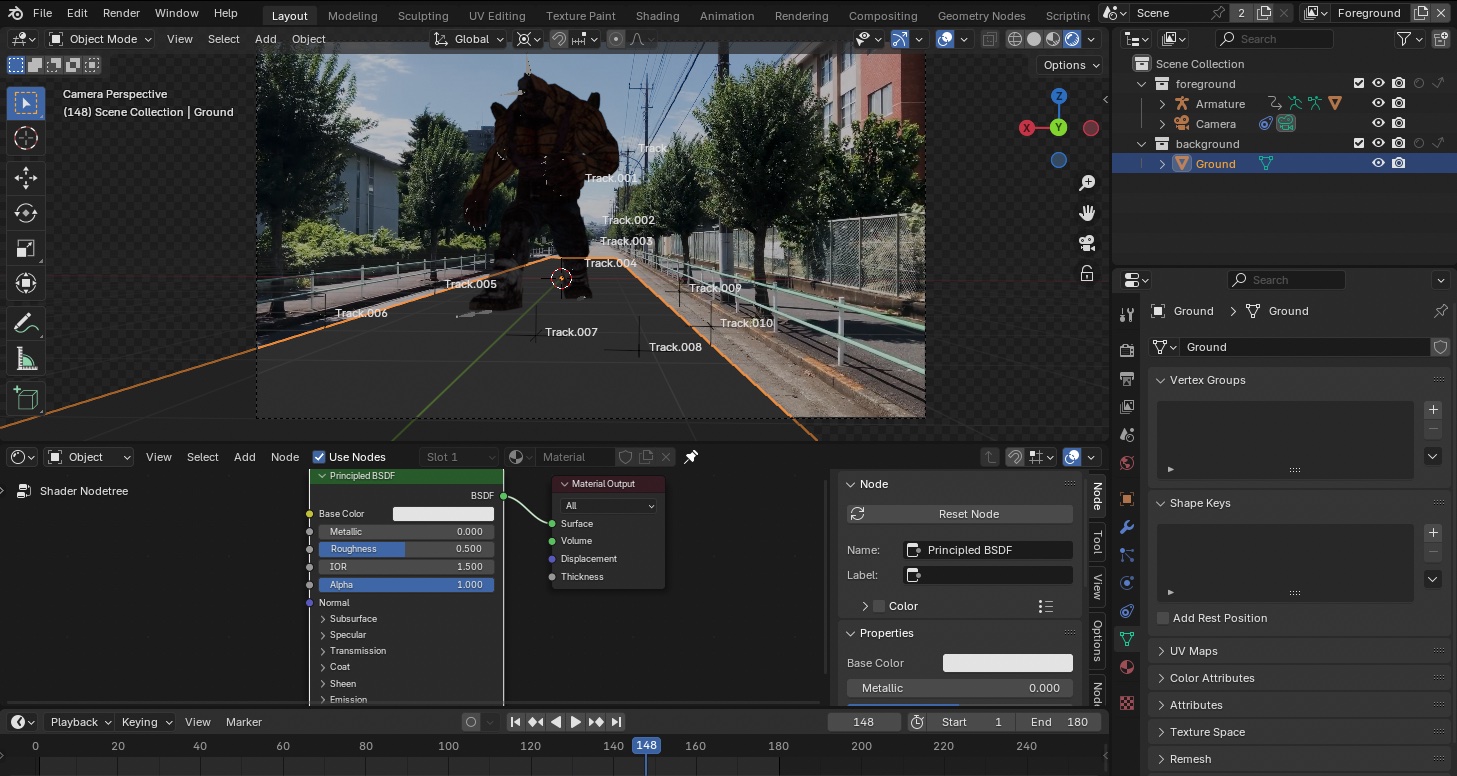
13.5 Creating Material Nodes
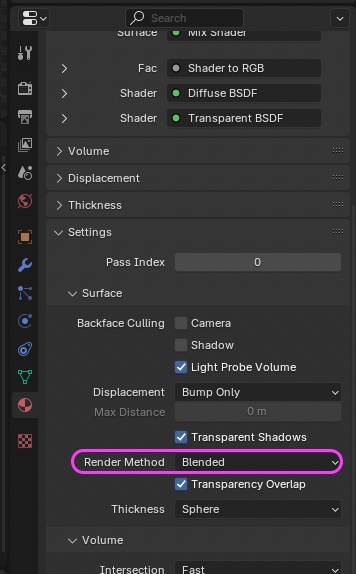
Note: Since Blend Mode was removed in Blender 4.2, you must follow the steps below
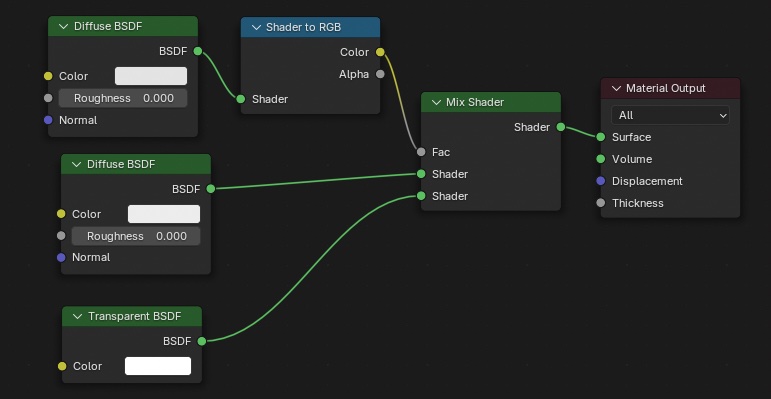
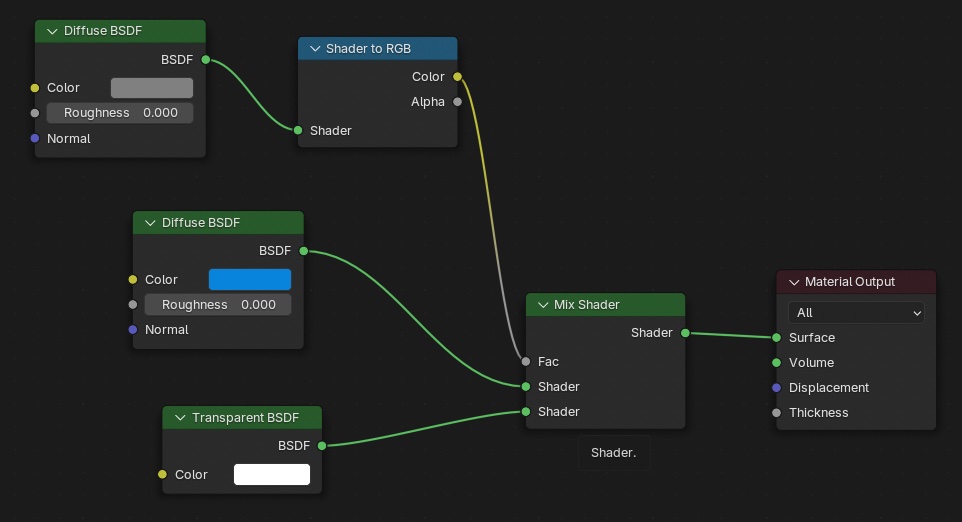
- Remove the Principled BSDF Create the following nodes and connect them as shown in the figure below.
- Two Diffuse BSDF nodes
- One Transparent BSDF node
- One Shader to RGB node
- One Mix Shader node
(Reference) YouTube - How to Make a Shadow Catcher in Eevee and Cycles/Blender 4.2
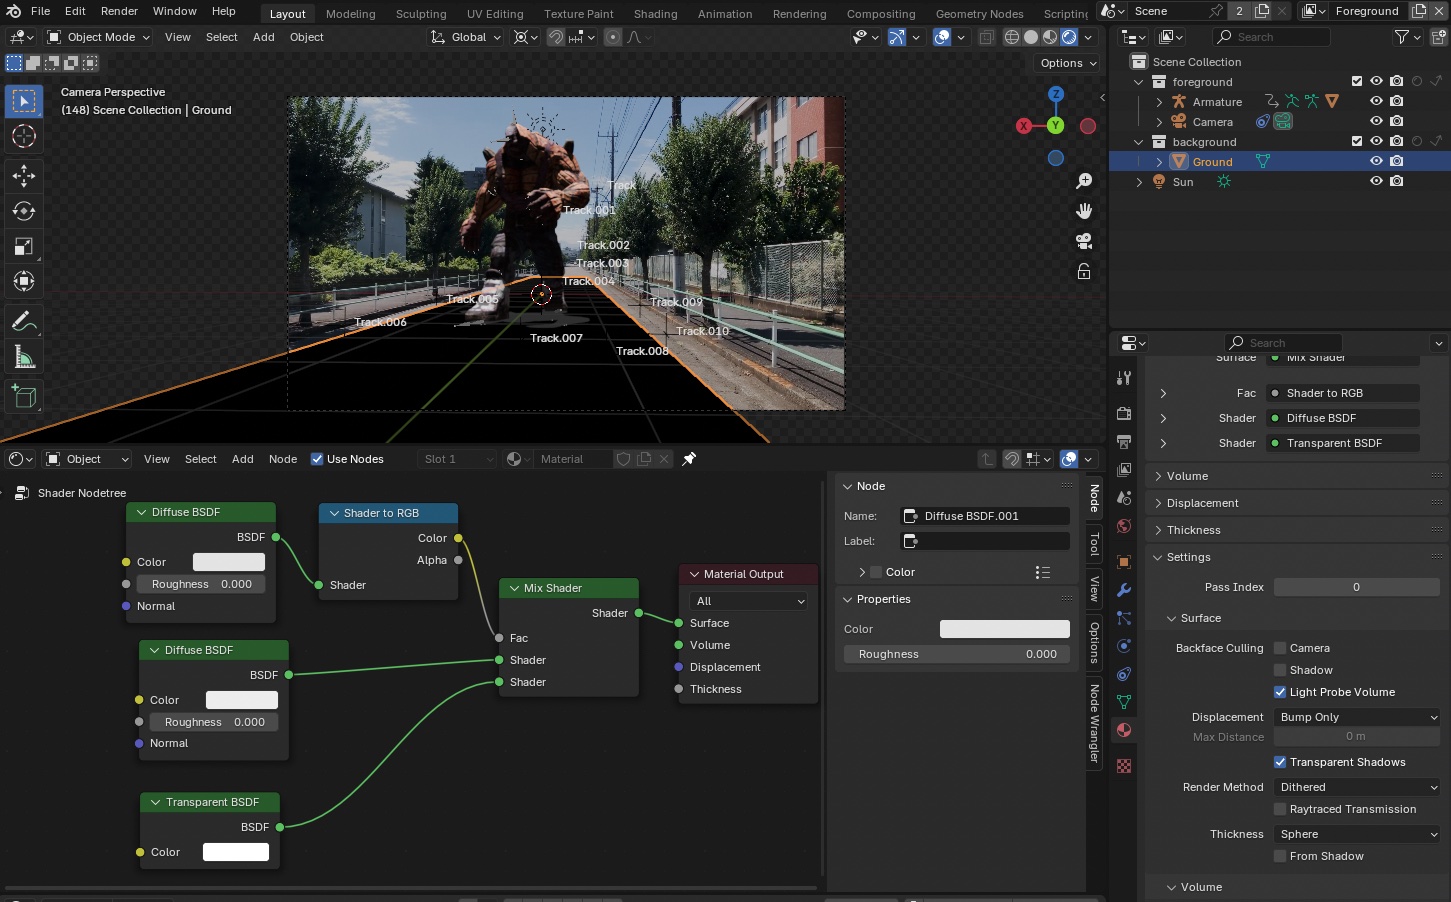
Go to Material Properties > Settings > Render Method and change it from Dithered to Blended.
With the settings described above, the Ground object will be transparent while casting a shadow.
Note: The darkness and color of the shadows vary depending on the balance between the intensity of the lighting and the adjustments to the materials listed above
- First Diffuse BSDF: Shadow darkness (also affected by the intensity of the Sun Light)
- Hue: 0.0
- Sat: 0.0
- Val: 0.257
- Second Diffuse BSDF: Affects shadow density and color
- Hue: 0.607
- Sat: 1.0
- Val: 0.776
- Transparent BSDF: Transparency (also affected by light intensity)
- Hue: 0.0
- Sat: 0.0
- Val: 1.0
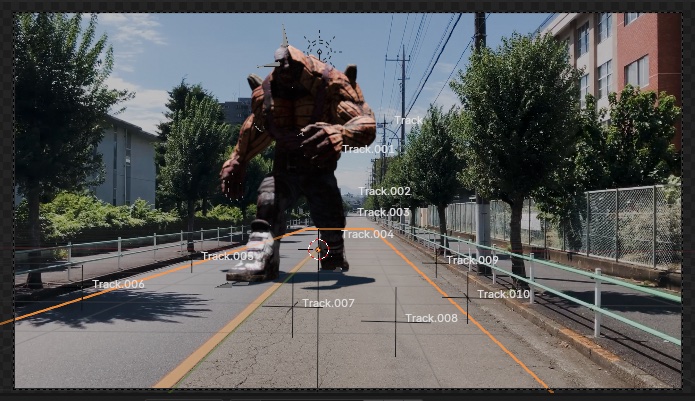
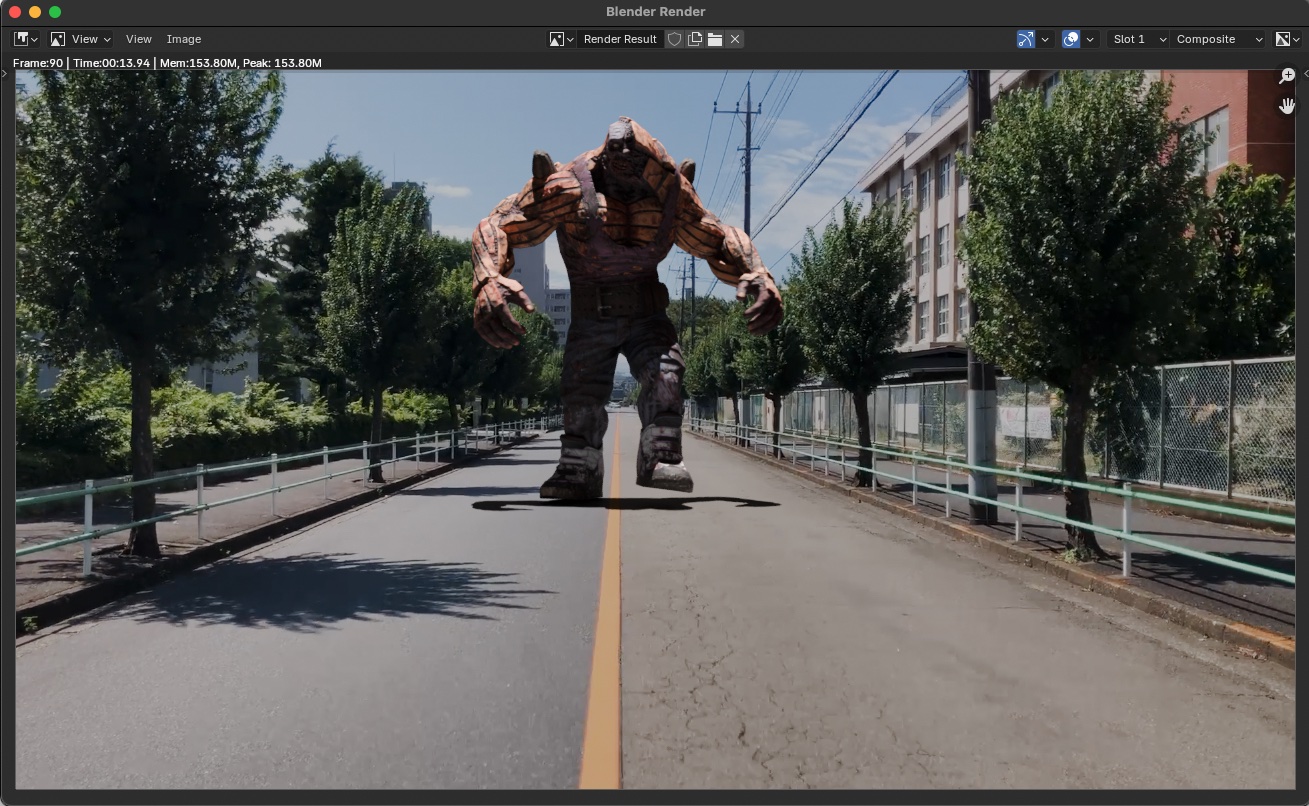
Check that the shadows have a slightly bluish tint, similar to those in live-action footage.
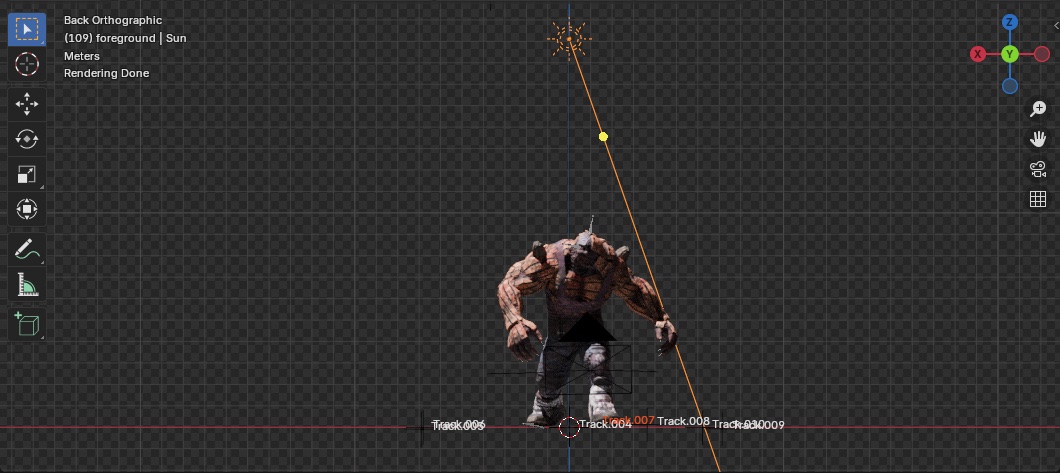
13.6 Adding “Sun Light” (in the foreground)
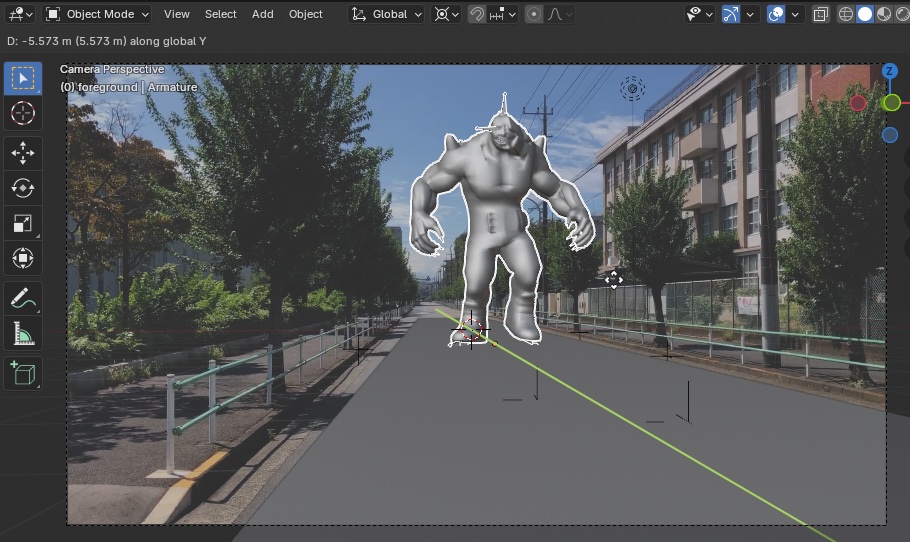
The front of the HULK is too dark, so I added a second Sun Light and adjusted its position as shown in the image below.
- Strength: 0.3
- Angle: 3° (shadow blur)

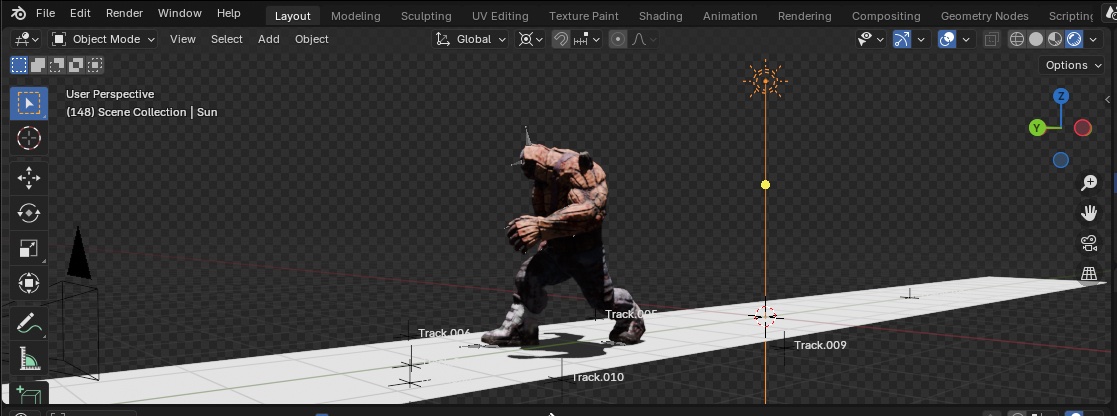
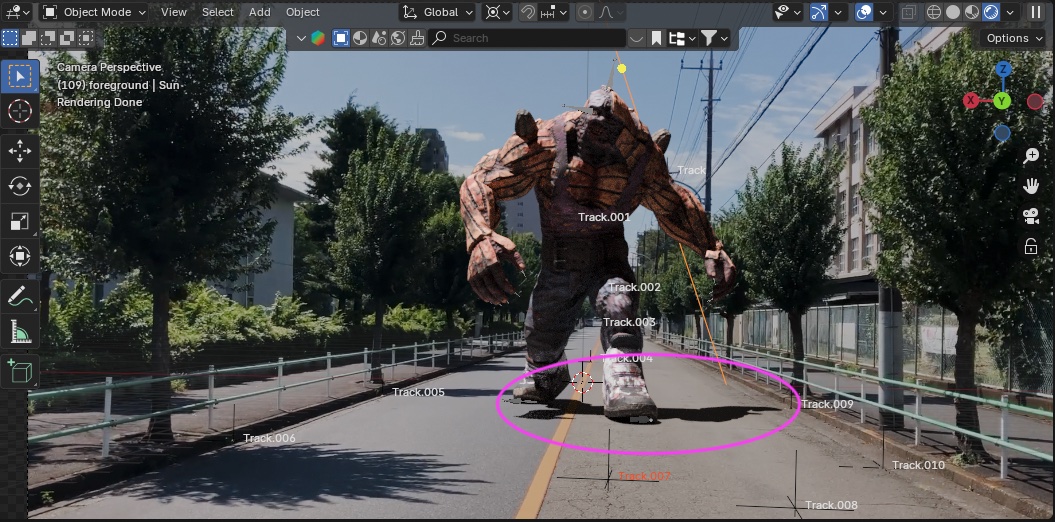
13.7 Adjusting the Light Direction and Ground Width
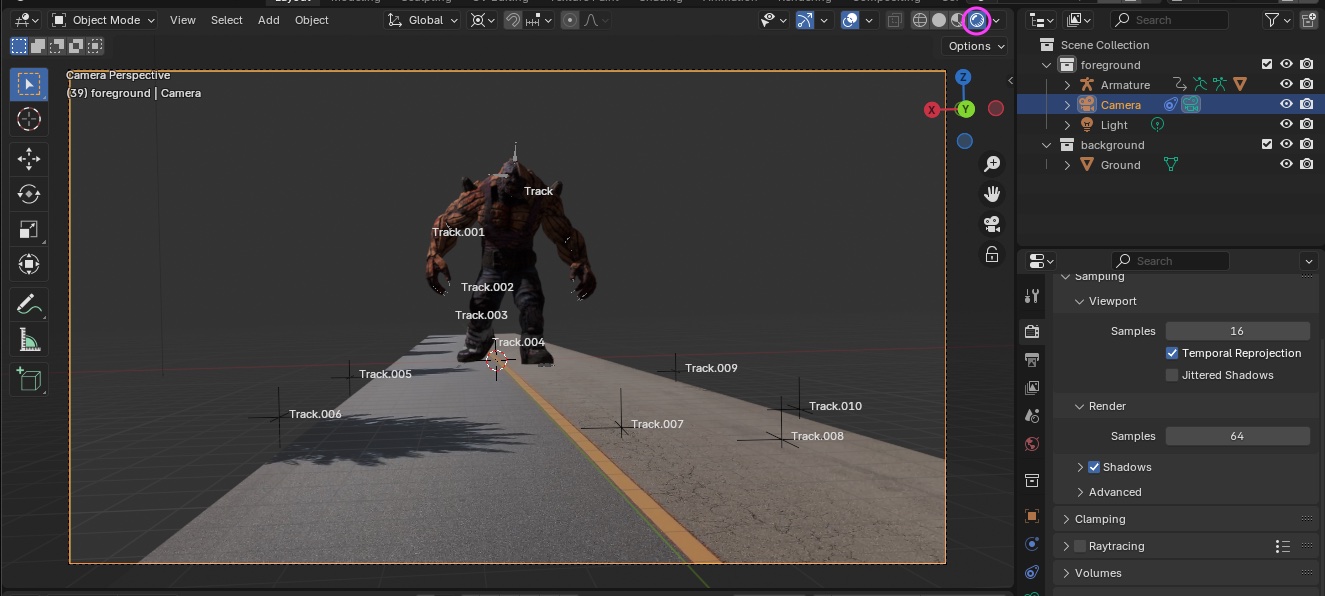
Since the shadow is directly below, adjust the direction of the first Sun Light so that the shadow falls on the right side, just like in the video.

If the shadow is cut off, increase the width of the “Ground” layer.
If left as is, the shadow will be rendered twice and become darker, so set the Fac value for the second Alpha Over in Composite to zero.
Note: Issue with changes in the contrast of the background video
- Go to Render Properties > Color Management and change View Transform from AgX to Standard.
- You can adjust the appearance of the image to your liking. This method is intended only for cases where you want to render the footage exactly as it is.
13.8 Video Rendering
Practice Assignment Rendering all frames takes more than 30 minutes. Configure the settings below, then select Render > Render Animation.
- Render Properties
- Resolution X: 1280 px
- Resolution Y: 720 px
- Frame Rate: 30 fps *Note: If you select the HDTV720p preset, the frame rate will be 24 fps, so please be careful.
- Output
- Location: Any location/filename ※Please use English for the output path, as Japanese characters may not be saved correctly
- File Format: FFmpeg Video
- Encoding > Container: MPEG-4
- Video > Video Codec: H.264
The video below shows a version where the shadows are accidentally too dark.
14. Cycles - Lighting and Shadow Settings ~ Rendering
14.1 Scope of Work
Start working from the file in “10. Saving the blend file.”
14.2 Features of Cycles Rendering (A Recap)
- Use Shadow Catcher to generate shadows
- Shadows cannot be viewed in preview mode (though they can be temporarily viewed by adjusting the View Layer)
- It is not possible to check the state of shadows while playing back in real time
- Use Composite to check the overall state after rendering
14.3 Preparation
Set “Holdout” and “indirect” in the “Filter” section of “View Layer” to “Display” (for behavior verification only)
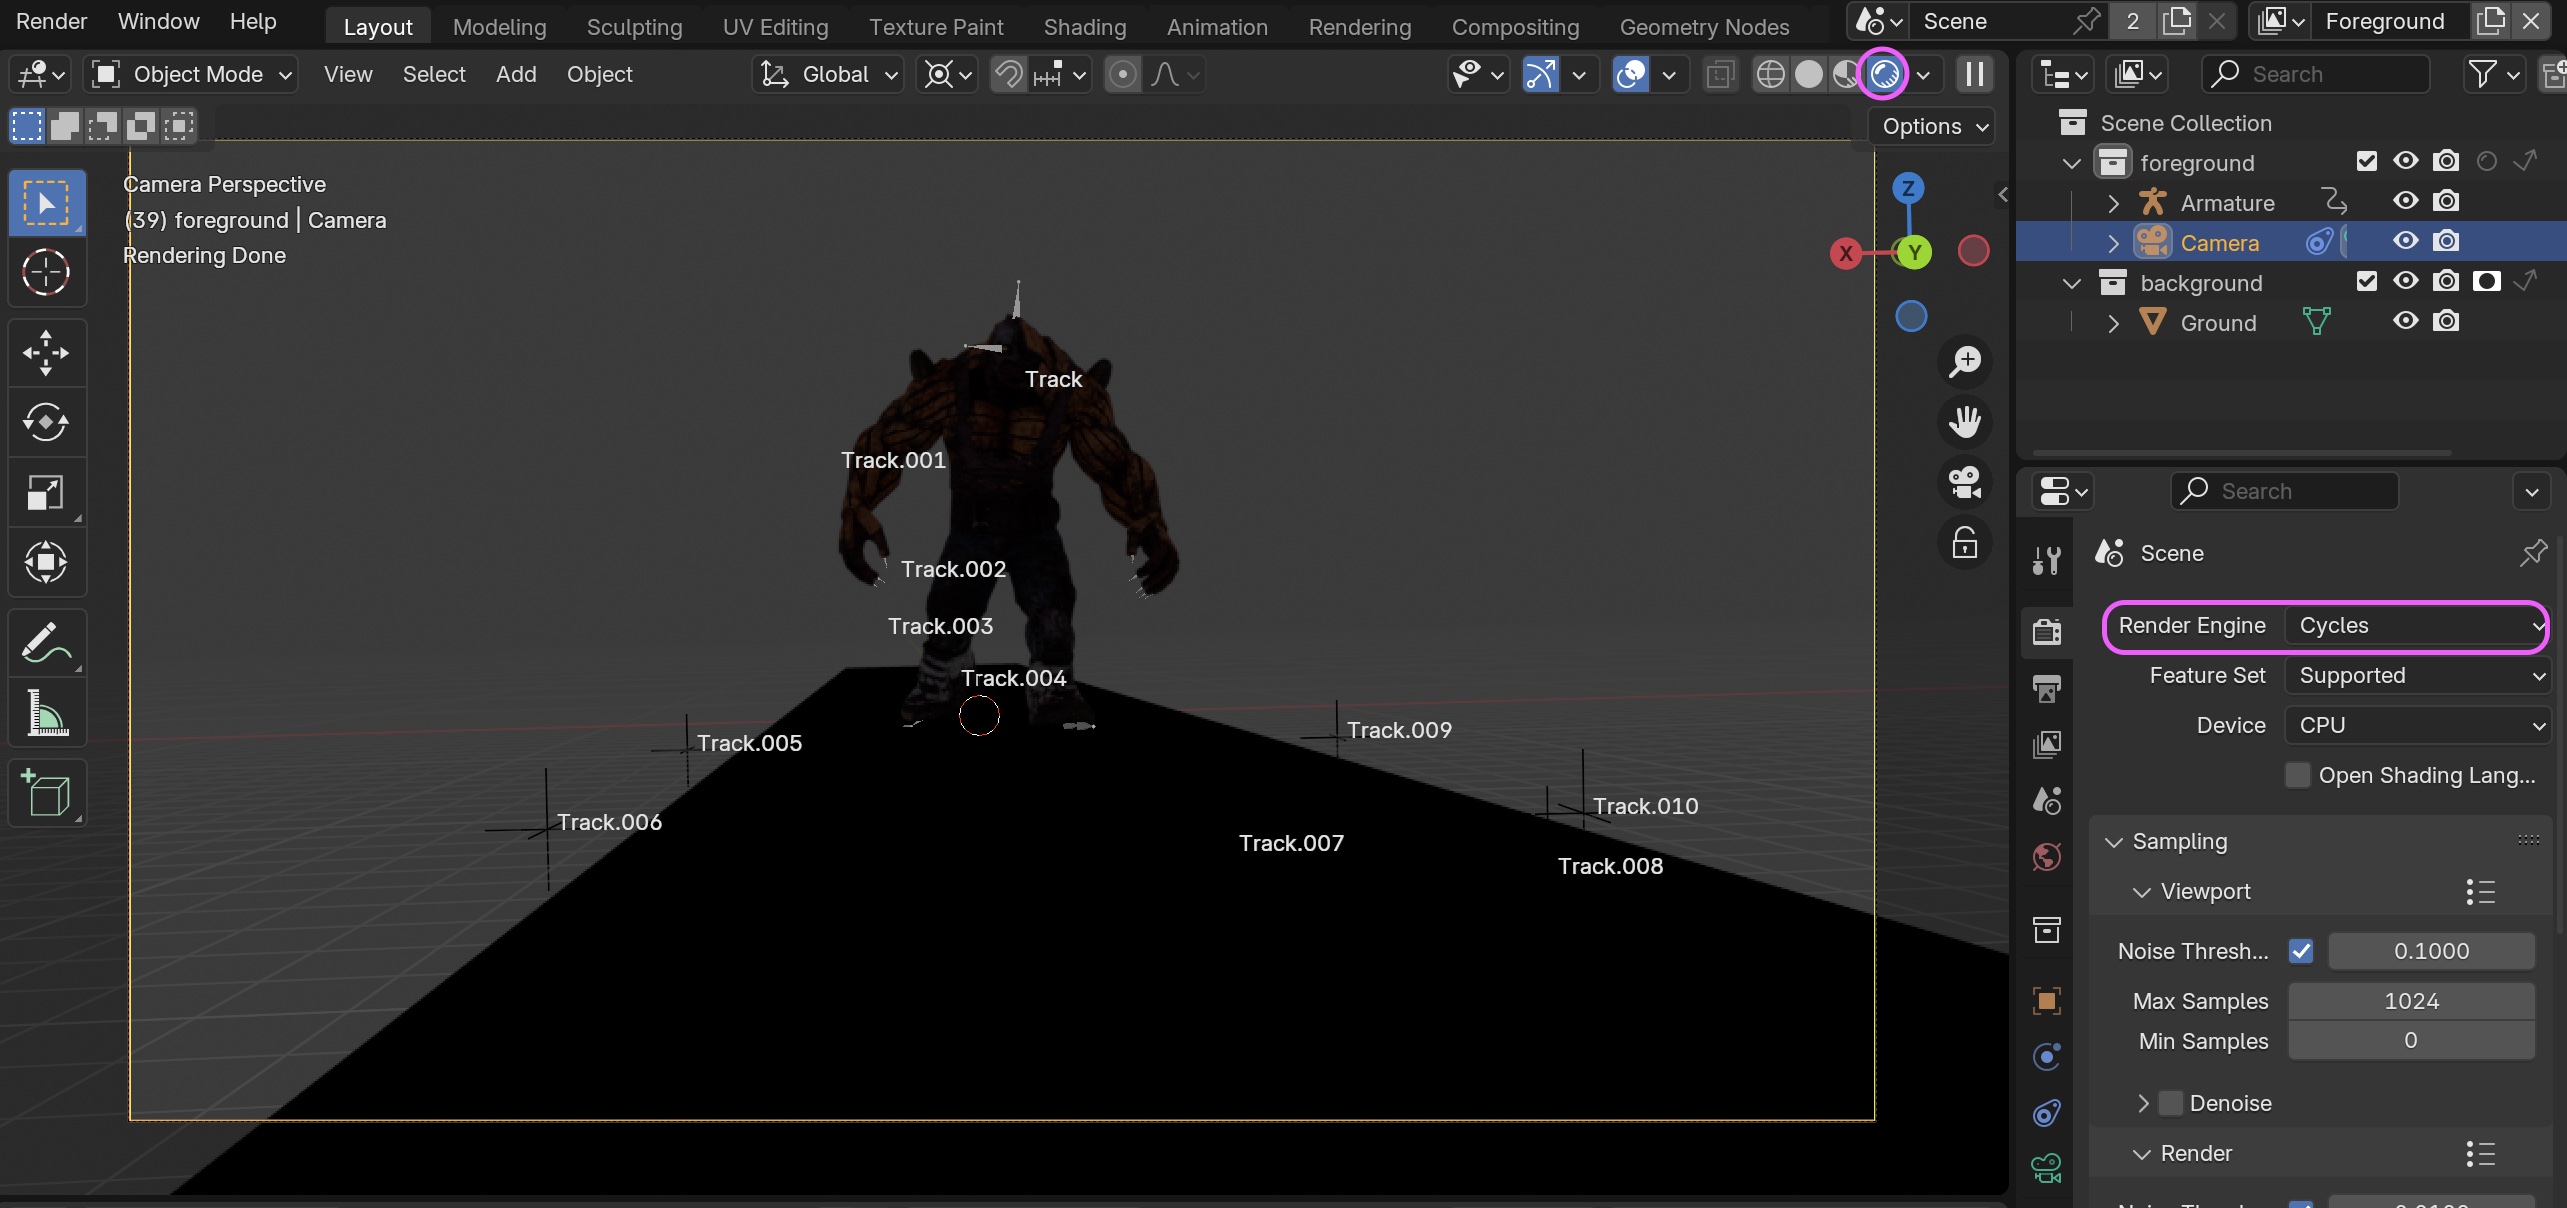
- Delete existing Cubes
- Delete existing Lights (Point)
- Viewport Shading: Change to Rendered
- Render Properties > Render Engine: Change to Cycles
In Eevee, the footage was visible only for the Ground portion due to the “Ground” holdout at this stage, but in Cycles, it remains completely black.
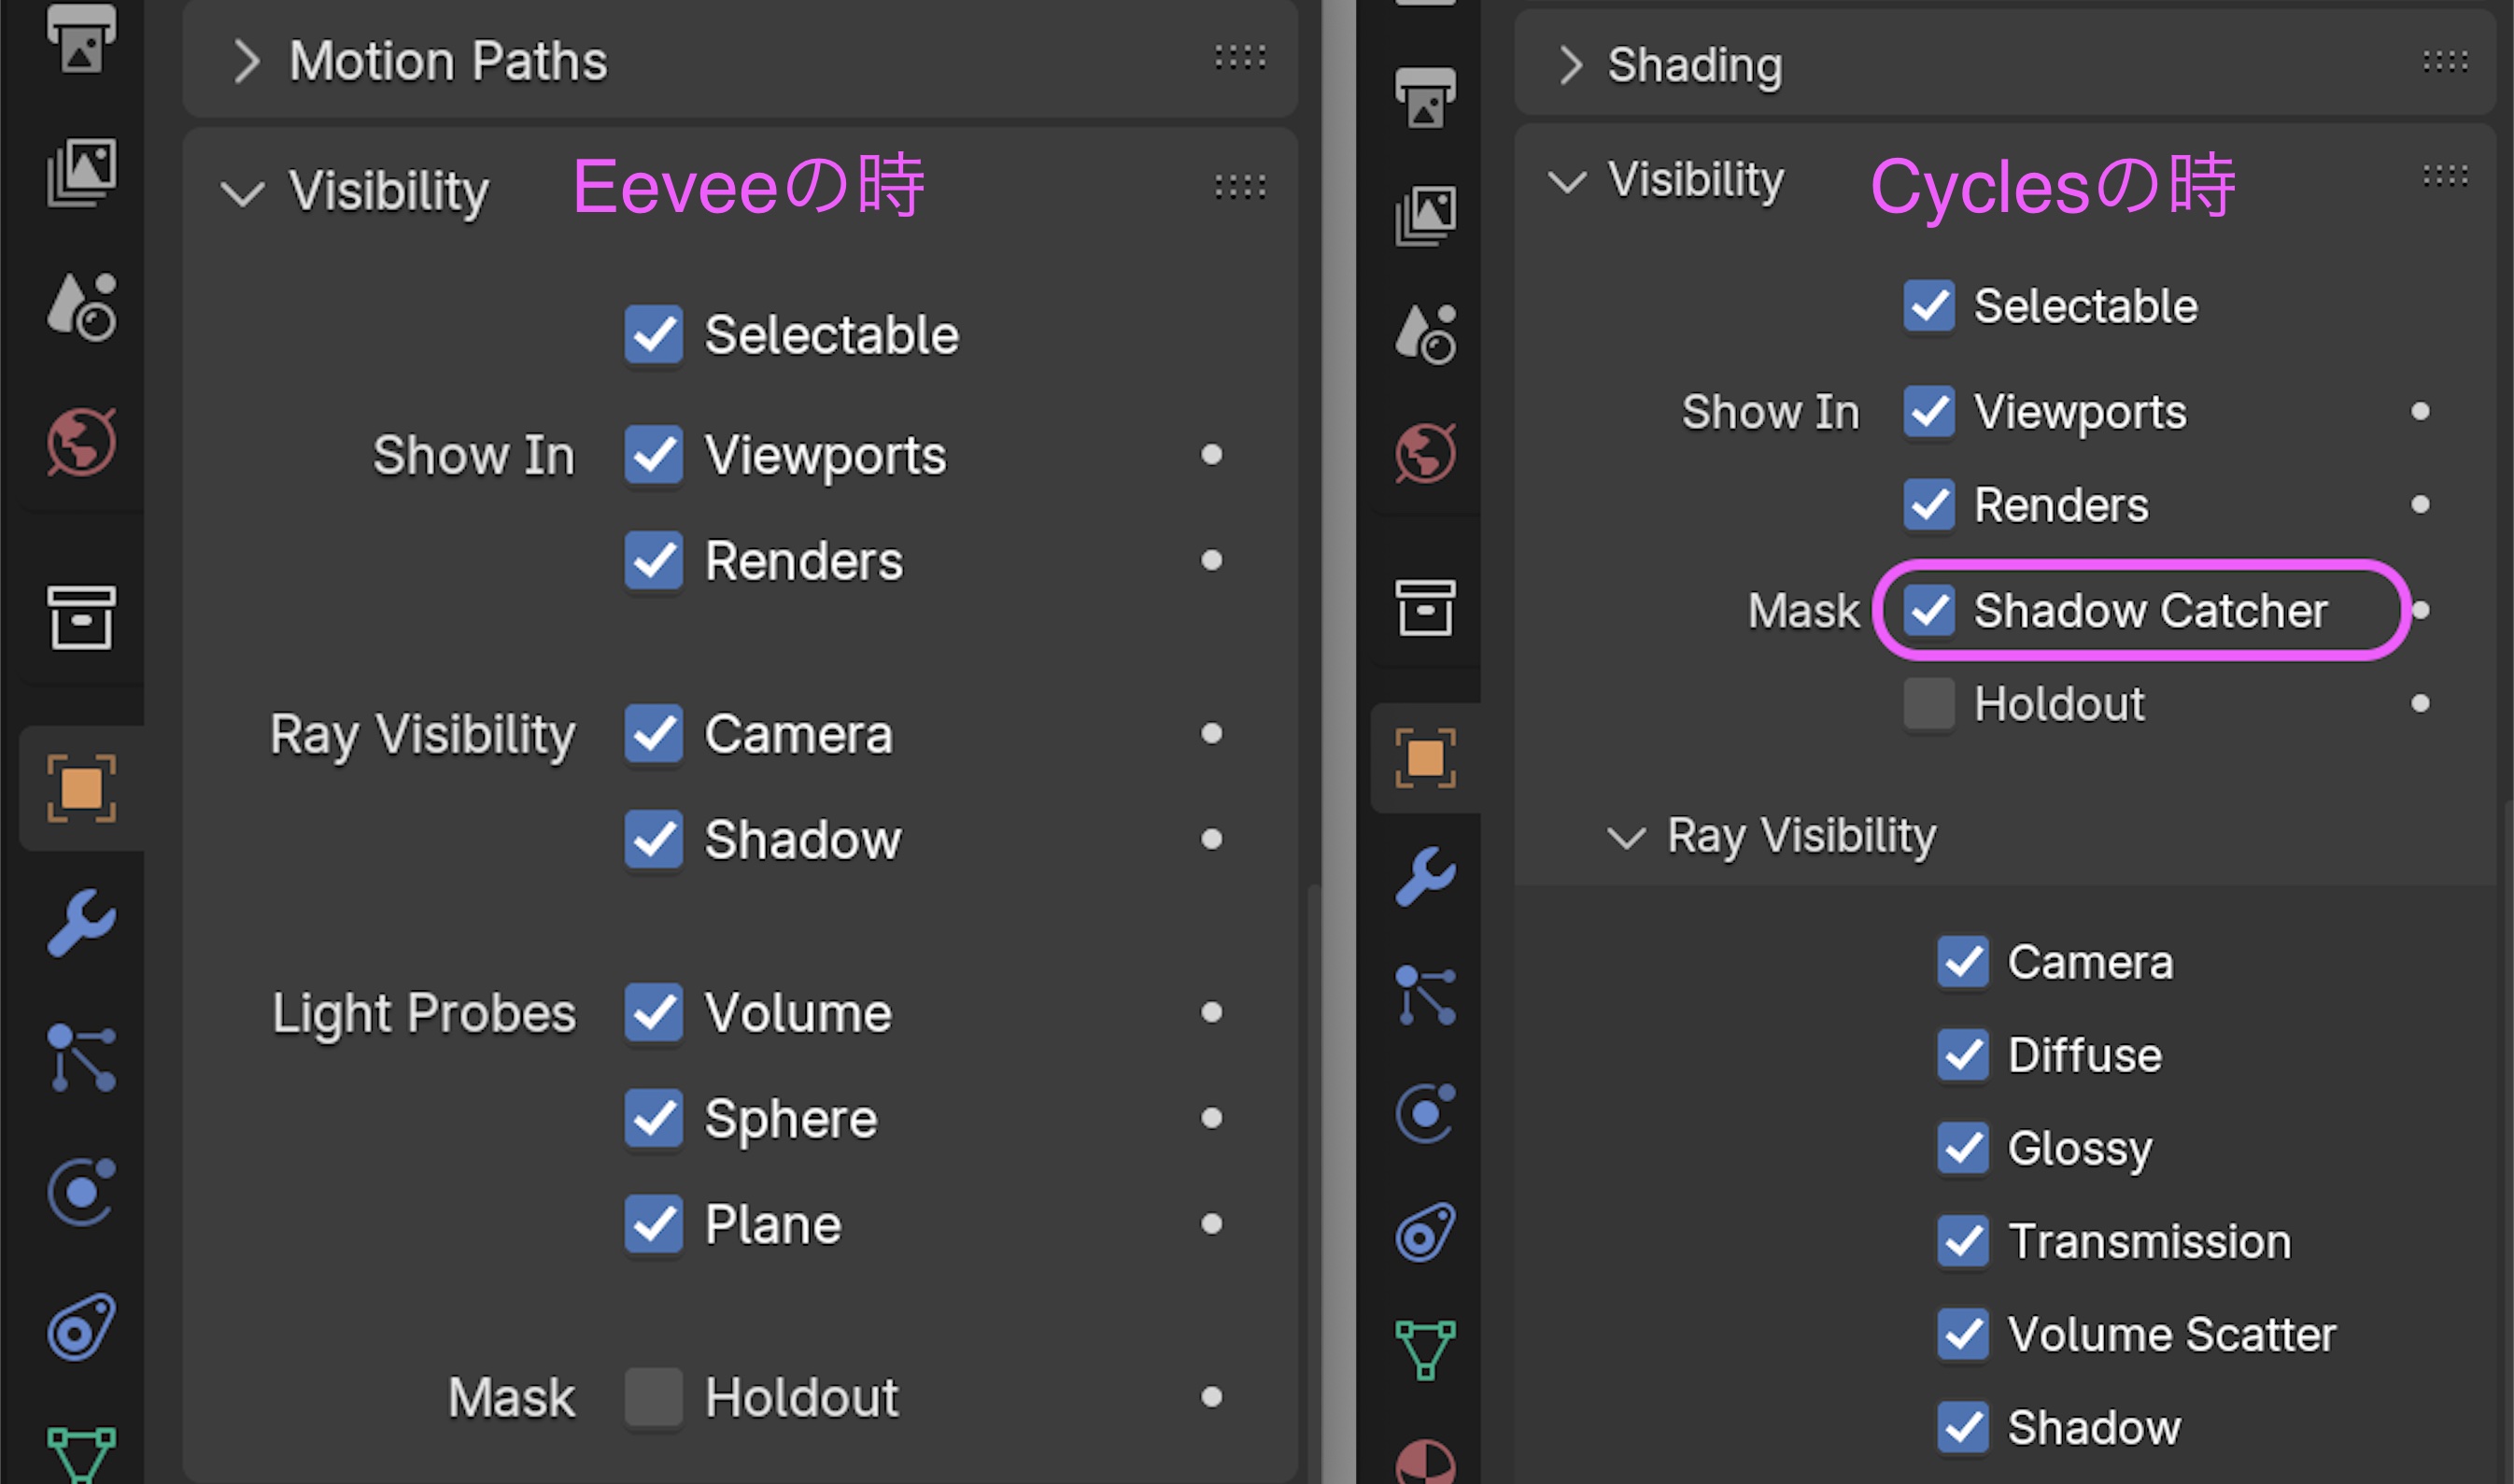
In Eevee and Cycles, the “Visibility” setting under “Object Properties” for the “Ground (Plane)” object changes.
In Cycles, make sure that “Shadow Catcher” is automatically checked in the “Object Properties” for the “Ground” object.
Check the “Transparent” box under Render Properties > Film.
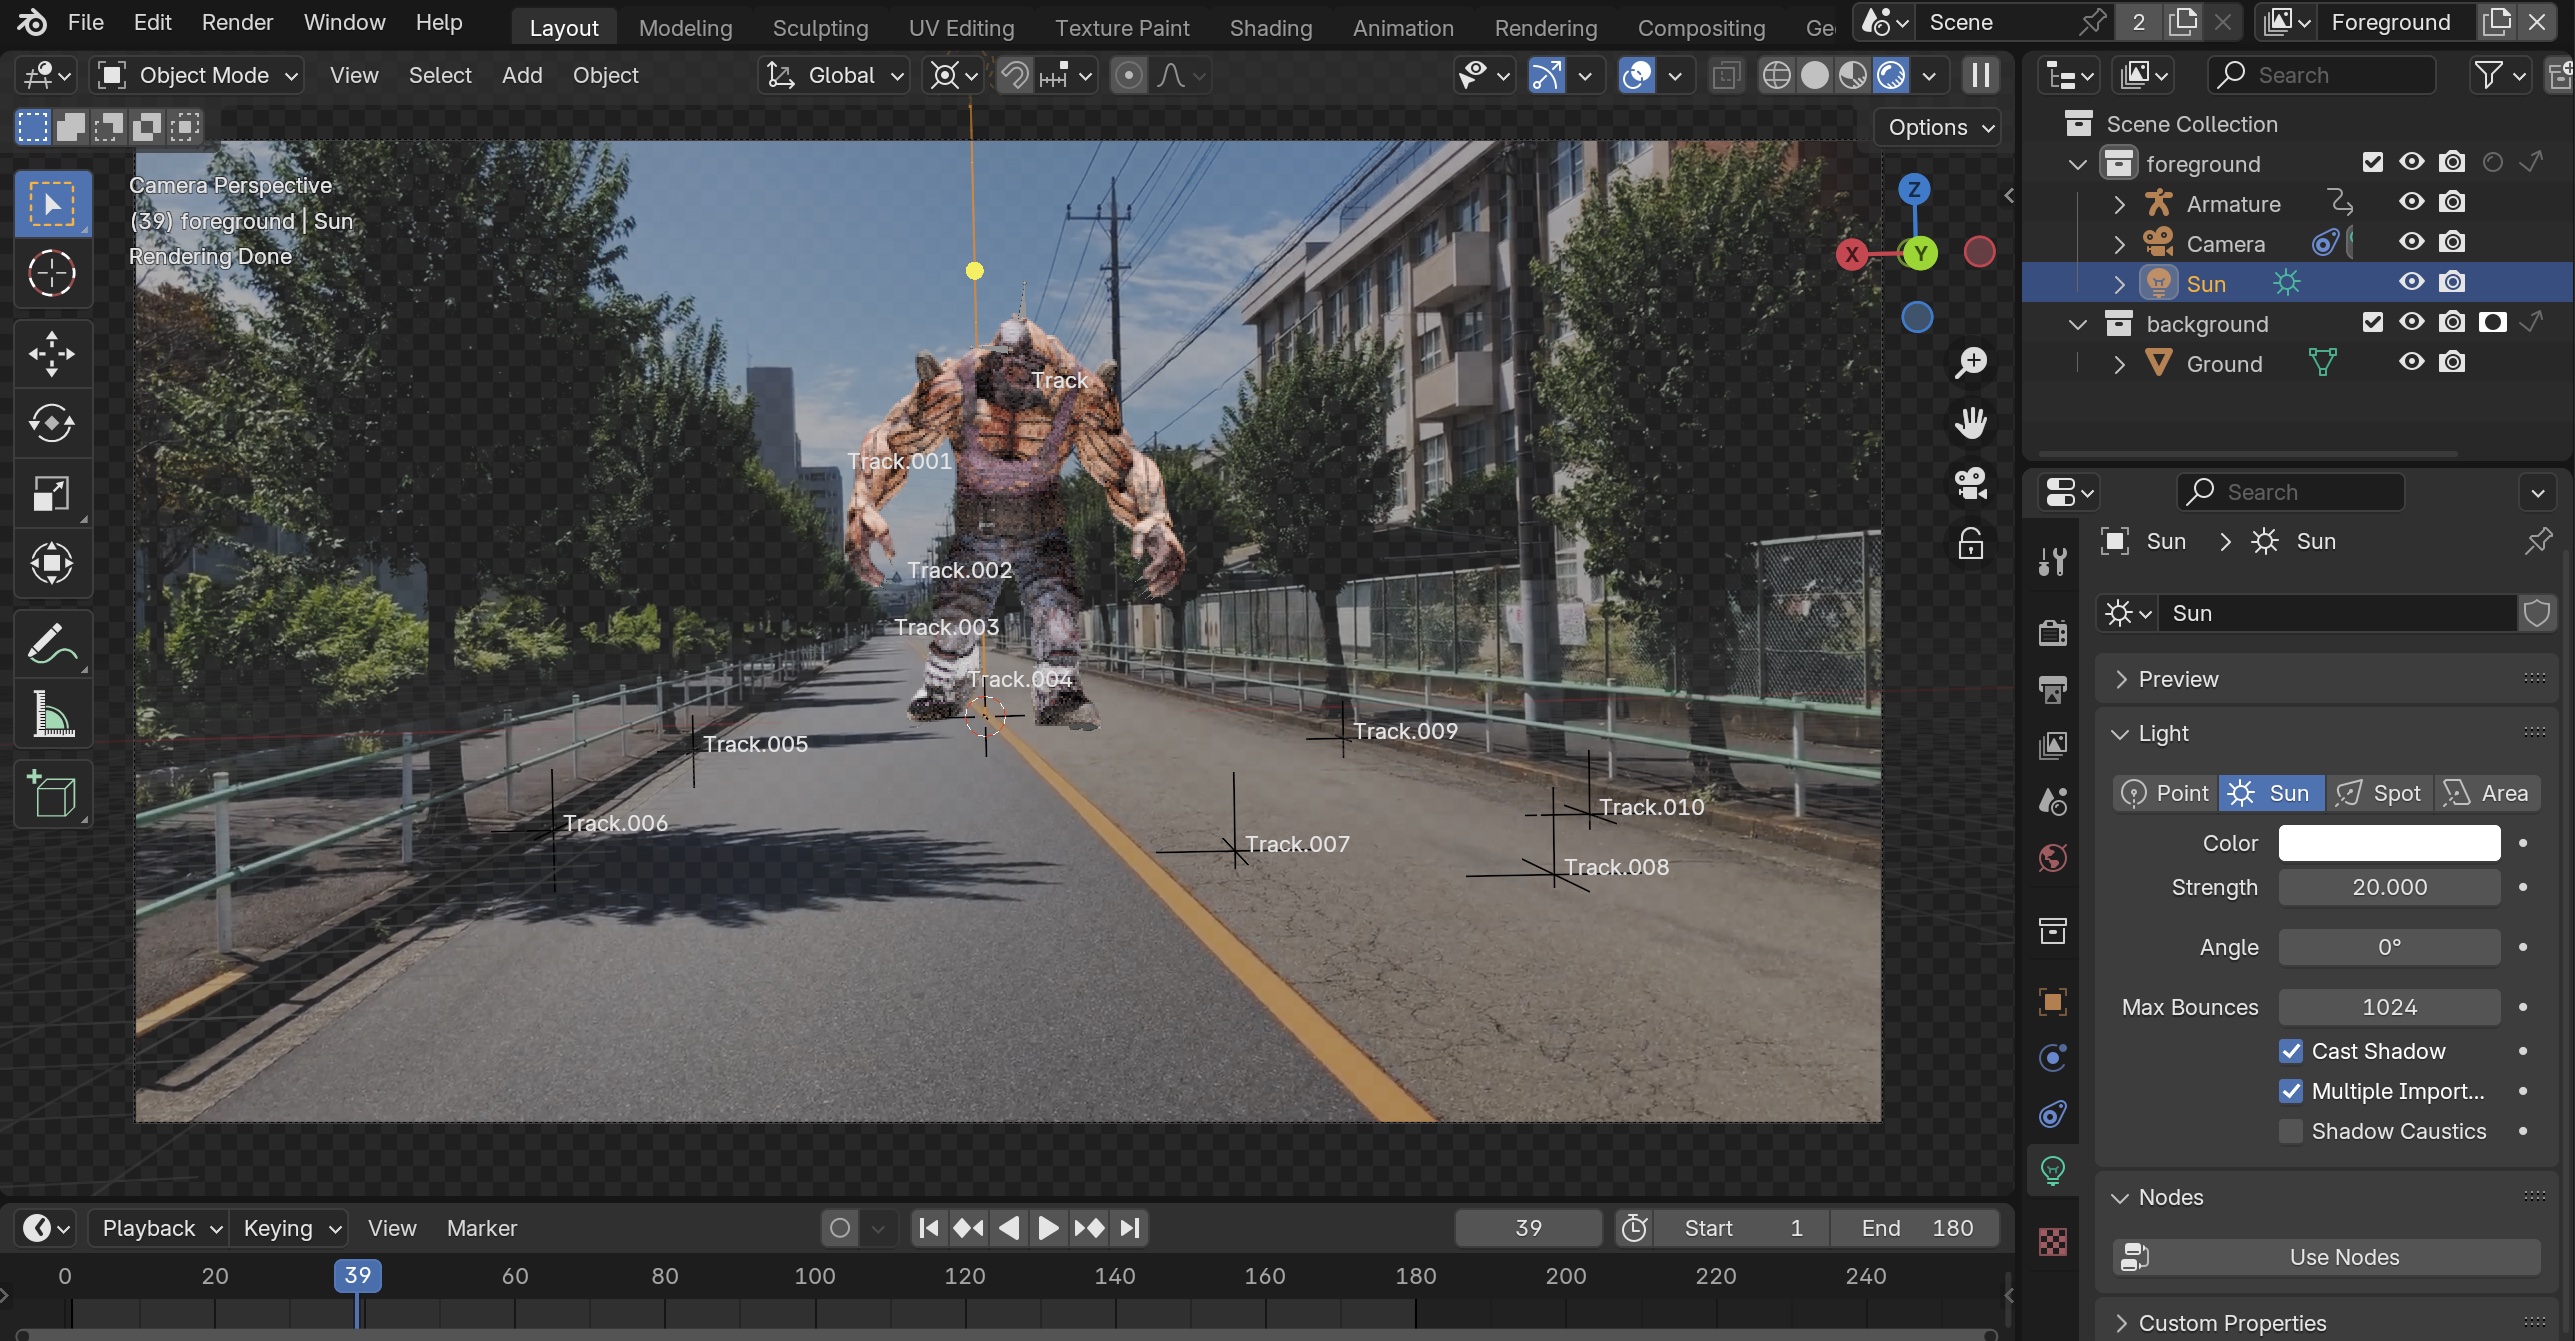
14.4 Adding Sun Light
- Add a Sun Light
- Strength: 20
- Angle: 0 (Shadow softening will be done in Composite)
- Raise the light’s height using the G and Z keys
It’s too bright at this point, but we’ll adjust it later.
14.5 Creating a Ground Material
Create a Ground material in the Shader Editor.
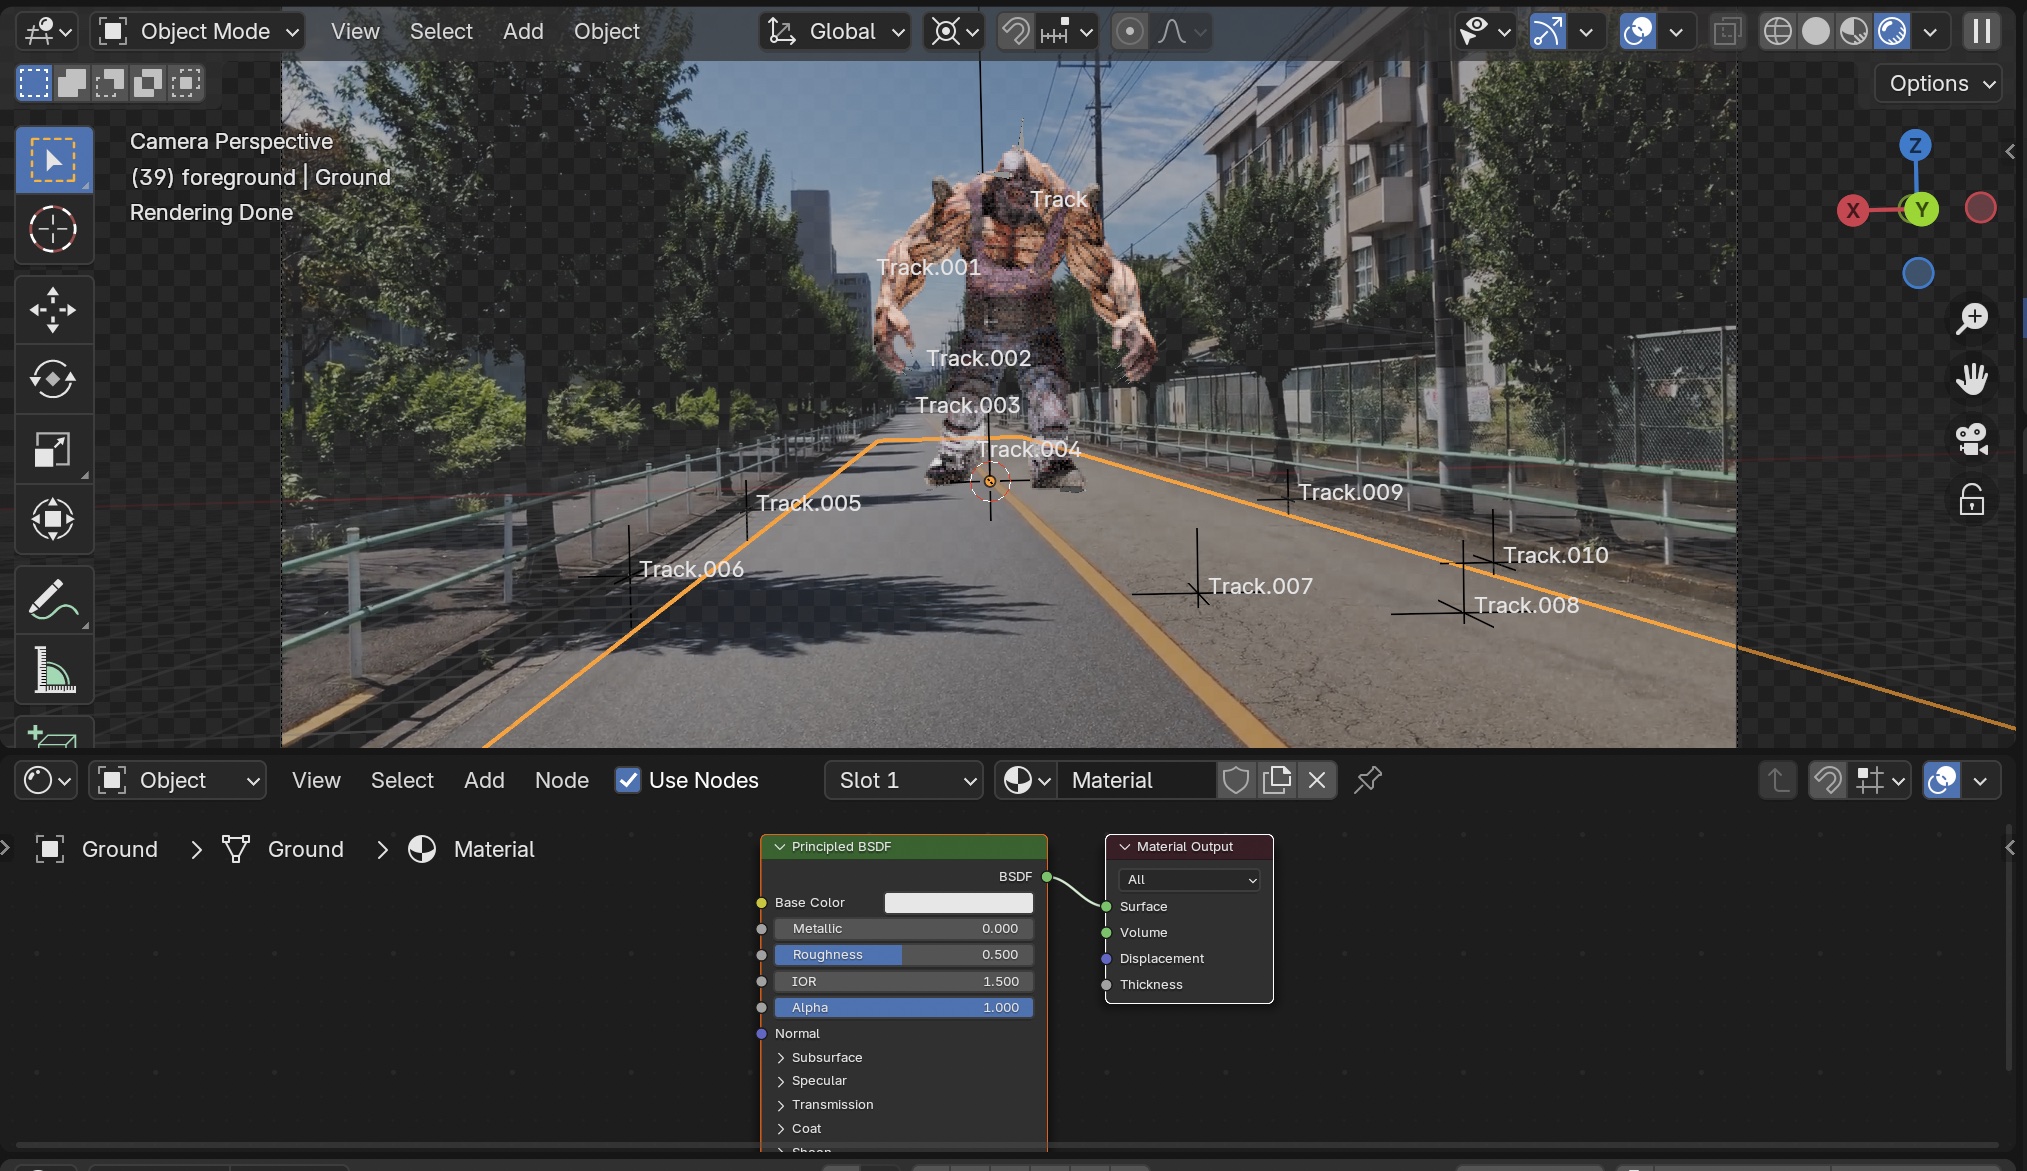
Change the “Base Color > Value” in Principled BSDF to 0.07.
Although the ground itself is hidden by the Shadow Catcher effect, you can see that the color of the ground material was being reflected onto HULK.

(Notes/For Reference)
- Set “Cast Shadow” (Object Properties > Light) and “Shadow Catcher” (Object Data Properties > Visibility) on the light, as well as “Shadow Catcher” (Object Data Properties > Visibility) on the object, to ON to enable shadow generation.
- In the Ground’s Object Properties > Ray Visibility > Glossy and Diffuse, you can enable or disable reflections from the Ground’s color onto HULK.
- If there are two lights, set the reflection effect from the floor to zero (Value: 0.0, Roughness: 1.0).
14.6 Direction of Light
To temporarily check for shadows, turn off “Holdout” in the “Background” collection.

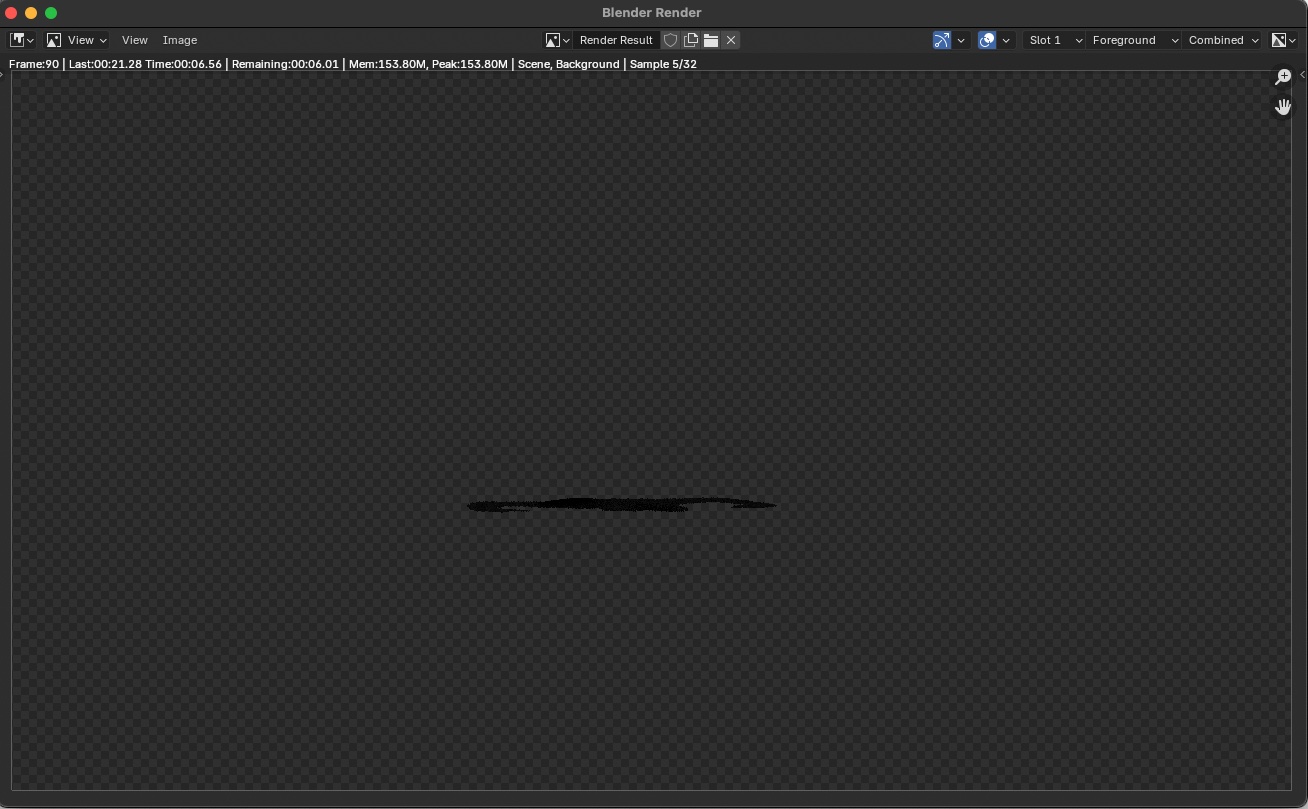
As shown in the figure below, the shadows (Background Collection) are displayed.
Not all elements of the actual Composite Node are reflected. While it is possible to render with Holdout turned off, the Composite is used to adjust the blend between HULK, the shadows, and the live-action footage.
Adjust the direction of the shadows to match the live-action footage.
If the right edge of the shadow is cut off, increase the width of the Ground Plane as needed.
Make sure “Holdout” in the “background Collection” is set to “ON.”
Change the Opacity to 1.0 in the Camera’s Object Data Properties > Background Images.
14.7 Understanding What Happens in the Setup Tracking Scene
When you perform “Setup Tracking Scene” in the Motion Tracking Workspace, the following settings are automatically configured. If you are not using Composite, you can manually configure the first two items listed below instead of using “Setup Tracking Scene”
- Camera constraints (camera movement) are set.
- A video clip is set as the camera’s background (displayed at 50% opacity).
- Two collections—foreground and background—are created in the Scene Collection.
- A cube is created at the origin.
- The Ground (Plane object) is placed in the background and set to Holdout.
- The following two View Layers are created:
- Foreground
- Background
- A Compositing Node Tree is automatically created (see below).
- Note: This was also created in Eevee, but only the Foreground layer was used.
14.8 Understanding View Layers
Display the Foreground View Layer (same as before).
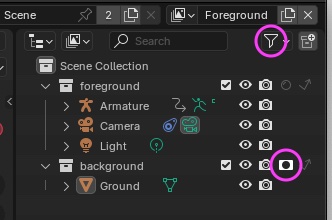
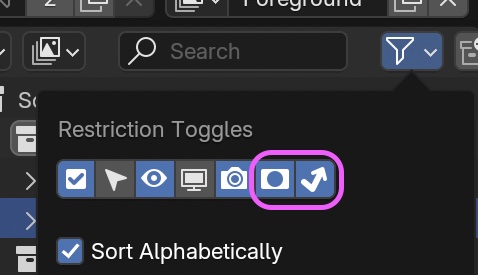
Click the icon shown below to display the “Background View Layer” from the menu.
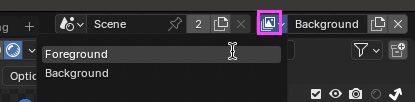
Only the shadow is displayed.
You don’t need to understand the following right away. Your understanding will develop as you experiment.
- The Foreground View Layer and Background View Layer are not intrinsically related to the Foreground Collection or Background Collection; rather, the Handout and Indirect Only settings are linked to each respective View Layer.
- “Holdout” acts as a mask, while “Indirect Only” hides the content. “Holdout” makes the lower layers transparent (creating a “hole” effect), whereas “Indirect Only” hides only that specific Collection while leaving the lower layers visible.
- The quality of the final output varies depending on how the Compositer nodes are arranged and how the parameters are adjusted.
- This View Layer allows you to render footage by separating it into background layers, shadows, characters, and other elements.
References:
- YouTube - Blender and Fusion Multi-Layer Workflow - Render Passes and Compositing for Beginners
- YouTube - Compositing in Blender 4.0 in practice - Tutorial
- YouTube - Understanding View and Render Layers in Blender
14.9 Understanding Composites
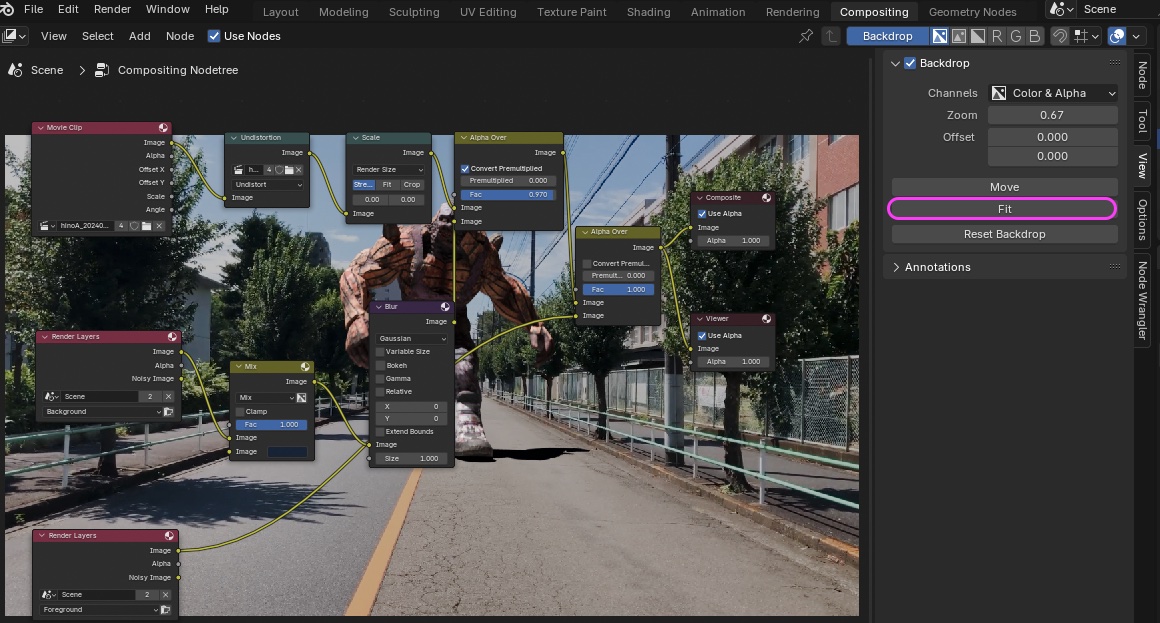
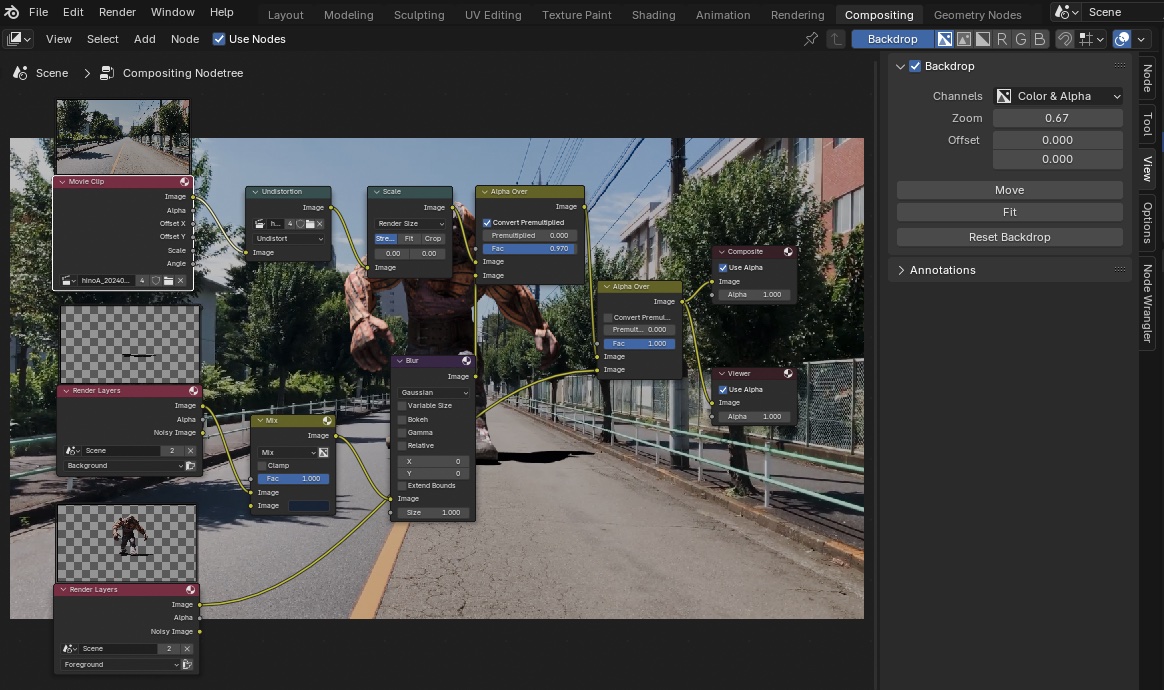
When you switch to the Compositing Workspace, the Compositer appears.
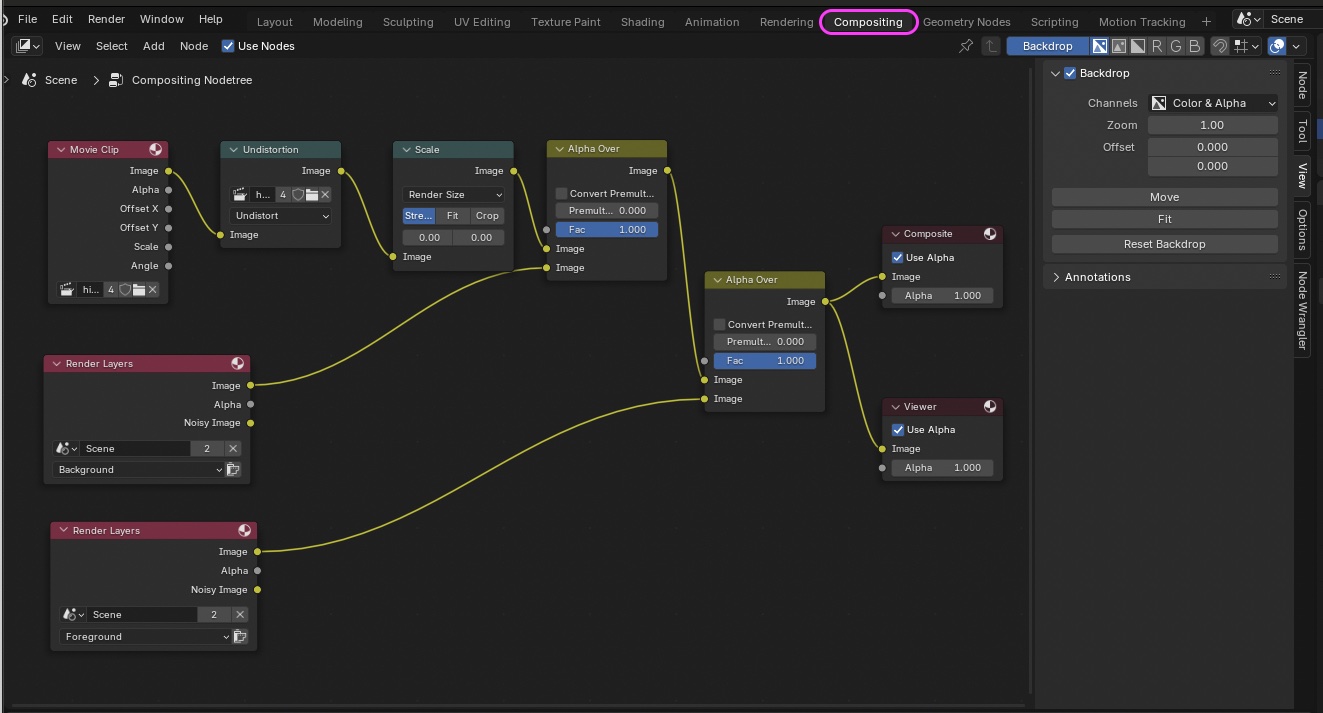
These are the nodes displayed in the Compositer, and the workflow is as shown in the figure below.
This section is for explanation only. We will cover the actual operations later.
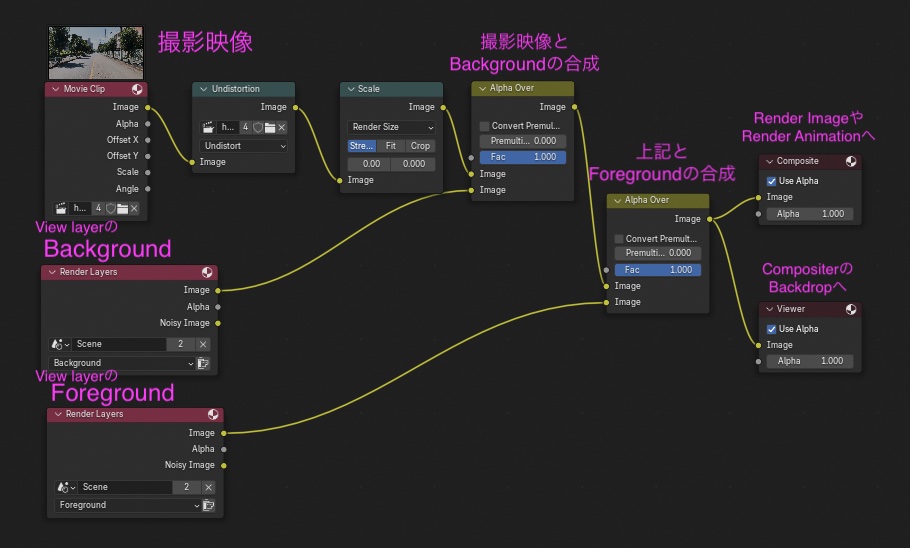
In general CG production, since compositing adjustments often involve trial and error, it is common practice to export background layers, shadows, and characters as a sequence of images and use separate compositing software such as After Effects.
14.10 Composite
To check the composite state, you need to render a still image. Since rendering takes a long time with the current settings, change the settings as follows to reduce the image quality.
- Output Properties > Format
- Resolution X: 1280
- Resolution Y: 720
- Render Properties > Sampling
- Viewport > Max Samples: 32
- Render > Max Samples: 32
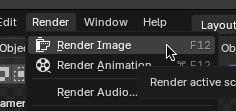
Go to the Render menu and select Render Image.
Rendering occurs in the order of Foreground, Background, and Composite.
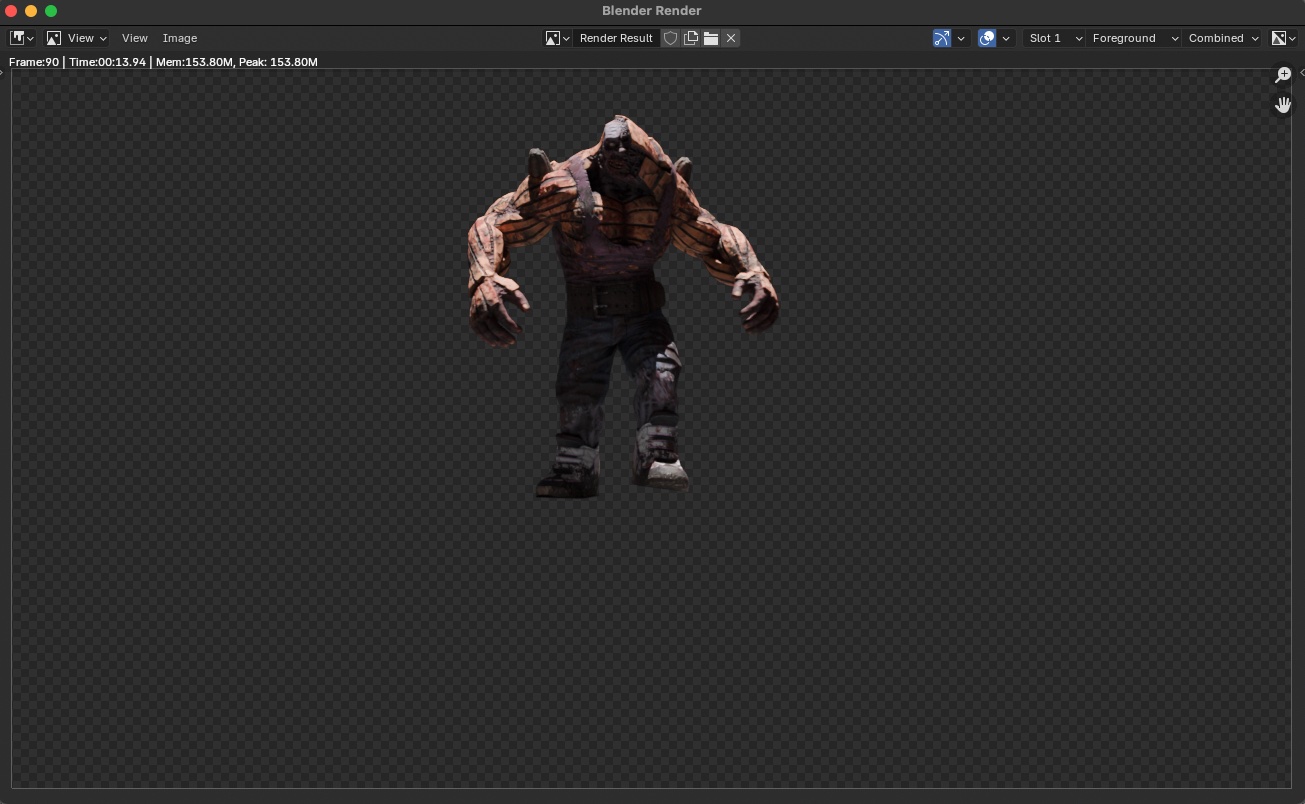
Once all rendering is complete, you can switch between layers to view each one.
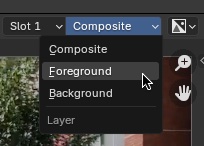
From left to right: Foreground, Background, and Composite layers.
- Close the Render Window.
- Switch to the Compositing Workspace.
- If the Backdrop is not visible, click the Backdrop button.

Do not touch the time indicator on the timeline Since only a single frame is being rendered, the background video will become out of sync whenever the current frame changes
You can adjust the scale and position of the backdrop in the Backdrop section of the sidebar.
Click “Fit” to resize it to fit the window.
To preview an image on top of a Movie Clip node or Render Layers node, press SHIFT+H (Node Preview).
If it doesn’t work, try pressing SHIFT+H a few times.
Let’s toggle the following nodes on and off (using the M key to mute them) to see how the compositing process works.
- Movie Clip: Background (see figure below)
- Alpha Over on the left: Shadow
- Alpha Over on the right: Foreground
Add the following nodes and adjust their parameters to control the shadow’s color and intensity.
- Add a Mix Color node (to add a blue tint)
- Hue: 0.62
- Saturation: 0.78
- Value: 0.06
- Add a Blur node (to control the blur)
- Filter Type: Gaussian
- X: 4
- Y: 4
- Size: 0.5
- Left Alpha Color (shadow transparency)
- Convert Premultiplied: ON (pre-multiplied blending?)
- Fac (Factor): 0.97
Note: Issue with changes in the contrast of the background video
- Go to Render Properties > Color Management and change “View Transform” from “AgX” to “Standard.”
- You can adjust the appearance of the image to your liking. This method is intended only for cases where you want to render the footage exactly as it is.
14.11 Rendering
Note: An important point that’s easy to overlook: Make sure to enable “Holdout” for the Background Collection in the View Layer.
The settings for this project are as follows: Render menu > Render Animation.
- Render Properties
- Resolution X: 1280 px
- Resolution Y: 720 px
- Frame Rate: 30 fps
- Output
- Location: Any location/filename *Please use English for the output path, as Japanese characters may not be rendered correctly
- File Format: FFmpeg Video
- Encoding > Container: MPEG-4
- Video > Video Codec: H.264
Rendering all frames can take several hours or more, depending on your PC’s performance. Since the settings in the first half specify Full HD and set “Render > Max Samples” to 32, you should reset this to 4096 if you want higher quality.
(Notes/For reference only) While the final output can be generated via the File Output node, as shown around the 12:20 mark in the YouTube video below, the Composite node itself connects directly to Blender’s Render Image and Render Animation functions, so using the standard rendering workflow is perfectly fine. Also, it appears that the File Output node can only save still images (presumably).
(This section is under construction)
- First, verify whether output is possible using “Render Image”
- I have confirmed that with “Render Image,” you can save the image via “Image > Save” in the “Render Windows” dialog.
15. Reference Sites for Shadow Catcher
- Blender 4.2: Controlling Shadows | Osamu Kitani
- Issue with Shadow Catcher in Blender 4.2 - Lighting and Rendering - Blender Artists Community
- YouTube - The Best Way to Work with Blender’s Shadow Catcher Pass
Note)
- Cycles shadow color: This method doesn’t work (the character’s shadow color changes, but the ground shadow doesn’t)
- YouTube - How to make a shadow catcher in Blender 4.0 Cycles and Eevee: Covers the basics of Shadow Catcher
- YouTube - New Shadow Catcher Features in Blender 3.0 | Cycles X Tutorial: More detailed adjustments
- Blender: How to use Shadow Catcher to render only shadows | reflectorange.net
- Shadow Catcher cannot produce colored shadows on its own
- rendering - Changes in shadow color when enabling Shadow Catcher - Blender Stack Exchange
- While the method described above uses Composite to achieve colored shadows, since there is no preview, it might be better to render only the gray shadows on a separate layer and then composite them in After Effects or similar software if you want to make fine adjustments.
- #100701 - Color Shadow Catcher with Cycles - blender - Blender Projects
- According to the above, you need to understand and use the “Shadow Catcher” render layer, which requires some knowledge.
- You need to understand the section starting at 1:30 in the YouTube video below.
- YouTube - New Shadow Catcher Features in Blender 3.0 | Cycles X Tutorial
16. Other Useful Websites
16.1 Websites Referenced (For My Records)
How to add a shadow catcher
- YouTube - Blender Motion Tracking Introduction | Add 3D Elements to Your Footage | Tutorial
- Part 1: Getting Started with Live-Action Compositing in Blender! [Stay Home VFX Collaboration Project] | Let’s Get Started! Let’s Take the Plunge! VFX!
- Part 3: Take Your VFX to the Next Level with Blender and Resolve Fusion! [Stay Home VFX Collaboration Project] | Let’s Get Started! Let’s Take the Plunge! VFX!
- YouTube - [Blender] Your First VFX Project! A Step-by-Step Guide from Motion Tracking to Compositing and Exporting [For VFX Beginners]
- YouTube - [Blender 3.x] Let’s Create VFX Footage Using Masking Compositing
The following section covers motion tracking methods other than Blender.
16.2 PF Track
Paid software. The free version is for trial purposes only. https://www.thepixelfarm.co.uk/pftrack
16.3 fSpy Open-Source Still Image Camera Matching
Free software. https://fspy.io/
16.4 After Effects
After rendering the Mixamo character in Blender, I composite it in After Effects.