img2img and Inpaint
Updated: 2026-05
1. What You’ll Learn on This Page
Up until now, we have focused on “text-to-image” generation. From this page onward, we will cover two methods that use existing images as a starting point.
- img2img: Uses an existing image as a “noise base” to generate a new image with a similar atmosphere
- inpaint: Selects only a portion of an existing image using a mask and redraws only that section
In class, both are treated as extensions of the basic workflow.
2. How img2img Works
In standard T2I, the diffusion process begins with an “empty latent image” (pure noise).
In img2img:
- The input image is encoded into the latent space using a VAE (compressed from image to latent representation)
- A small amount of noise is added to that latent image
- The diffusion process begins with that “half-noisy latent image”
- The image is redrawn while being guided by the prompt
- The image is converted back to its original form via VAE decoding
In other words, img2img starts with “noise that retains the characteristics of the original image, rather than pure noise.”
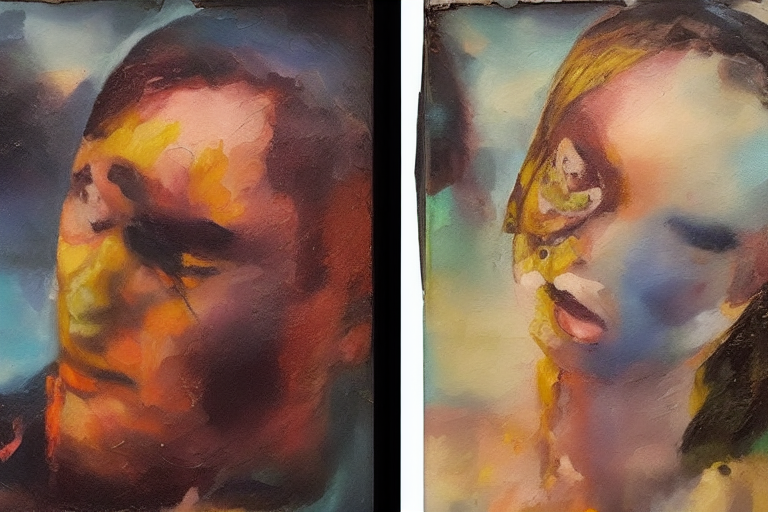
3. The Role of denoise (Noise Reduction Rate)
The most important parameter in img2img. It determines how much noise to add within the range of 0.0 to 1.0.
| denoise | Result |
|---|---|
| 0.0 | Exactly the same as the original image |
| 0.3 | Slightly repainted version of the original image, with composition largely preserved |
| 0.5 | Moderate; half the influence of the original image remains |
| 0.7 | Only the silhouette of the original image remains |
| 1.0 | Identical to the original T2I (no influence from the original image) |
Image: The “denoise” value determines the degree to which the original image is “forgotten.”
4. The img2img Workflow
Make the following changes to the Minimum Workflow.
- Delete the Empty Latent Image node
- Add a Load Image node
- Add a VAE Encoder node (compresses the image into a latent representation)
- Connect the output of the VAE Encoder to the
Latent Imageinput of the K-Sampler - Lower the
denoisevalue of the K-Sampler from 1.0 to 0.5, for example
That’s all it takes to make it img2img.
4.1 Sample Workflow
- Source image: Photos you’ve taken, images generated by SD, free stock images found online, etc.
- Prompt: “Same composition, but in an oil painting style,” “watercolor style,” “cyberpunk style,” etc.
- Denoise: Start by trying values around 0.5 to 0.7
5. How Inpaint Works
An advanced version of img2img. Use this when you want to change “only a part of an image.”
- Prepare the input image and its corresponding mask (the mask is a black-and-white image, with the white areas representing the “areas to be modified”)
- Apply noise only to the masked areas
- Redraw the image according to the prompt
- Leave the areas outside the mask unchanged
For example:
- “Replace only the person’s face with someone else’s”
- “Remove the utility pole from the background”
- “Change the pattern on the clothes”
- “Replace only the left half of the image with a different scene”
6. The Inpaint Workflow
Comfy Cloud includes a mask editor. Instructions:
- Load the target image using Load Image
- Right-click the image node → Select Edit Mask
- Use the brush to paint the “area you want to change” white
- Once finished, the mask will automatically be linked to the node
- Use the VAE Encoder (for Inpainting) node (this is different from the standard VAE Encoder)
- Connect it to the K-Sampler as usual
Denoise is important here as well. It determines “how much of the original color to retain” in the masked areas. A value between 0.7 and 1.0 is commonly used.
6.1 Tips for Masking
- Blur the edges: Sharp masks make the seams stand out. Blur the edges slightly.
- Make it slightly larger than the subject: Don’t make the mask fit the subject perfectly; leave a little extra space.
- Multiple areas at once: A mask can contain multiple white areas.
7. Related Templates (in Comfy Cloud)
The “Popular” section of Comfy Cloud’s templates includes the following related workflows.
- Qwen Image Edit 2509: An advanced editing workflow that integrates image editing with control networks
- Inpaint Templates (Similar items are also available in the “Getting Started” category)
- Outpaint Templates: Extends images outward (generates masked areas beyond the original boundaries)
Use these as a starting point and customize them to suit your needs.
8. Estimated Credit Usage
- img2img: Similar to standard T2I (even with low denoising, the computational complexity is essentially the same)
- inpaint: Similar to standard T2I
Specialized templates (such as Qwen Image Edit) use more resource-intensive models, so they are slightly more expensive (4–8 cr per image).
9. Exercises (for Class Use)
Exercise A: Turning Photos into Paintings
- Load a photo you took or the banner image from A-1 (generated by Z Image Turbo) into img2img
- Prompt:
oil painting, impressionist style, brushstrokes, dramatic lighting - Denoise: 0.5
- Steps: 20, CFG: 7
- Run it a few times to get a feel for which denoise value you prefer
Exercise B: Removing Objects
- Load a photo of yourself
- Use a mask to paint over the area of the object you want to remove (e.g., utility poles, signs, trash cans)
- Prompt: A description of the surrounding scenery (e.g., if the background is sky, use
clear blue sky) - Denoise: Set to around 0.9
- Check the result to see if the object has been removed naturally
Exercise C: Replacing Only the Face
- Prepare a portrait image (one for which you hold the rights)
- Mask the face area
- Prompt:
portrait of an elderly Japanese man, weathered face, kind eyes - Denoise: 0.85–1.0
- Check whether the face has been completely replaced
10. What’s Next
- ControlNet — Precisely specify composition and pose using separate images
- LoRA — Narrow down the art style or subject
- Image to Video — Convert still images into videos