Multiple Ways to Loop Mixamo Character Animations
Updated: 2026-05*
1. Introduction
There are several ways to loop a Mixamo character animation; pick the one that fits your purpose. The technique differs significantly depending on whether the source animation is In Place or Root Motion.
1.1 What is In Place / Root Motion?
The opposite of In Place Animation is Root Motion. Root Motion means motion relative to the Root (world space). It’s also called Root Animation or Moving Animation.
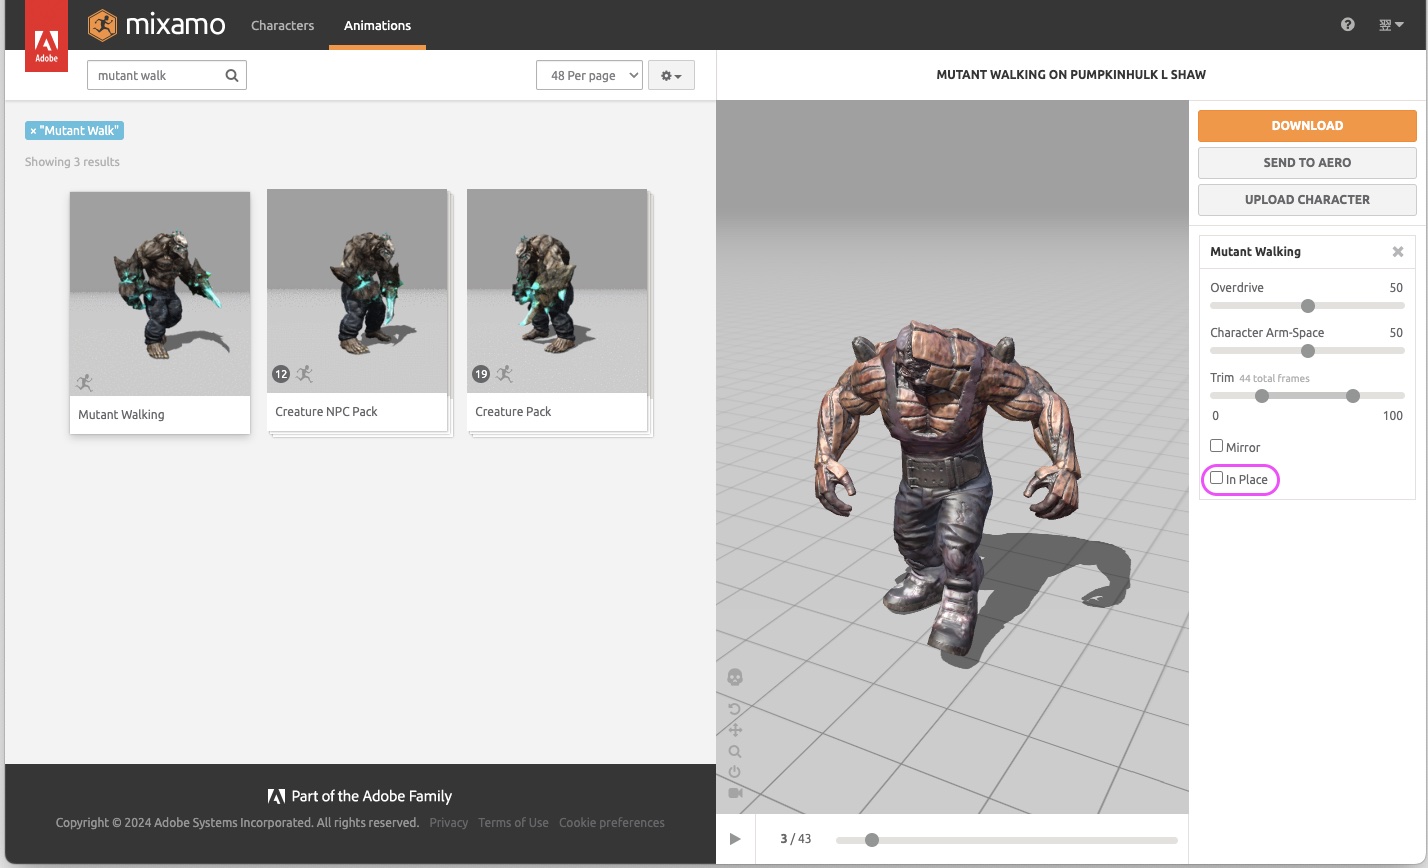
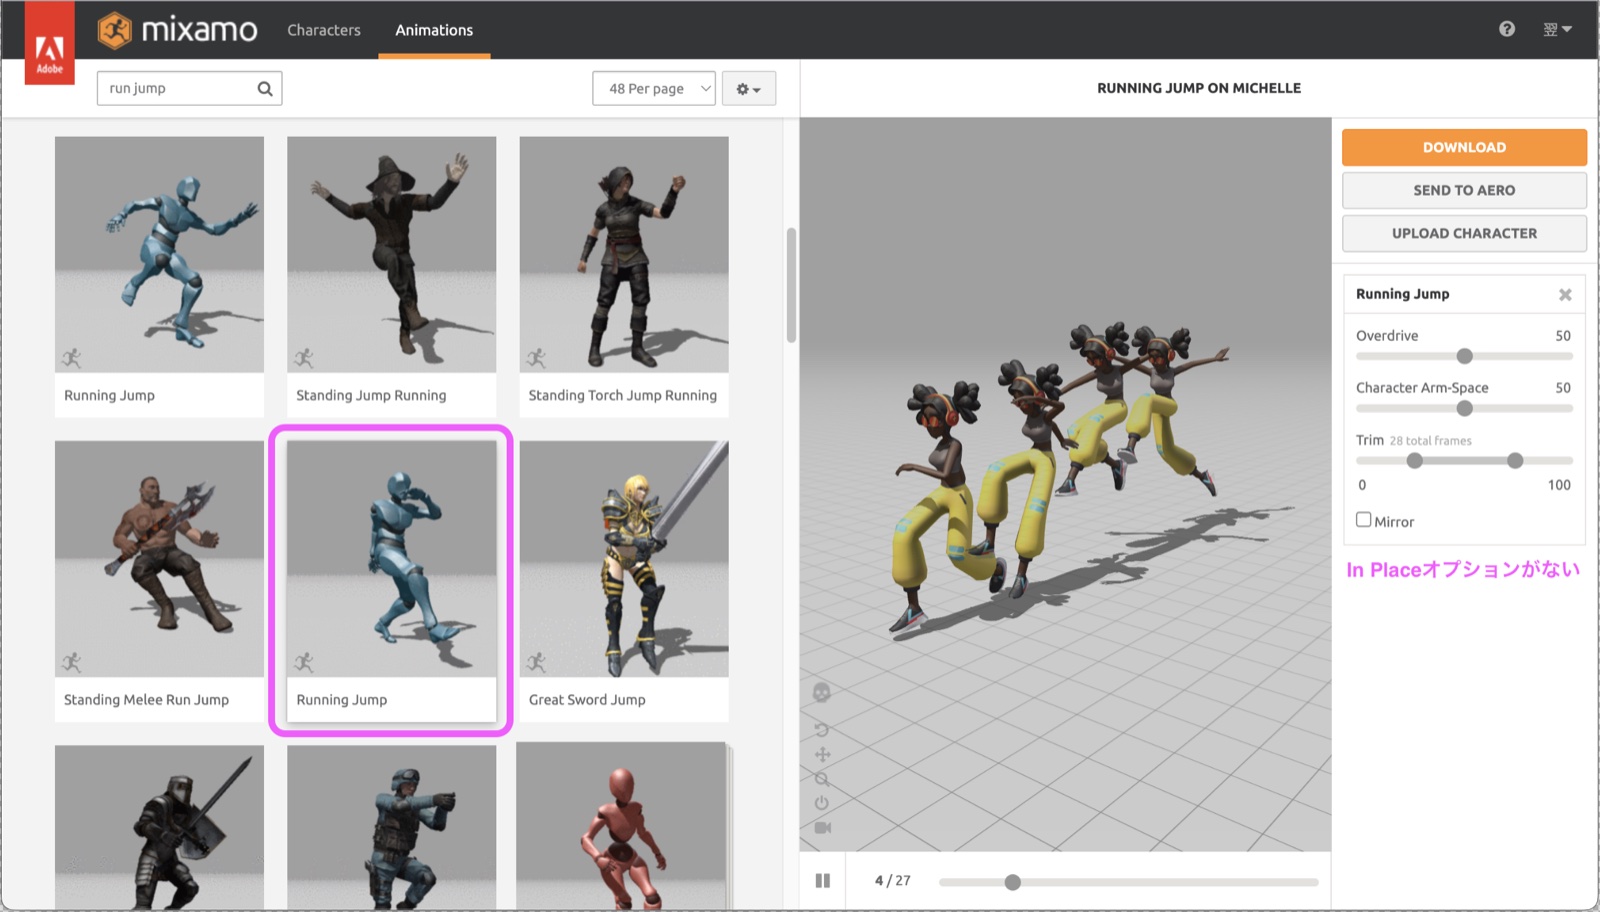
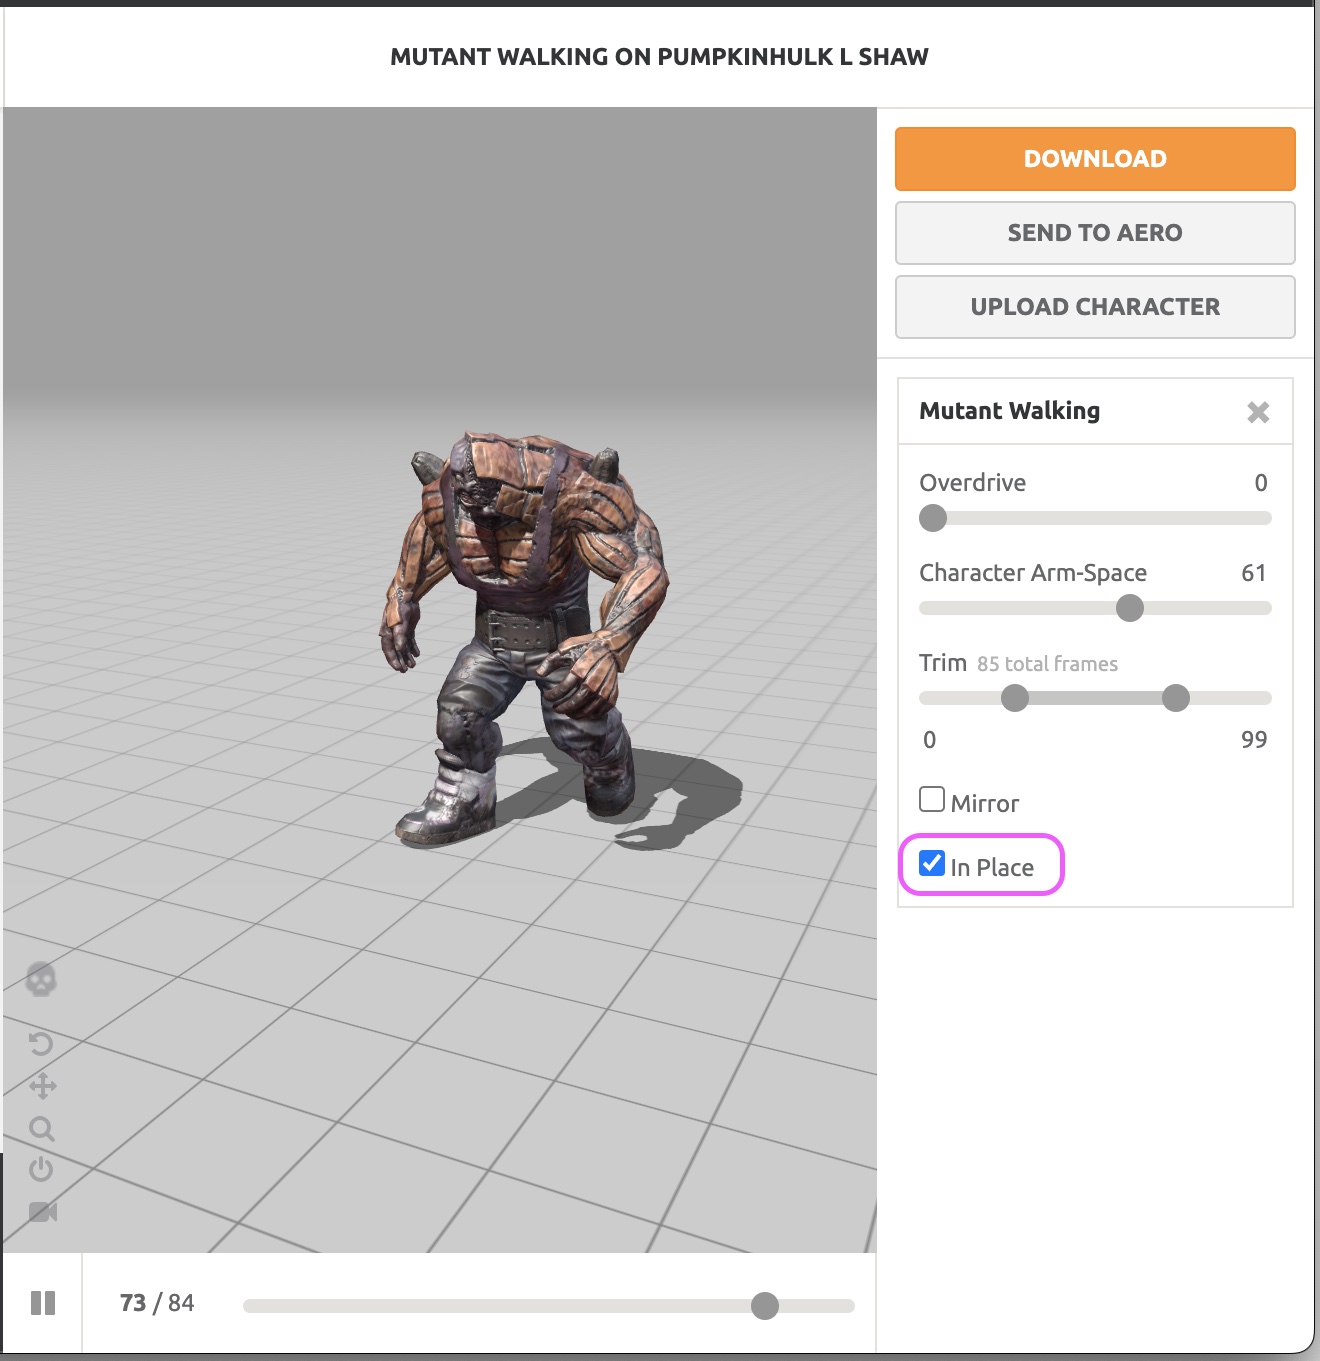
In Mixamo, the parameter on the right side of the screen below toggles In Place on/off. Some animations don’t support In Place (the Running Jump in the video above is one example).
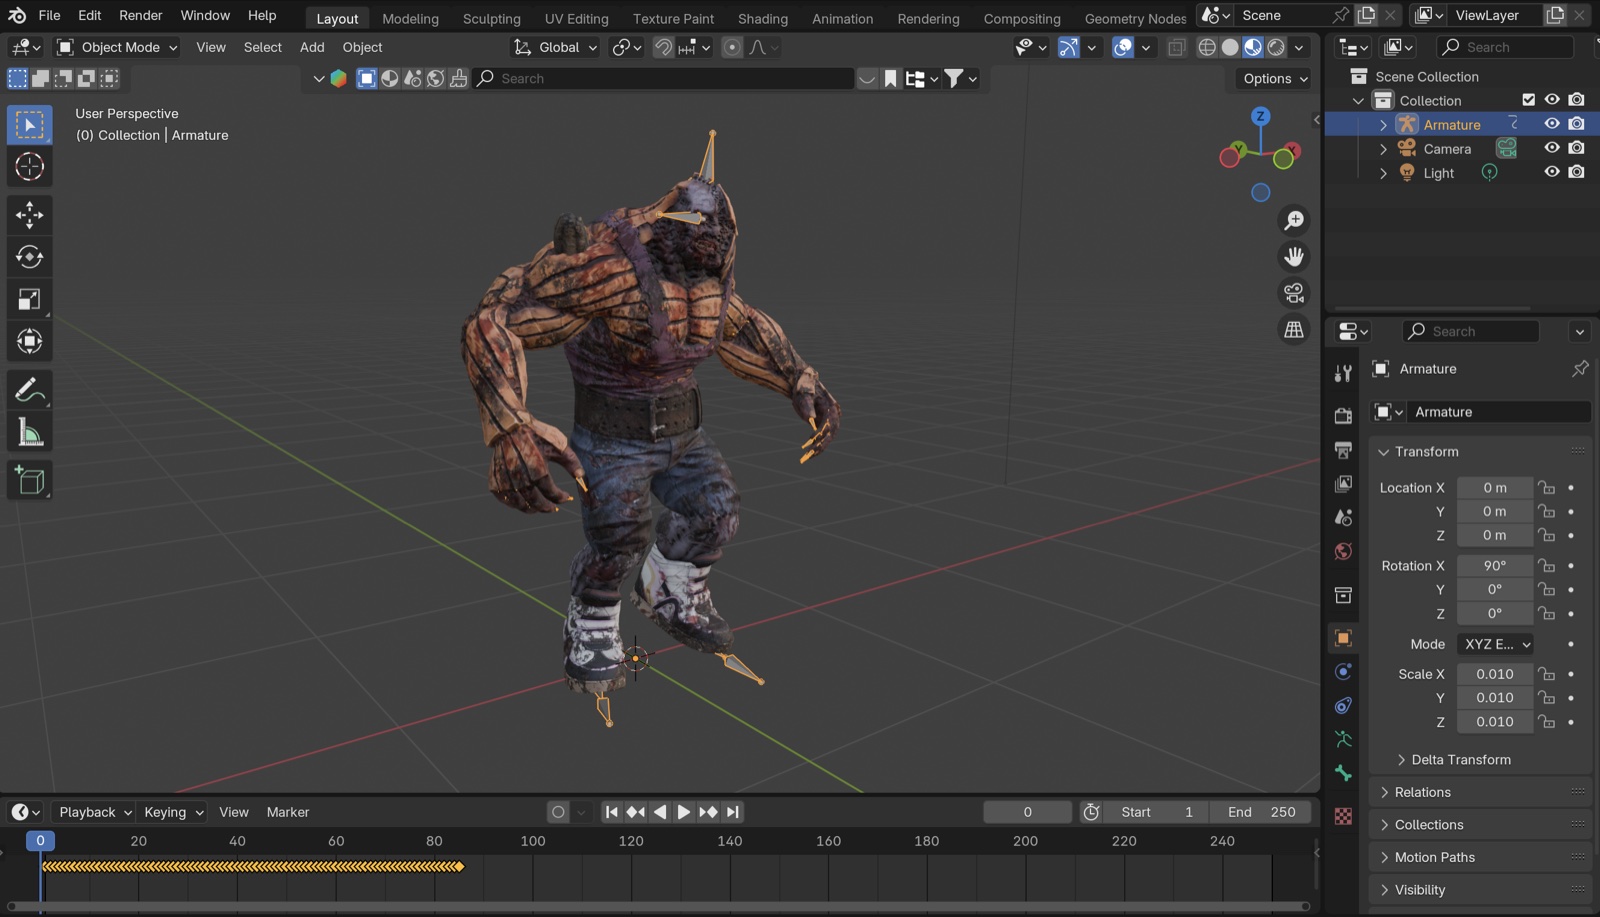
Mixamo’s default frame rate is 30 fps, while Blender’s default is 24 fps. If you don’t match them, the animation will play slightly slow when imported to Blender, so align one to the other.
1.2 Converting Root Motion to In Place (Experimental)
Mixamo’s Running Jump does not support In Place.
Procedure
To convert a Root Motion animation to In Place:
- Select the Root Motion Armature.
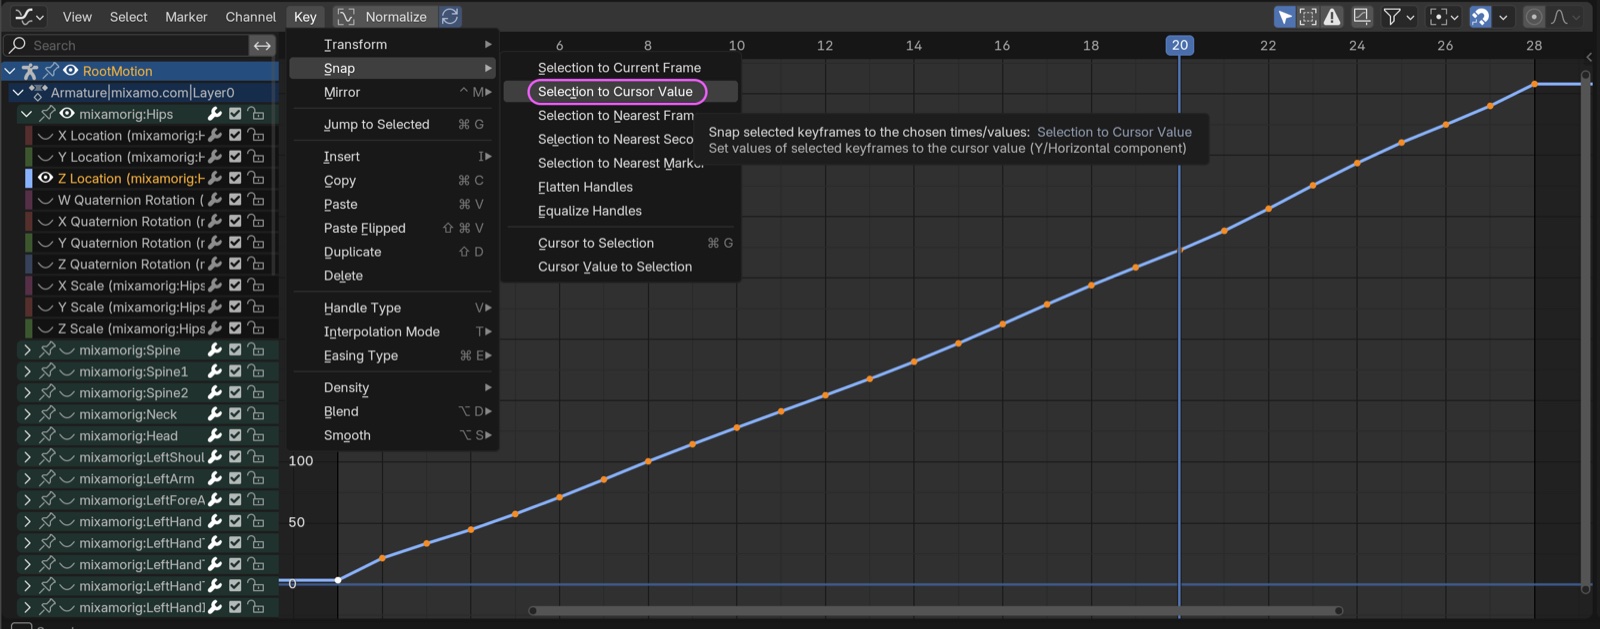
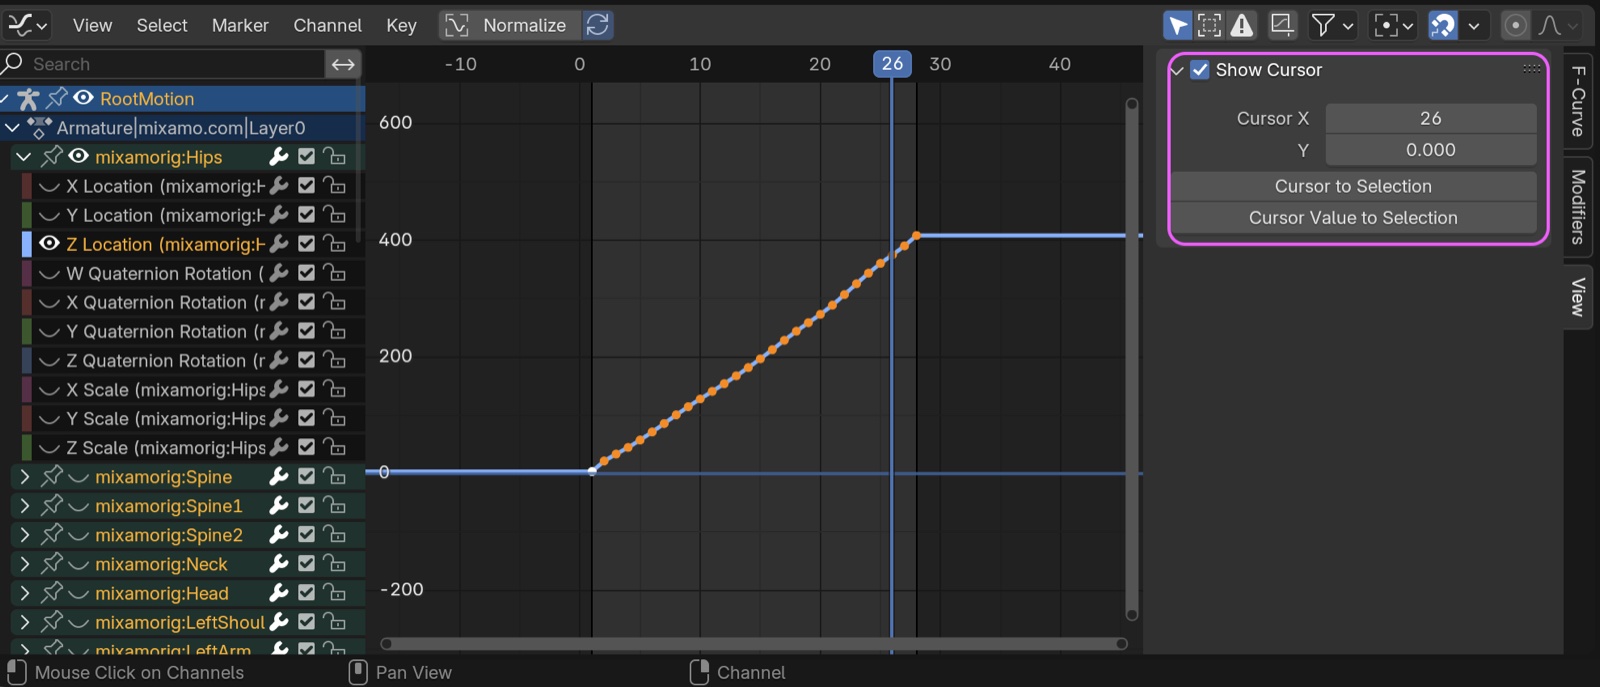
- In the Graph Editor, show only the Hip’s Z Location and select it.
- Run Key menu > Snap > Selection to Cursor Value.
The “Cursor” here refers to the 2D Cursor. Its Y value stays at zero unless you intentionally change it (by typing into the Y number box, dragging it left/right, or SHIFT + RMB to change both X and Y). So Selection to Cursor Value is equivalent to setting Y to zero.
2D Cursor references
If you use the In Placer Addon below, you can convert Root Motion to In Place with a single click.
2. Method 1: Using NLA (Root Motion)
This is the same approach used in section 12 (“Repeating STEP BACK”) of Nonlinear Animation (NLA). It’s well suited when you want to fine-tune the animation in NLA.
For In Place sources, simply setting Repeat is enough.
A simple repeat:
Shifted backward and adjusted:
3. Method 2: Move the Armature of the In Place Animation
4. Method 3: Walk Straight Forward (Root Motion)
For live-action compositing exercises.
4.1 Preparing Pumpkinhulk
Download the following from Mixamo:

- Character: Pumpkinhulk L Shaw
- Animation: Mutant Walking
- Overdrive: 0
- Arm Space: 60
- Trim: 0–99
- Important: if there’s a one-frame pause, even after Make Cyclic in the Graph Editor, the animation will lock to the slope of the last two keys.
- Temporarily enable In Place to verify the loop point at 0–99 isn’t broken.
- Disable In Place.
- Rename the downloaded file (it’s helpful to encode the settings in the name).
- e.g.
Mutant Walking_RootMotion_0to99.fbx
- e.g.
4.2 Importing into Blender
- Drag and drop into Blender, or use File > Import > FBX.
- Viewport Shading: Material Preview.

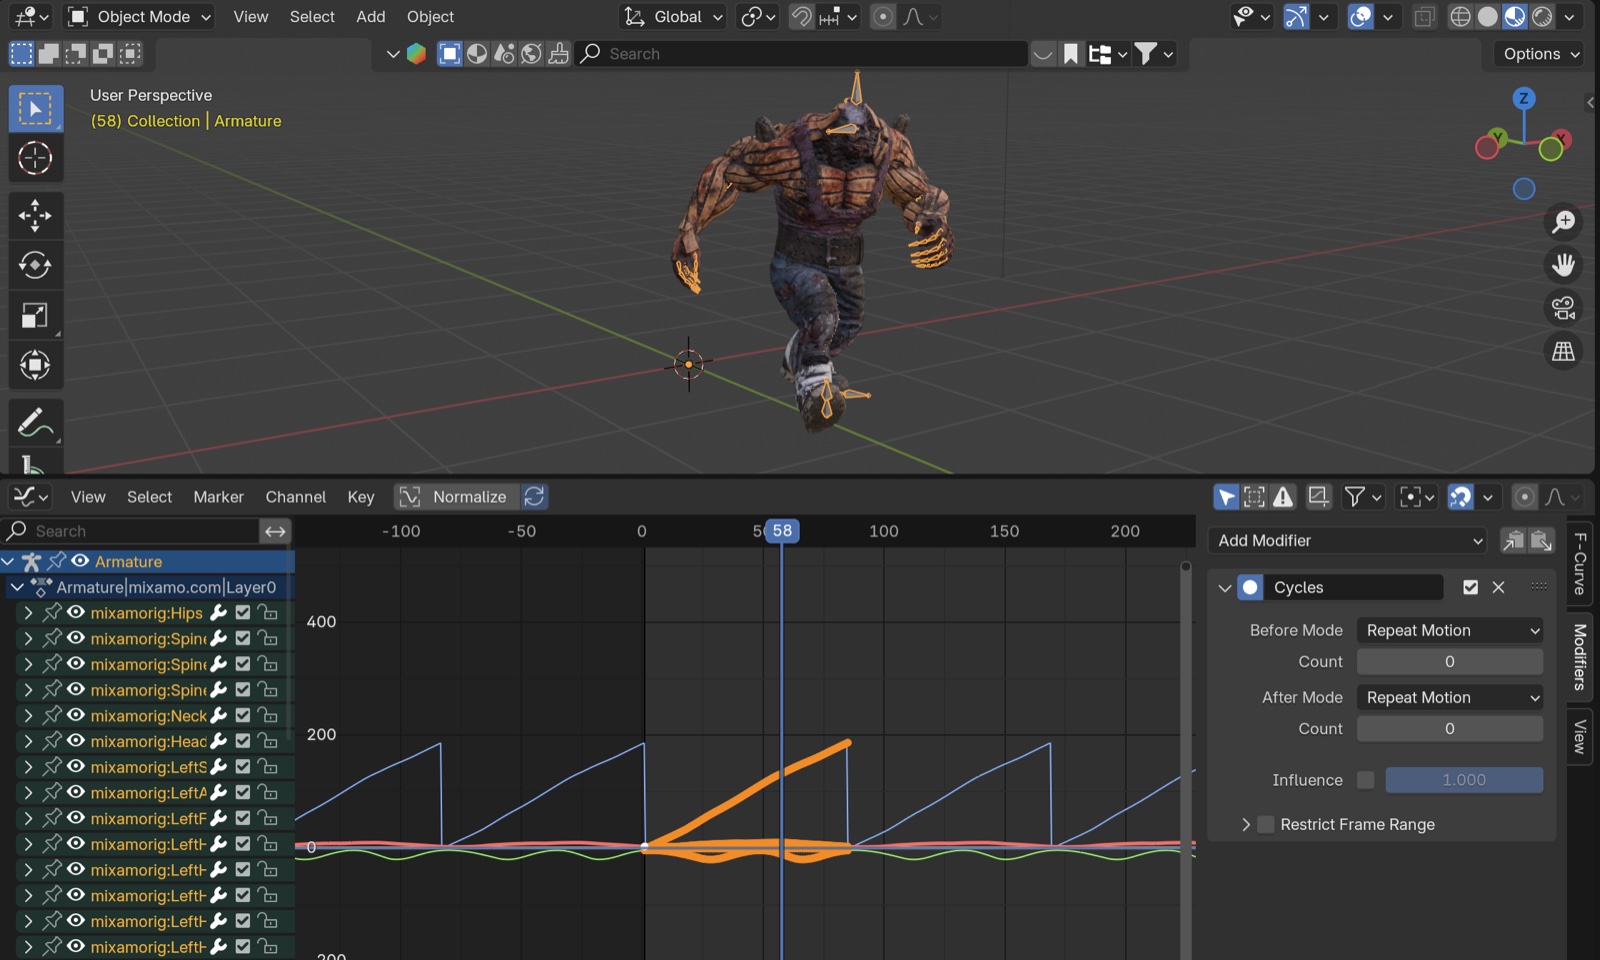
4.3 Graph Editor
- Keep the Armature selected.
- Switch the Timeline to the Graph Editor.
- Press N to show the sidebar, then open the Modifiers tab.
- View > Frame All.
- Zoom out a bit.
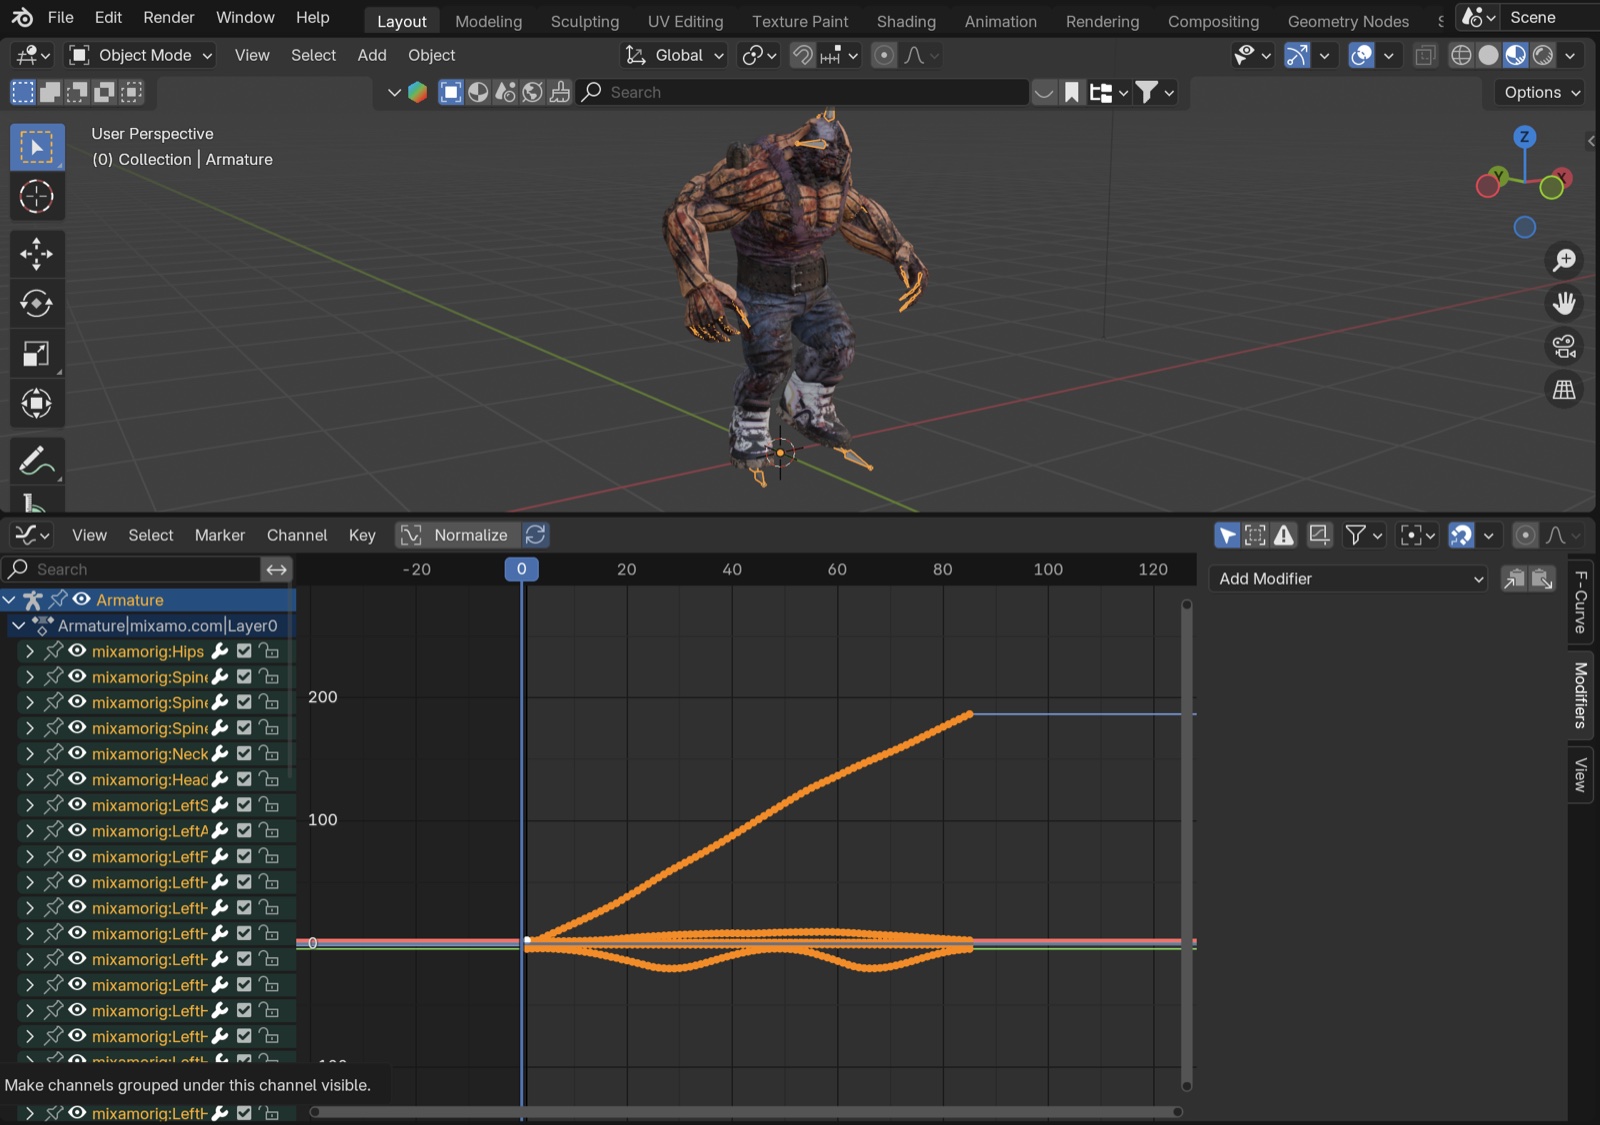
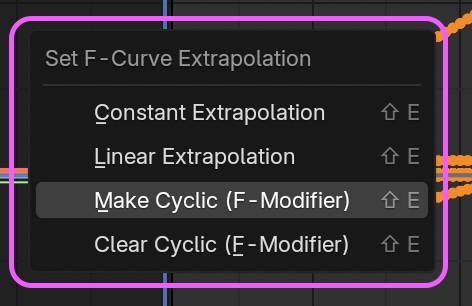
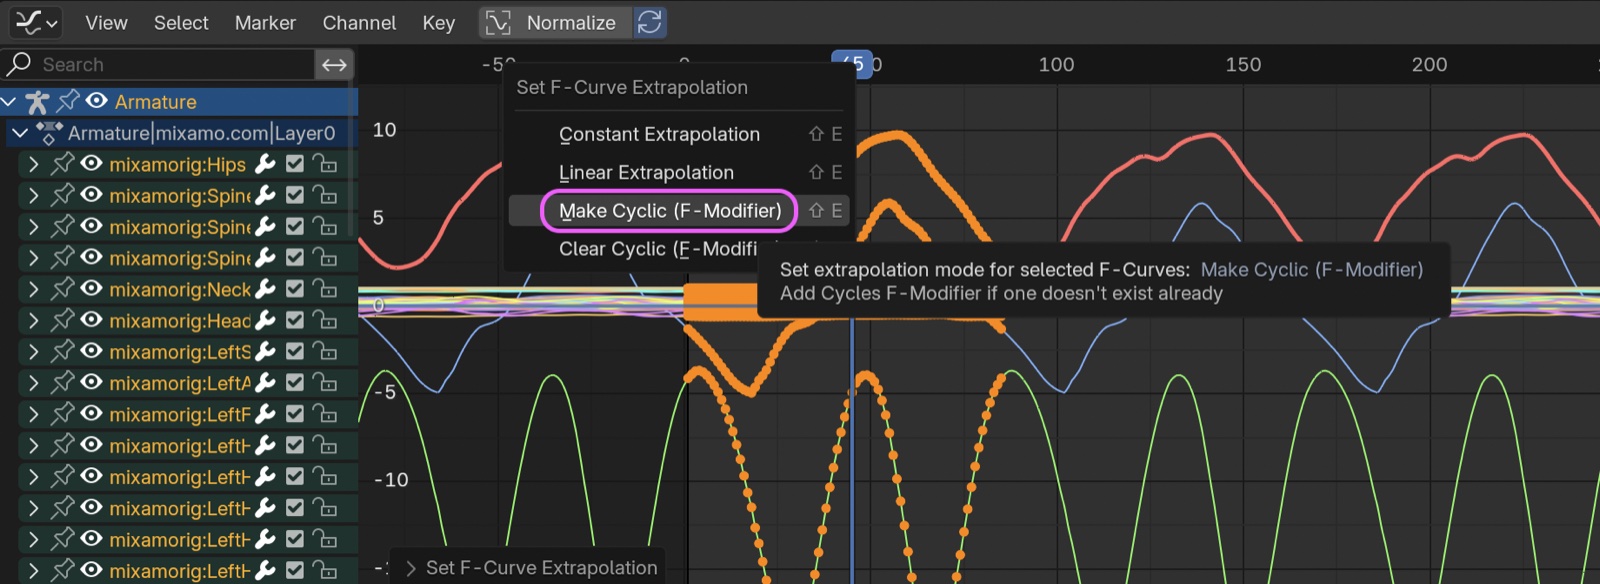
Press SHIFT+E and choose Make Cyclic (= Add Modifier > Cyclic).
Keyframes that loop infinitely in both directions are generated.
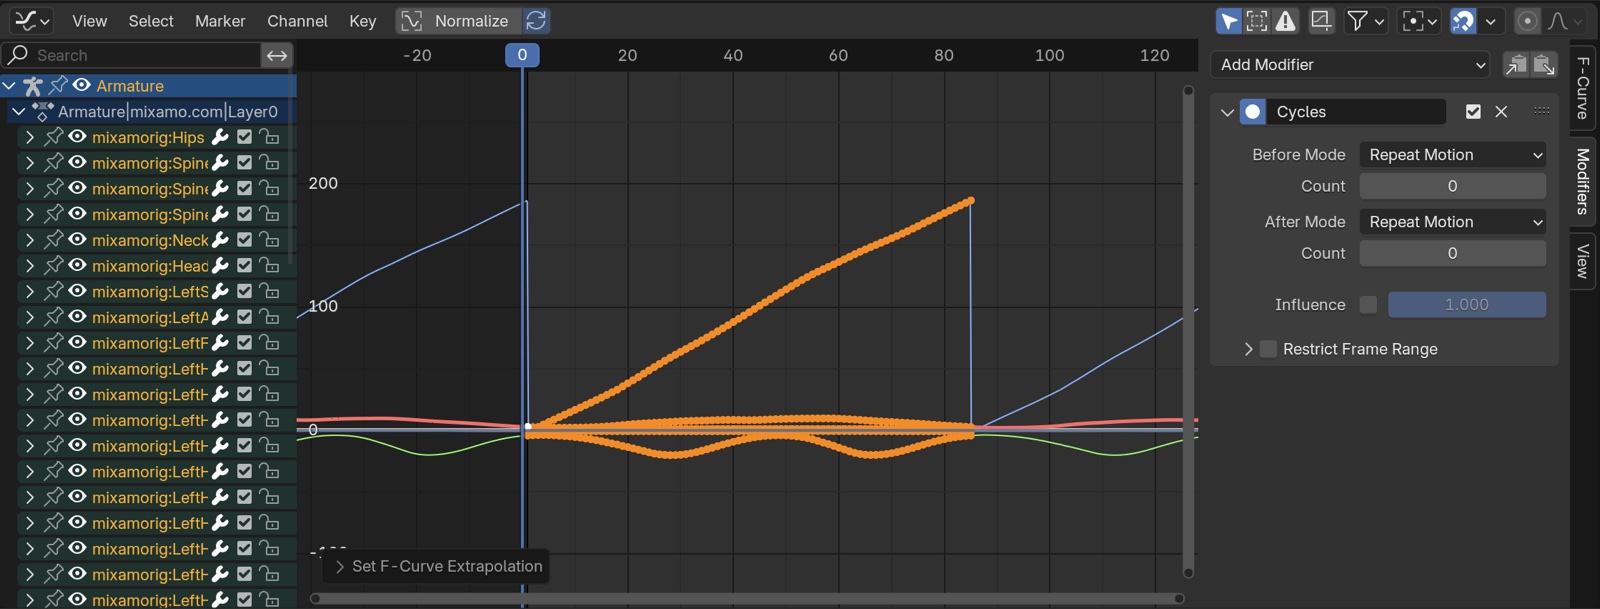
Play back to confirm the In Place animation loops.
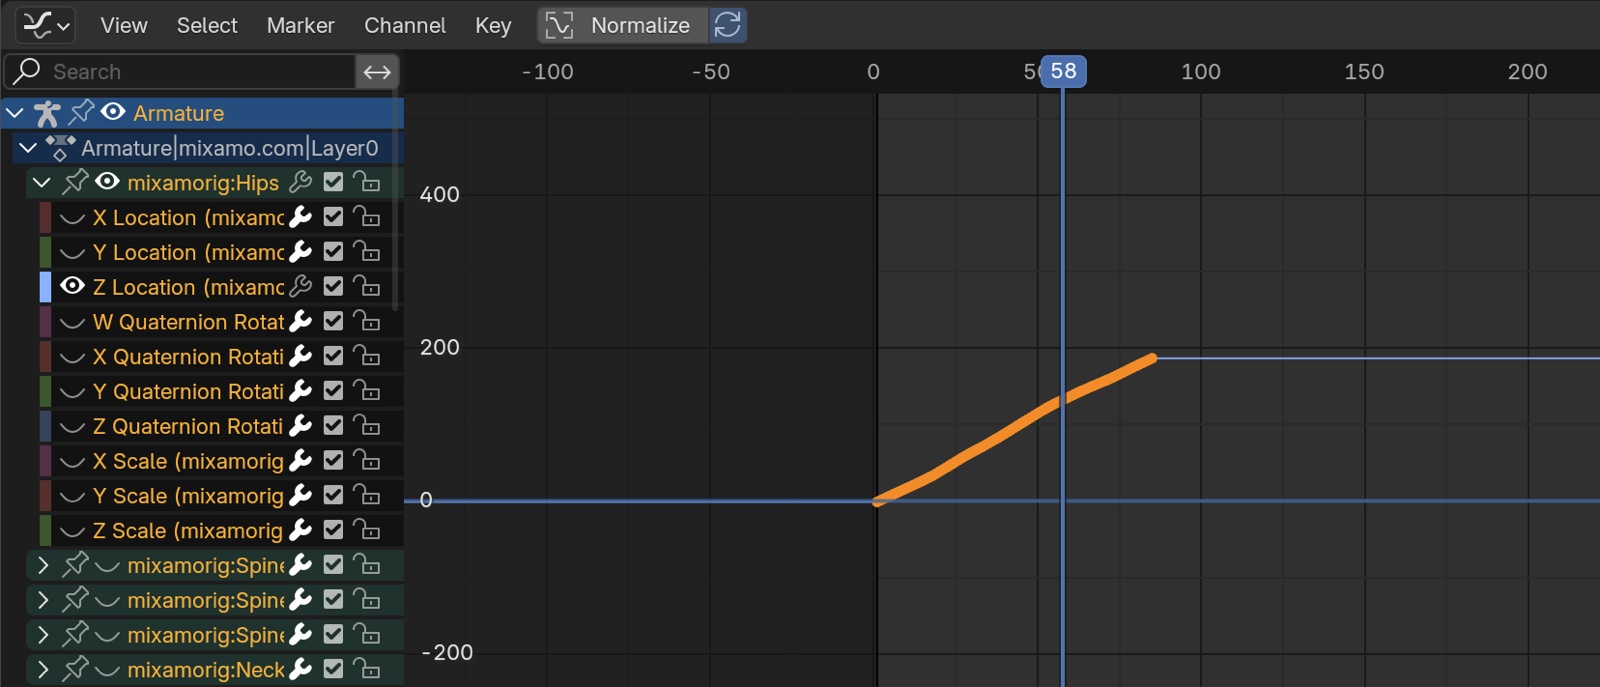
- Show only the Hip’s Z Location.
- Toggle the wrench icon off so the F-Curve Modifier is disabled.
Press SHIFT+E and switch to Linear Extrapolation.
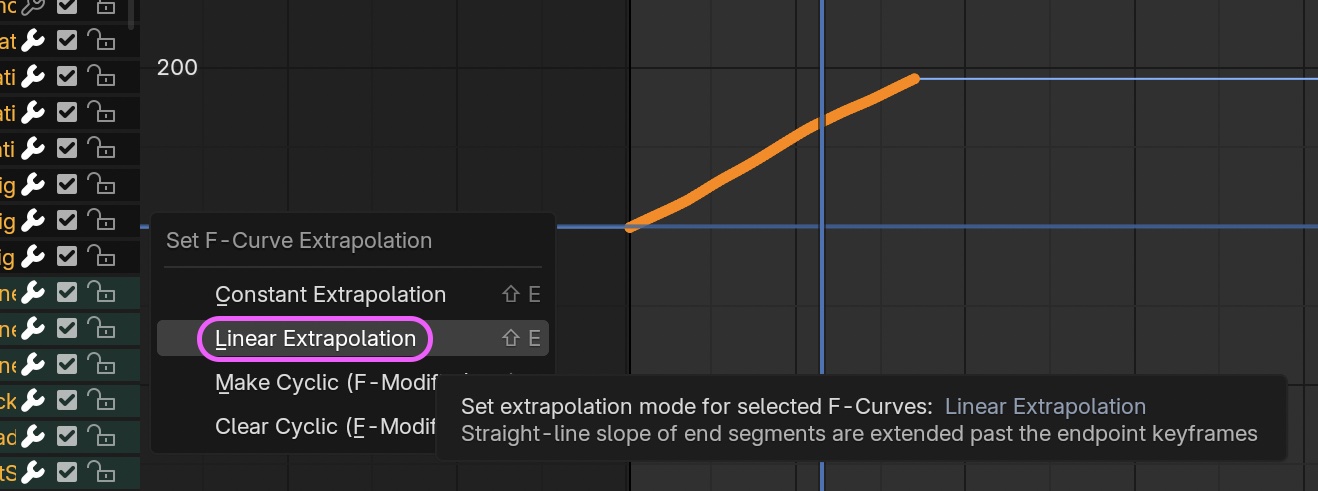
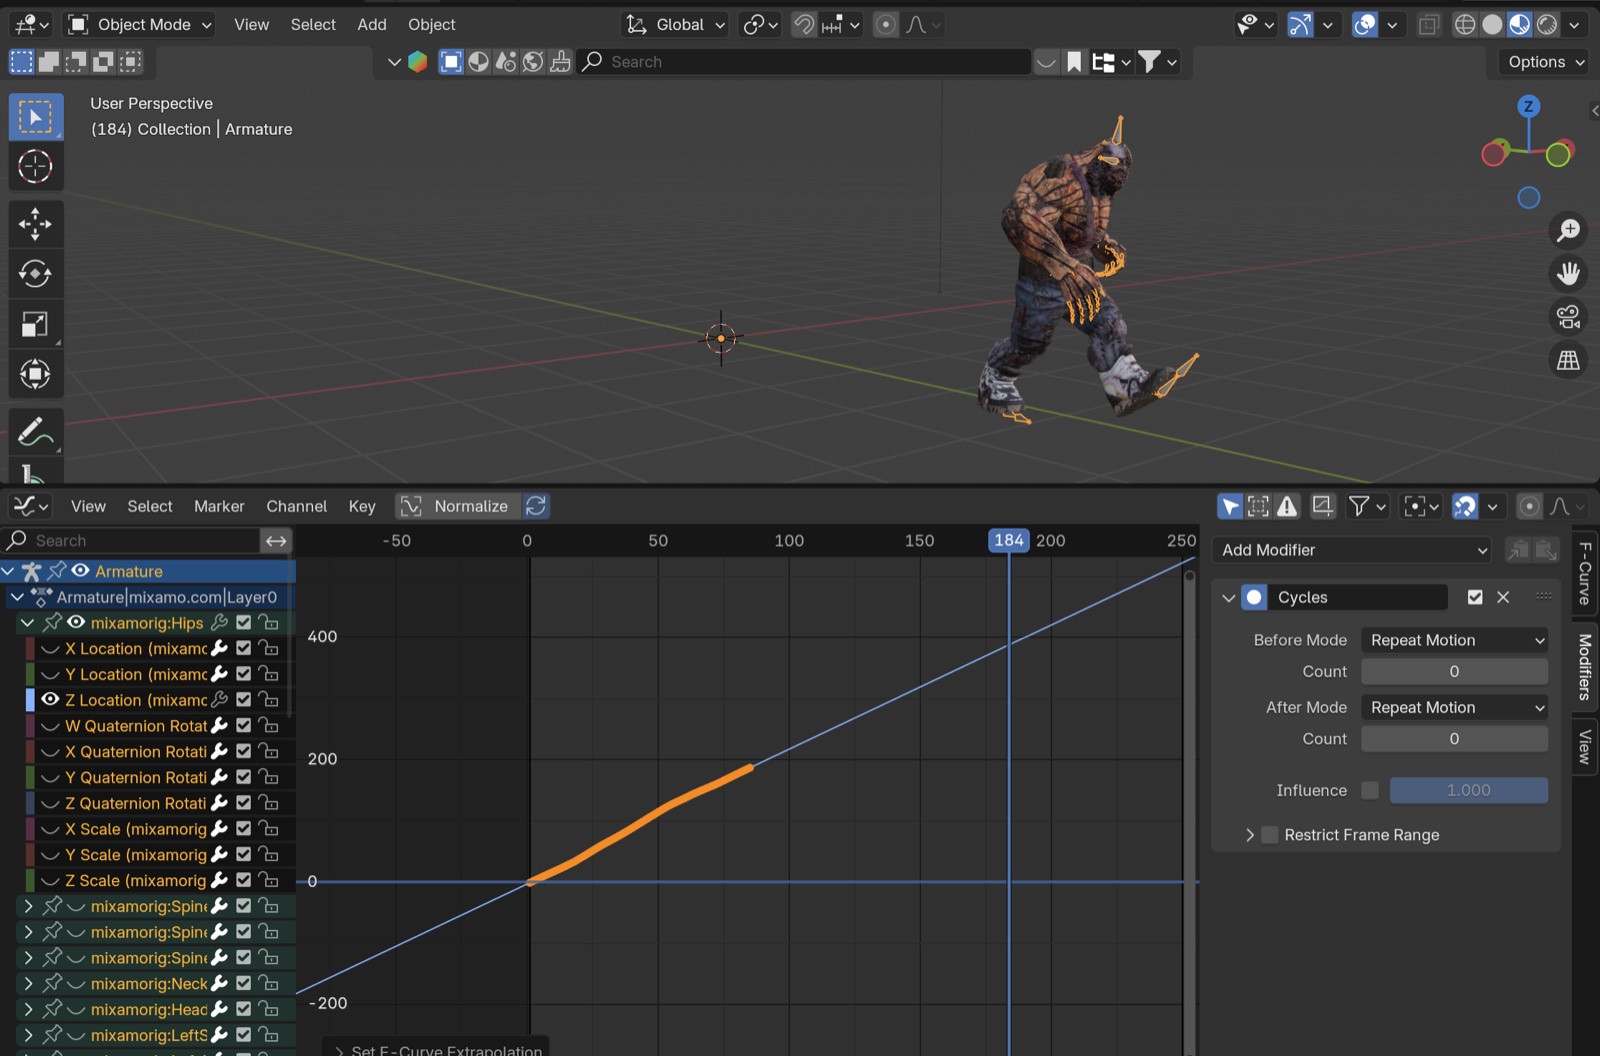
The keys extend along the slope of the original keyframes.

Play back to confirm the character walks indefinitely (within the Timeline’s Playback range).
Note: when you Clear Cyclic, the Modifier tab disappears. To re-edit, re-apply Make Cyclic with SHIFT+E, click another name on the left, then click your target name again — the tab reappears (root cause unknown).
References
- YouTube — Extending Mixamo Walk Animation Cycles - Blender Beginners Tutorial — the method shown in this article
- YouTube — EASIEST WAY TO EXTEND/LOOP YOUR MIXAMO ANIMATIONS IN BLENDER — heavily abbreviated; takes a slightly different approach
5. Method 4: Walk Along a Path (In Place)
For live-action compositing exercises.
5.1 Download from Mixamo (different from Method 3 — note the difference)
- Character: Pumpkinhulk L Shaw
- Animation: Mutant Walking
- Overdrive: 0
- Arm Space: 60
- Trim: 0–99
- Enable In Place.
- Rename the downloaded file.
- e.g.
Mutant Walking_InPlace_0to99.fbx
- e.g.
5.2 Importing into Blender
- Drag and drop into Blender, or use File > Import > FBX.
- Viewport Shading: Material Preview.
5.3 Looping In Place — Method A: Make Cyclic
Either Method A or Method B below works.
- Select the Armature.
- Switch to the Graph Editor.
- Press SHIFT+E to apply Make Cyclic.
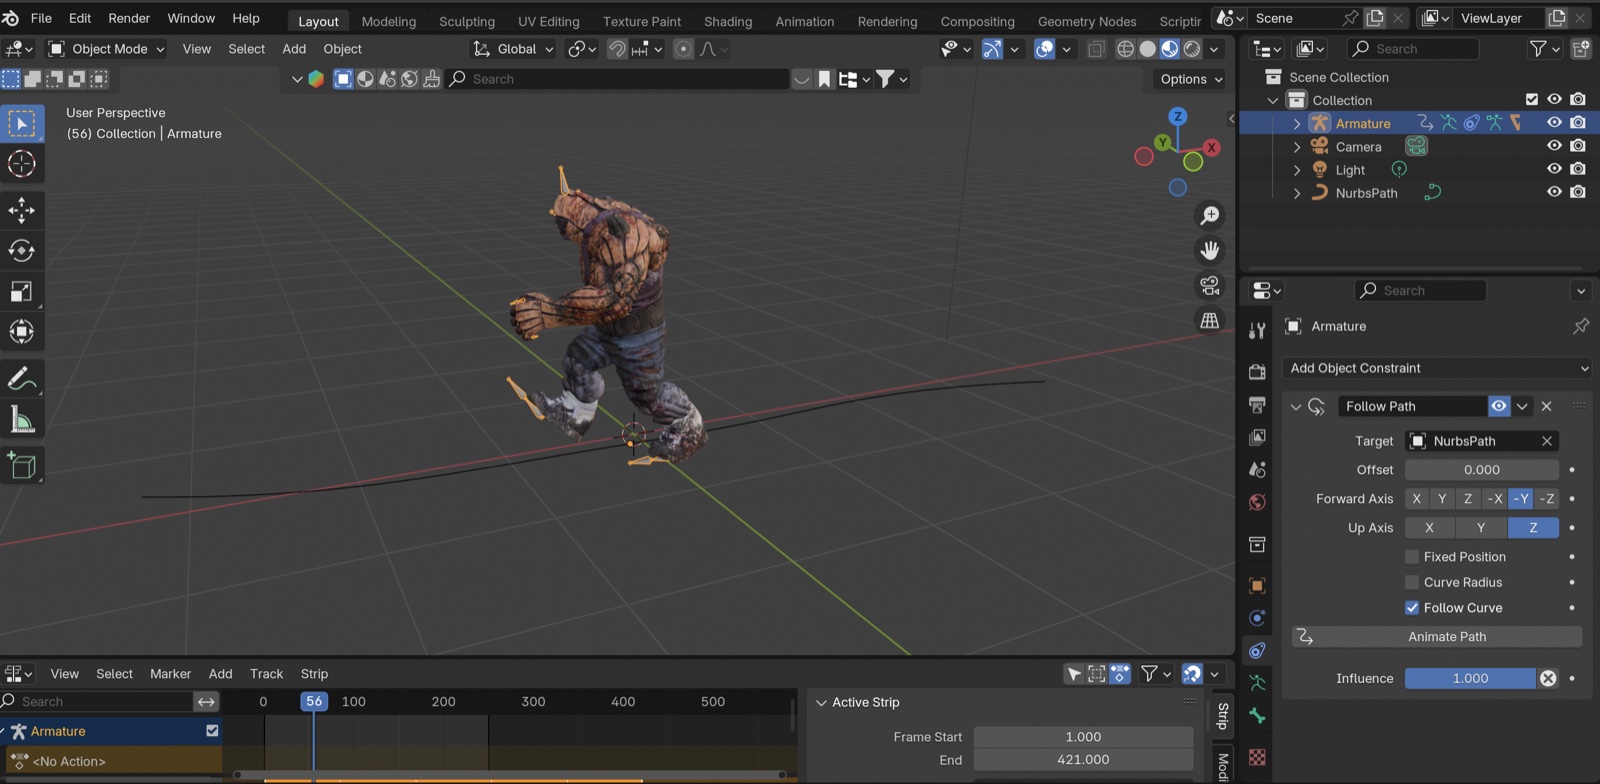
5.4 Looping In Place — Method B: NLA
- Select the Armature.
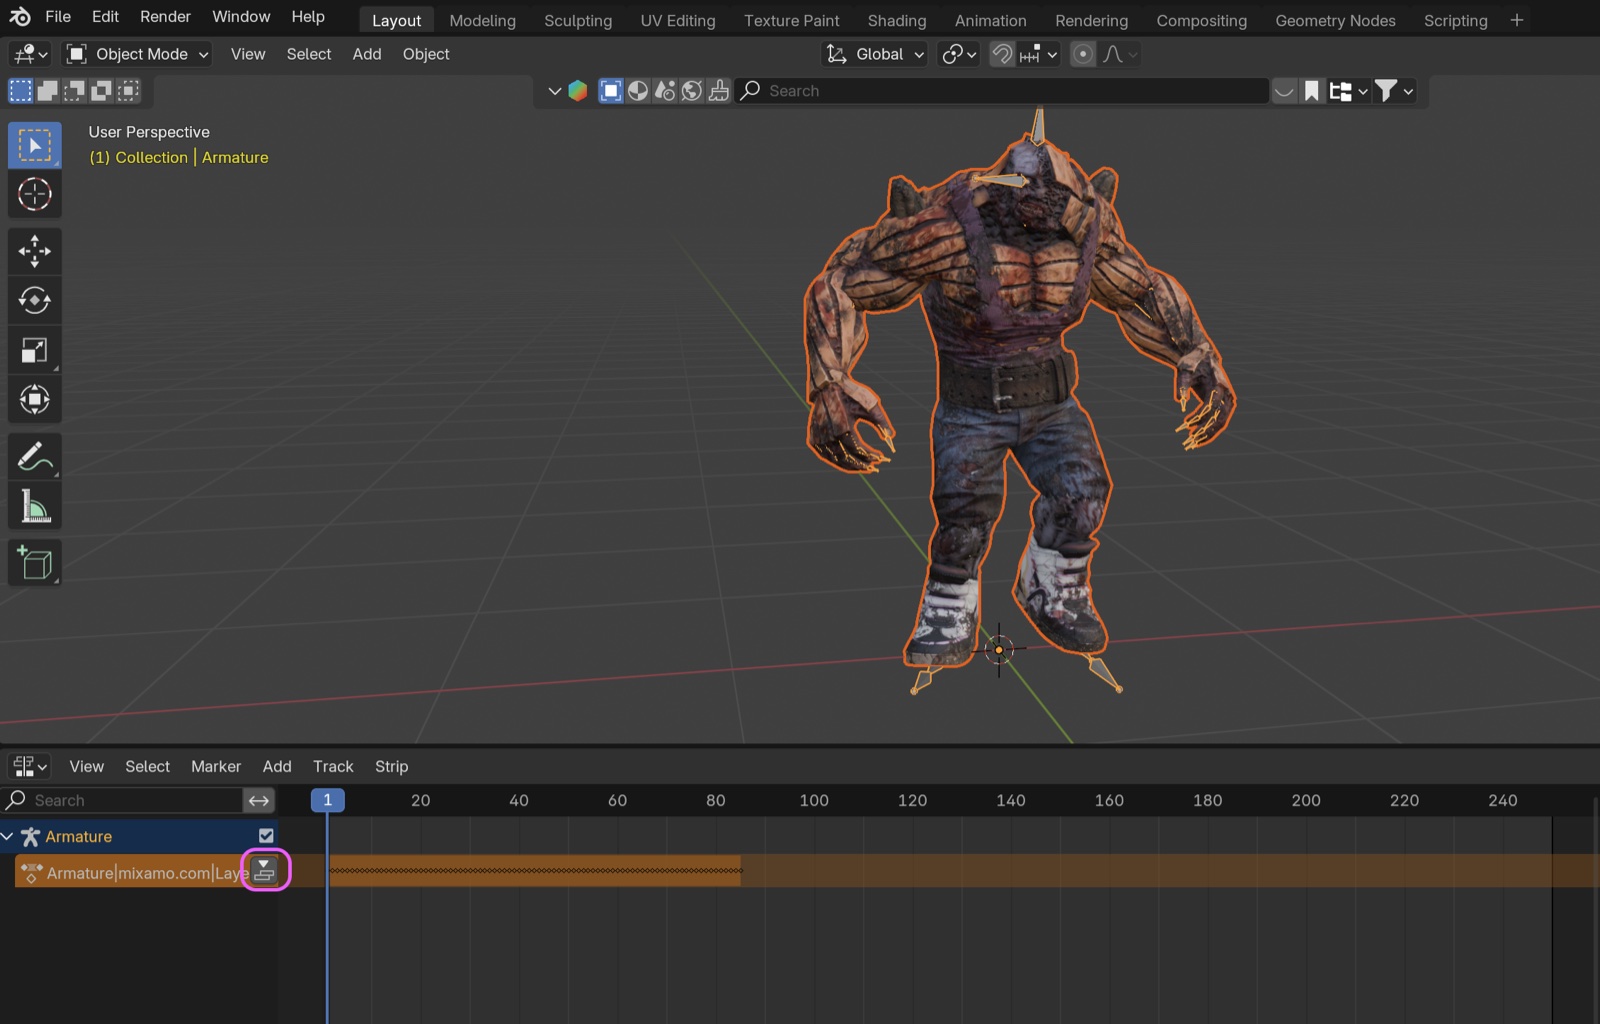
- Switch to the Nonlinear Animation Editor.
- Run Push Down Action to convert keyframes into an Action Strip.
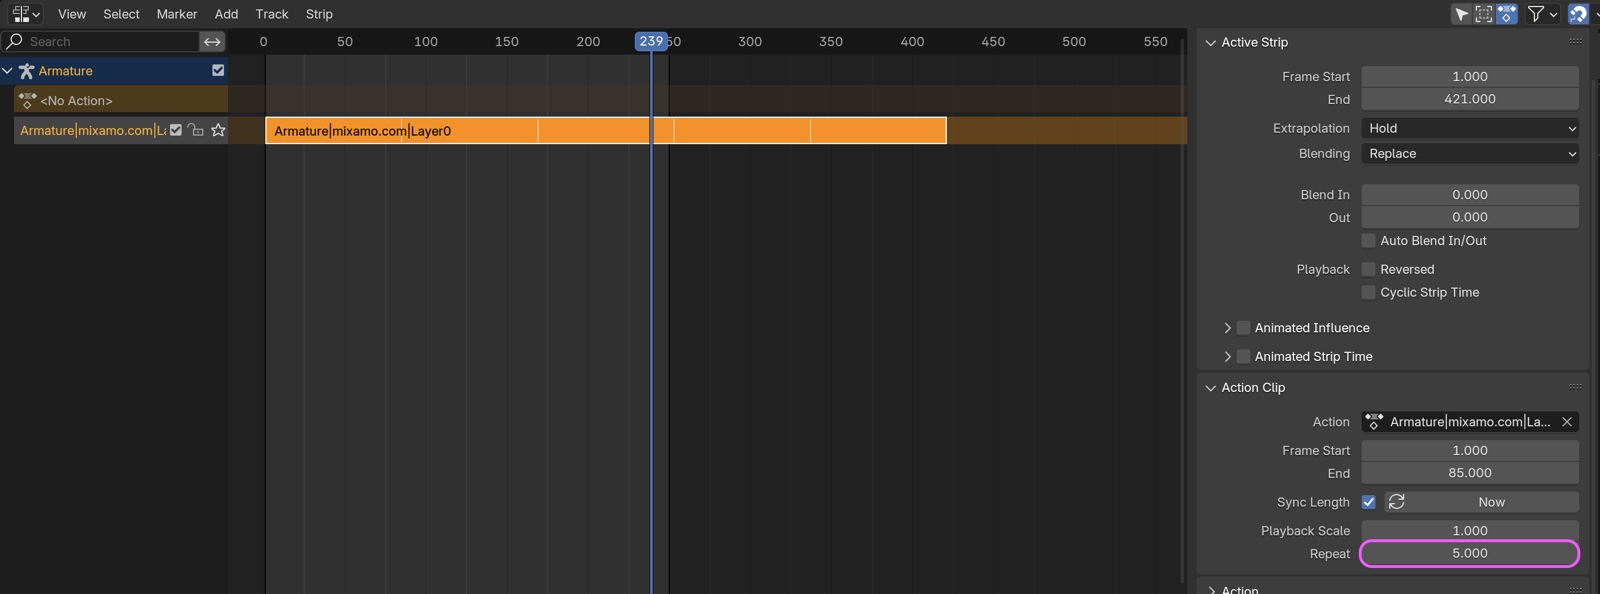
In the sidebar’s Strip tab, set Action Clip > Repeat to the value you need.
5.5 Creating the Path
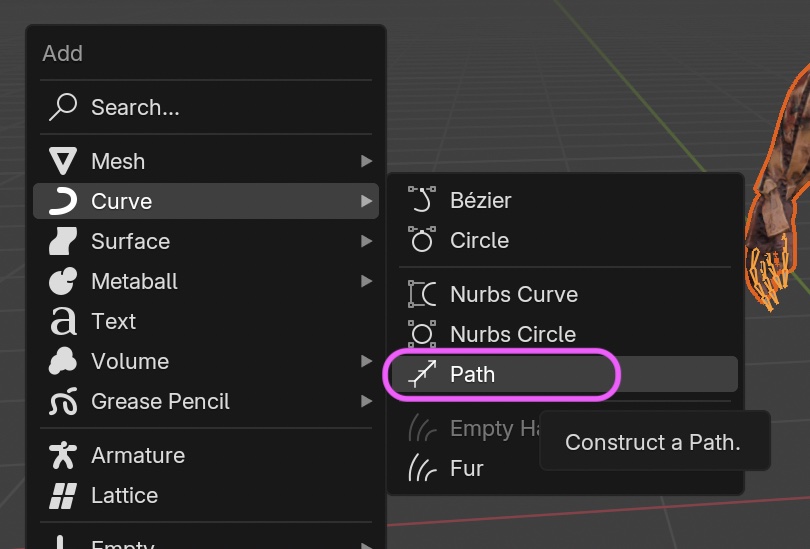
In the 3D Viewport, choose Add > Curve > Path.
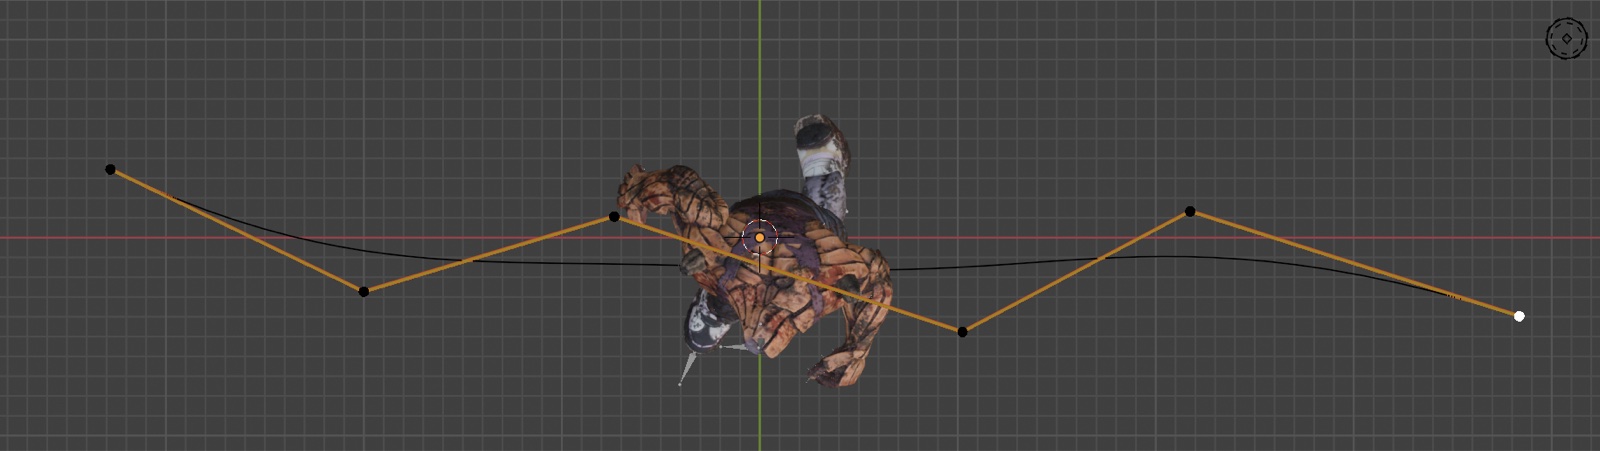
- Switch to the Z (top) view.
- Select the NurbPath.
- In Edit Mode, use Subdivide, Extrude, and G (move) to shape it.
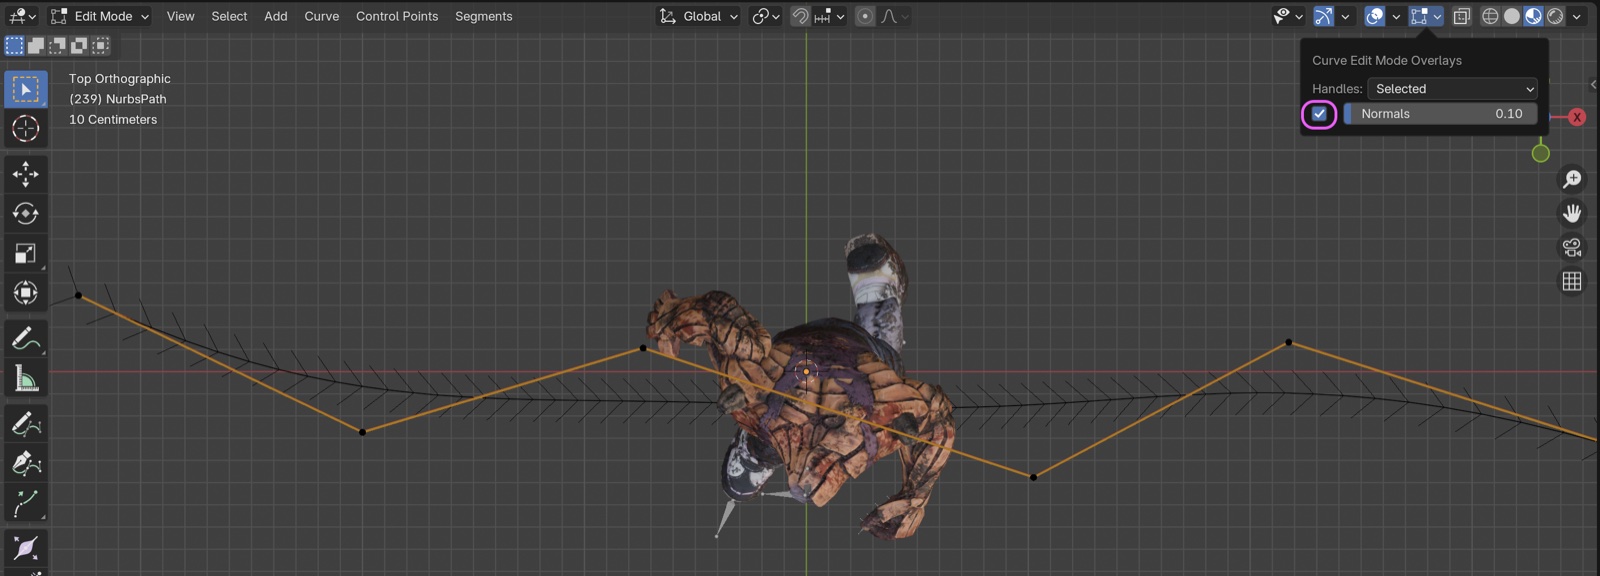
In Edit Mode Overlays, enable Normal display and check the path direction.
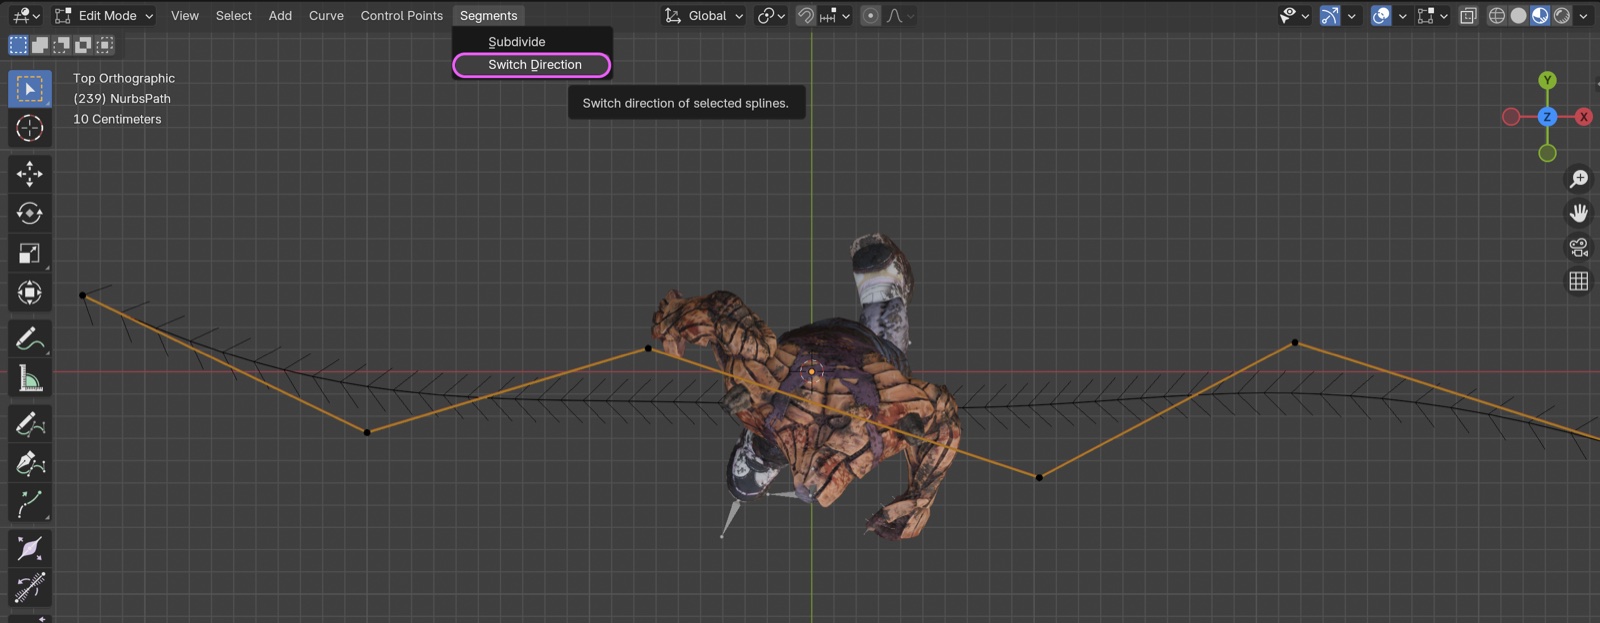
If needed, run Segments menu > Switch Direction.
- Switch to Object Mode.
- Select the Armature.
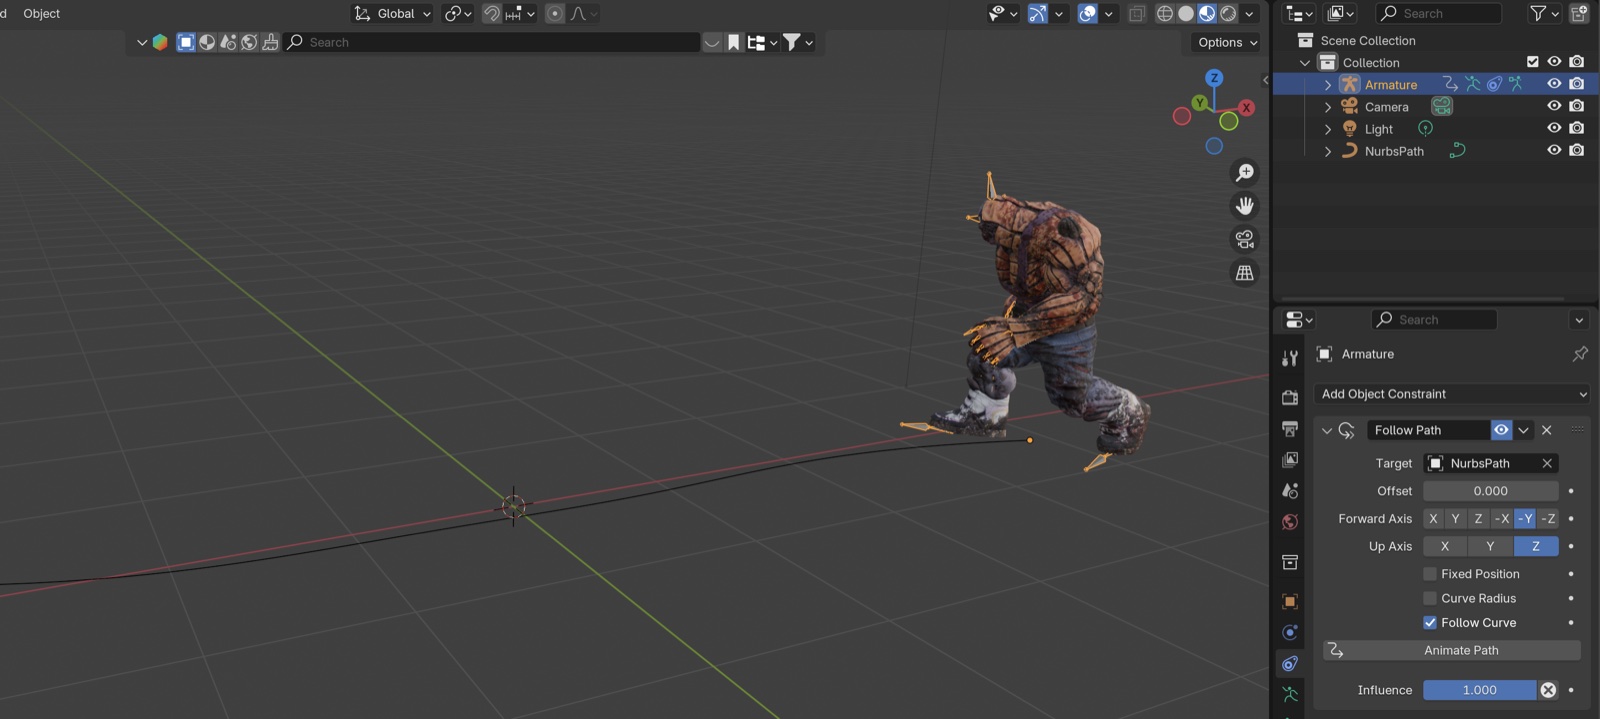
- Add Object Constraints Properties > Follow Path.
- Target: NurbsPath
- Forward Axis: -Y
- Enable Follow Curve.
- Click Animate Path (do not skip).
The figure below shows the direction after Switch Direction.
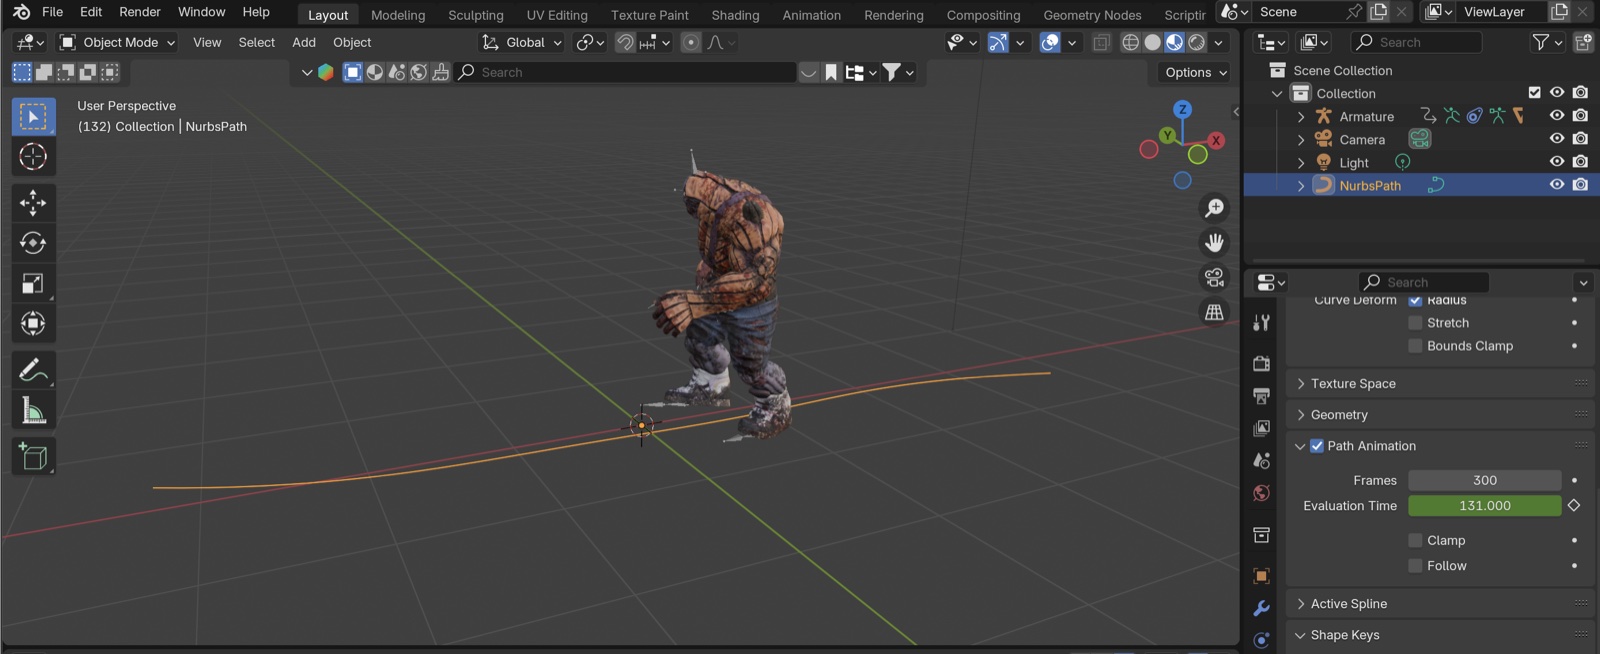
Play back.
- You’ll notice the speed is too fast.
- Select the NurbsPath.
- Object Data Properties (path icon) > Path Animation > adjust the Frames value.
- Depending on path length and character size, aim around 300–500 so the feet don’t slide while walking.
- Adjust in steps of 100 first, then refine in steps of 50.
- A small amount of slipping is unavoidable when the character turns.
- Frames is the frame at which the path animation reaches 100%.
References
- YouTube — How to make Character follow path | Blender 3.1 tutorial — the exercise here is based on this video.
- YouTube — Blender Quick Tip -{ WALK ALONG THE PATH }- — this video forces the Offset to be animated, which feels like a hack. Offset is meant for starting partway along the path.
- YouTube — Walk on a path using Mixamo in Blender and 3ds Max — uses a Cone as the parent, which doesn’t seem strictly necessary.