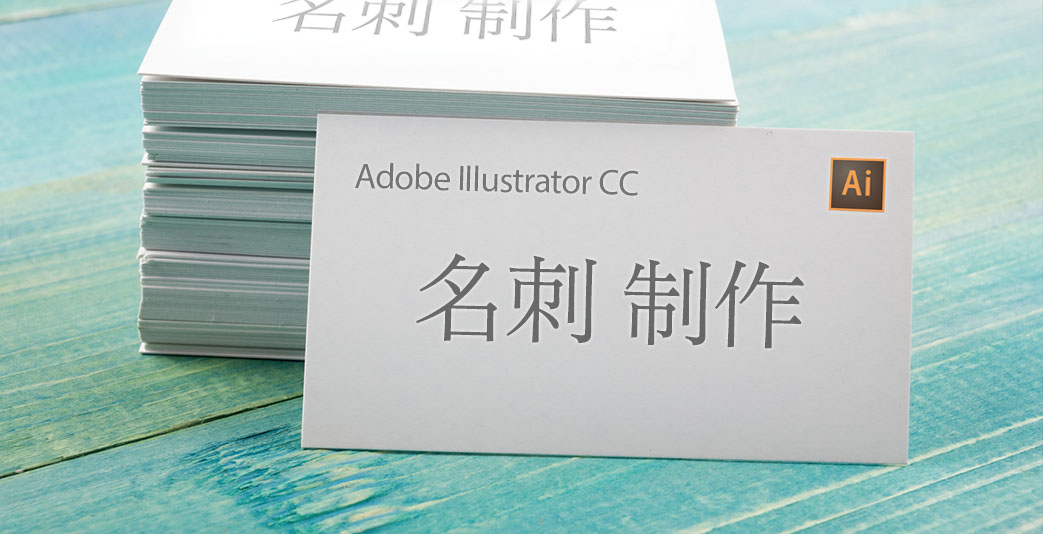
Business Card Design
Updated: 2015-01
This article was written in 2015. It is kept here as an archive — the content is outdated and some links may no longer work.
1. About Business Card Design
For this business card project, we will use registration marks and bleed.
Once you understand bleed and trim, you’ll be able to create print-ready files for a printing company, and by using online printing services, you can produce high-quality printed materials at an affordable price.
2. About Online Printing
In recent years, an increasing number of printing companies have begun accepting data submissions online, making it easy to produce high-quality printed materials at affordable prices. Customers can choose from a variety of paper types and take advantage of services ranging from poster and booklet printing to on-demand printing.
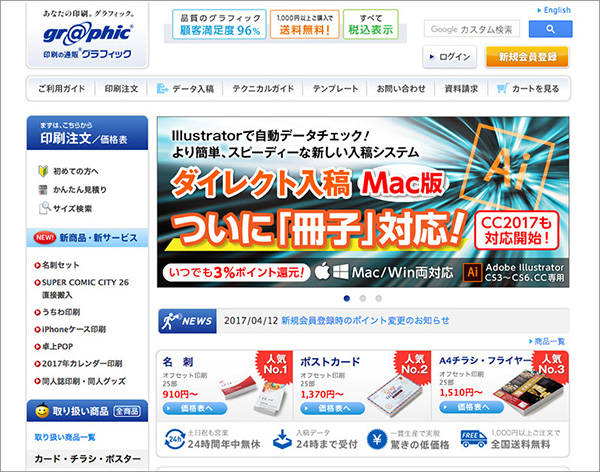
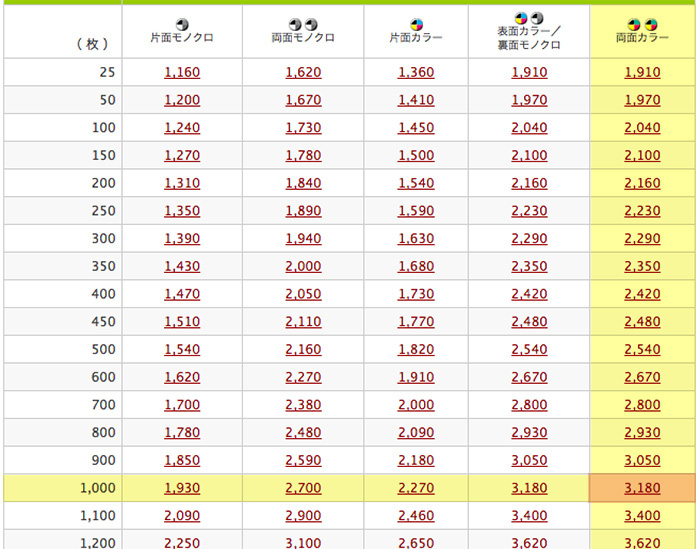
In the case of Graphic Co., Ltd. (see image above), depending on the paper stock, double-sided color printing of 1,000 sheets can be produced at a low cost of ¥3,180, as shown in the table below.
3. Trim Marks and Bleed
“Trim marks” are guidelines used to cut the print to its final size; in the business card shown below, “corner trim marks” and “center trim marks” have been added. Use the center and corner trim marks as registration guides, then cut along the trim lines.
*The Japanese name “tombo” (literally “dragonfly”) comes from the fact that the center trim mark resembles the insect known as a dragonfly.
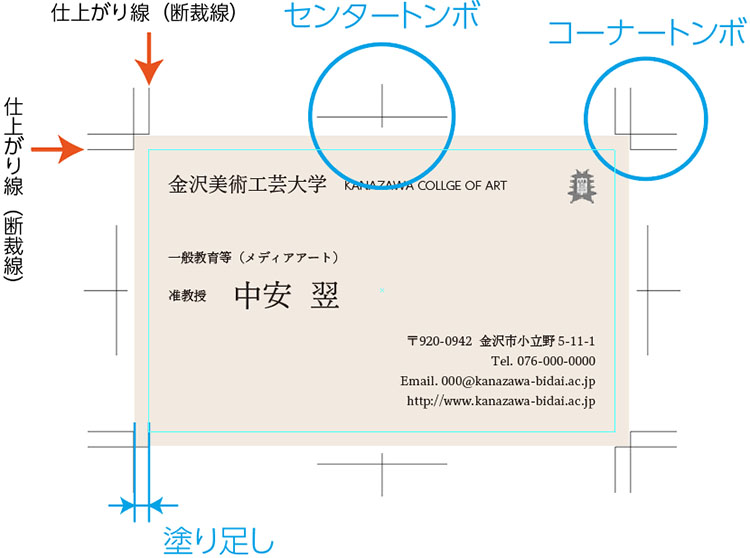
In addition, when designing printed materials with photos or colors extending to the very edge, the images must be laid out so that they extend beyond the trim line to account for any misalignment during trimming. This extended portion is called “bleed” (trim margin).
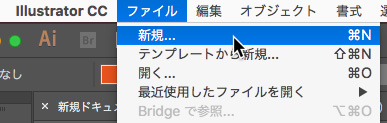
4. Creating a New Document
Select File > New.
Use the New Document dialog (see below).
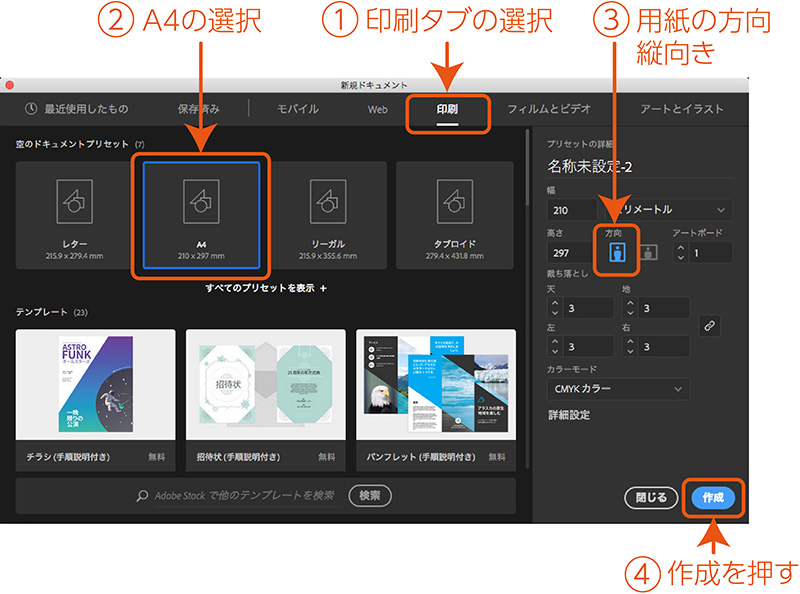
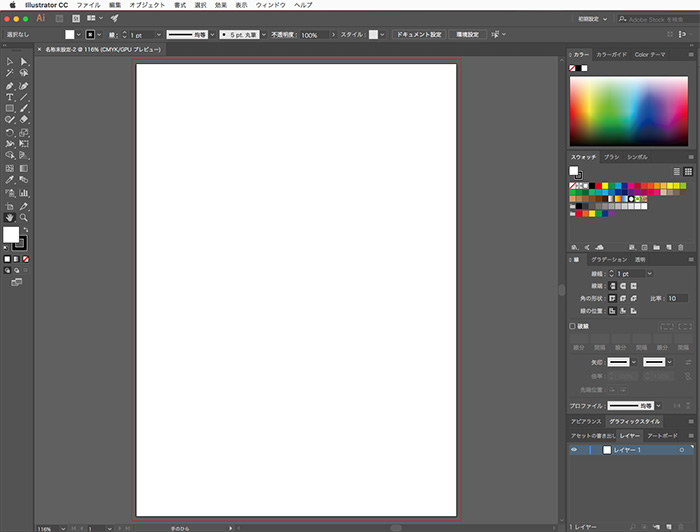
An A4 portrait-oriented artboard (print area) is displayed in the document window (see below).
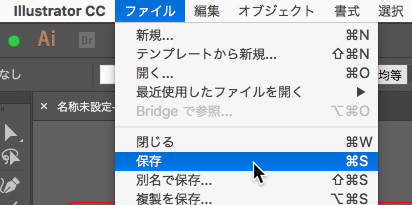
5. Saving Documents
Select File > Save.
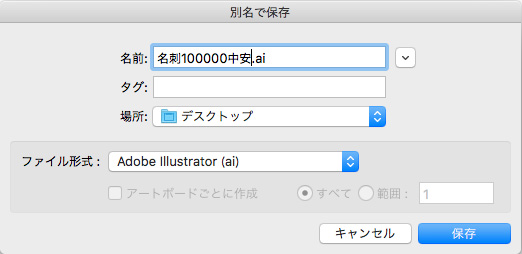
In the Save dialog box (see below), change the file name to “Business Card + Student ID + Name.ai.” The “.ai” is known as a file extension; it indicates the application used to create the file (ai = Adobe Illustrator), so do not delete it.
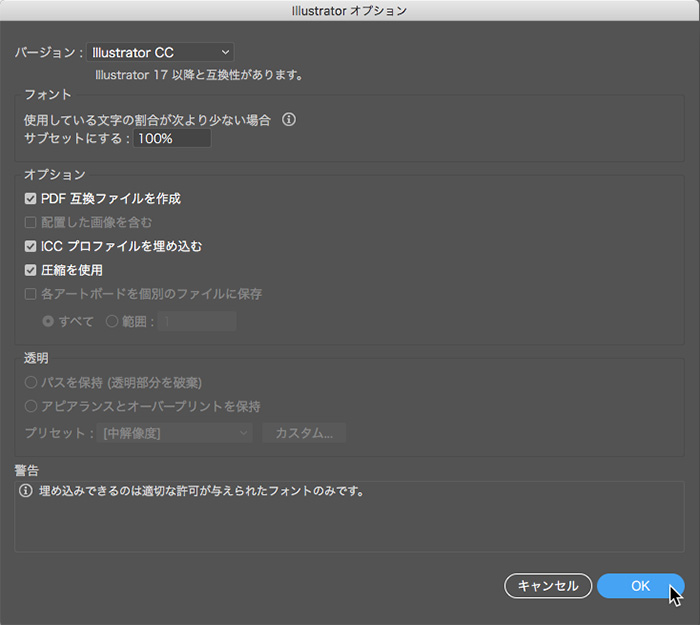
The Illustrator options window will appear as shown below; click the OK button in the lower-right corner without making any changes.
(In Illustrator Preferences, you can save your file in an earlier version when sharing it with older versions of Illustrator. In that case, new features will no longer be available.)
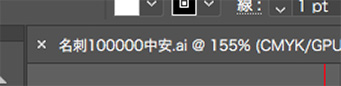
The file name is also displayed in the upper-left corner of the document window.
When you’re not yet used to using a Mac, it’s easy to save files in the wrong location, so visually check that the file was saved where you intended.

6. Creating Trim Marks
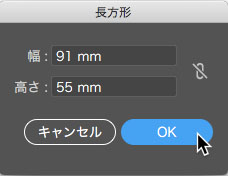
Select the Rectangle Tool and click on the artboard (do not drag).
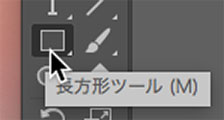
A dialog box for entering values will appear; enter the following standard Japanese business card sizes.
For landscape orientation: 91 mm wide × 55 mm high
For portrait orientation: 55 mm wide × 91 mm high
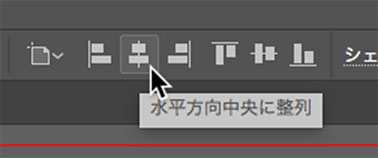
Here, we’ll use the Align feature in the Control Panel to align the rectangle we created to the center of the artboard. (Alternatively, you can use the Align panel via the Window menu. Using the Distribute option in the Align panel allows you to easily create various patterns. This will be explained separately.)
If the “Align to Selection” icon shown below appears in the Control Panel, click it to switch to “Align to Artboard.” If “Align to Artboard” is already selected, you can leave it as is.
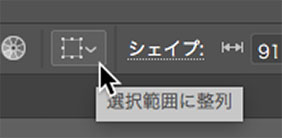
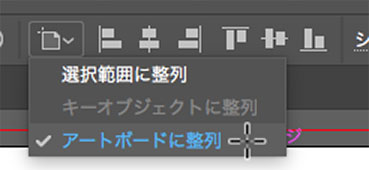
With the rectangle selected, click “Align Horizontally” and “Align Vertically.”

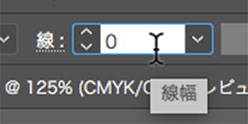
Next, with the rectangle selected, set the line width to 0. (This is because trim marks are created outside the line width.)
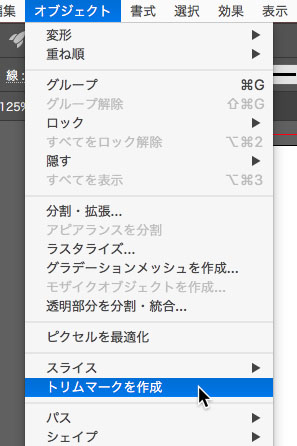
With the transparent rectangle selected, choose Object > Create Trim Marks. (Note: This is not Effects > Trim Marks (Appearance).) *When placing an order with a printing company, be sure to check their requirements regarding trim marks.
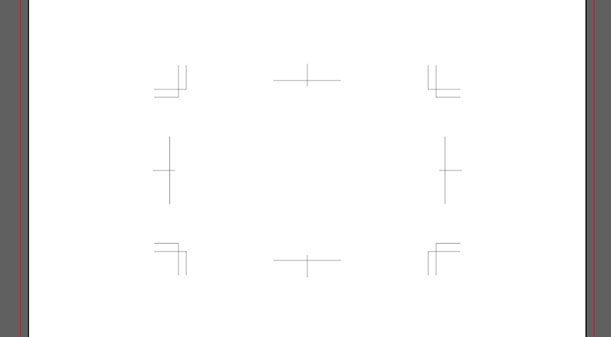
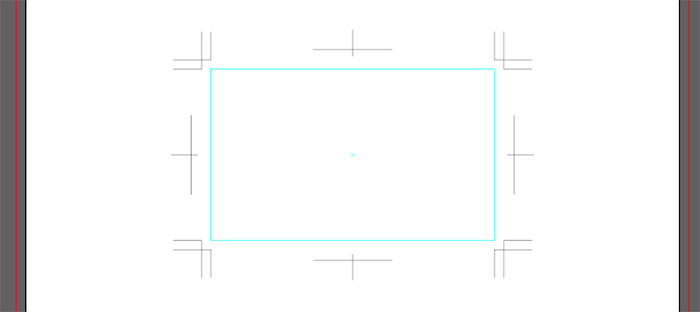
Since the print area is not visible in the image above, create guides (lines that will not be printed).
As shown in the figure below, right-click on the transparent rectangle and select “Create Guide” from the context menu.
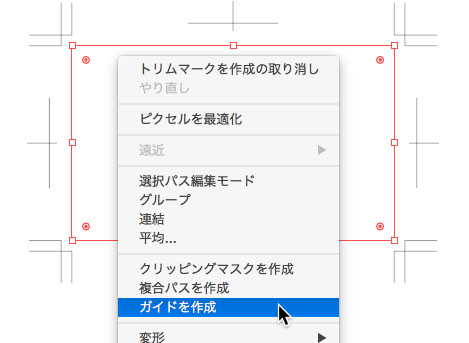
Next, use layers to separate your work into a layer for the crop marks and guides and a layer for the business card design. Lock the crop marks and guides layer to prevent accidental deletion.
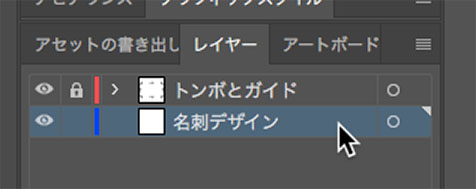
In the Layers panel, select an unlocked layer before making any edits. Please note that if you select a locked layer, the cursor shown below will appear and you will not be able to edit it.

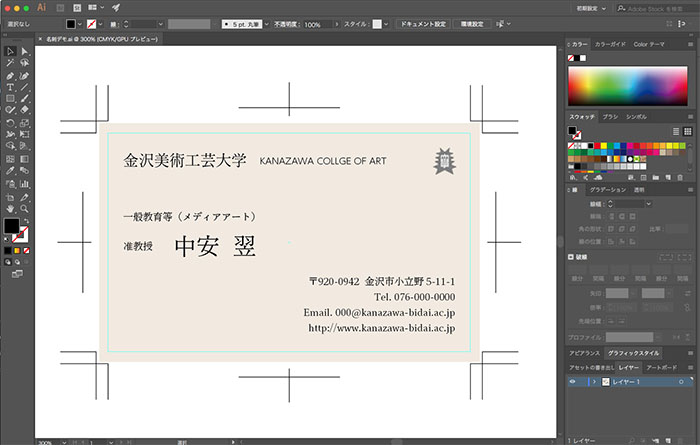
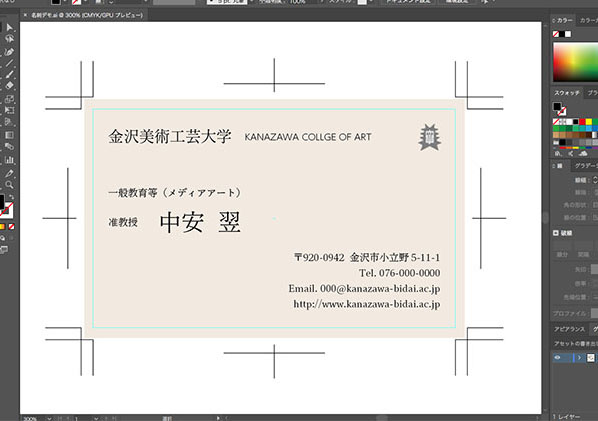
7. Business Card Design
Use the tools you learned in the Illustrator Basics course to create your own designs.
Since business cards are used to exchange contact information with others, they must include at least your “name,” “affiliation,” and “contact information.” You may use a placeholder for your mailing address or phone number. If you wish to include an image, please inform your instructor, as instructions will be provided during class.
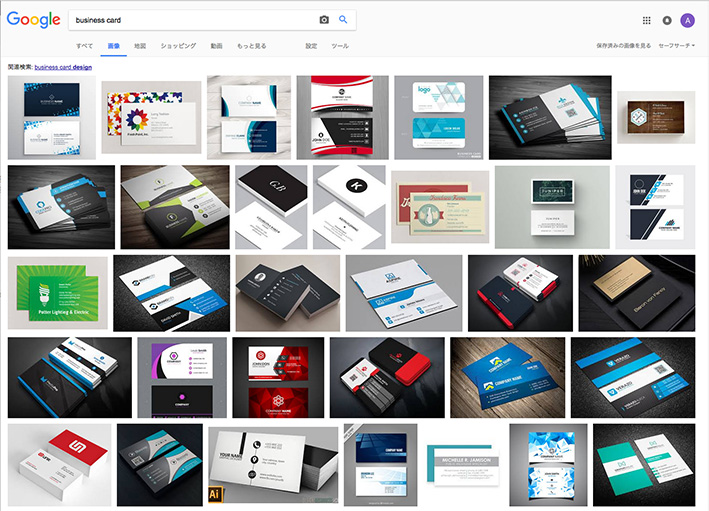
If you search for “business card” on Google Images, you can see a variety of business card designs.
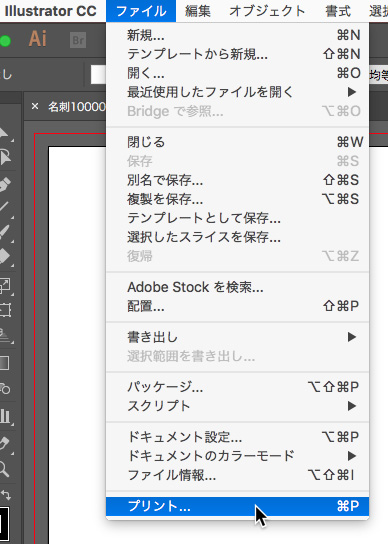
8. Submission Method 1: Print
Select File > Print.
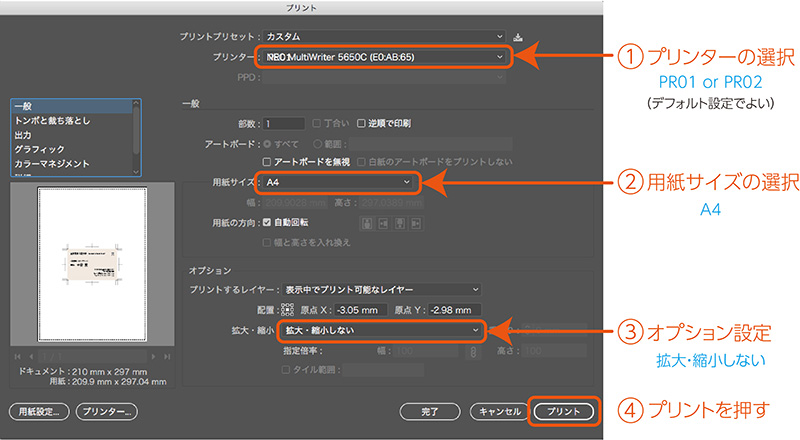
Navigate the print dialog.
9. Submission Method 2: Saving PDF Files
PDF (Portable Document Format) is an electronic file format that can be viewed and edited on computers and other devices. For example, while a document created in Word (in .doc format) cannot be opened without Word, saving it as a PDF makes it viewable on any operating system or tablet device. In addition to Illustrator, you can also save files to PDF format from applications such as Photoshop and Office. PDF files offer various features, including proofreading, redaction, and signing. To edit these files, you need specific software such as Adobe Acrobat.
Perform this task only after the business card design is fully complete and saved as an Illustrator file. Please note that any changes made after saving as a PDF will only be reflected in the PDF file. When making changes to the design, edit the original Illustrator file and save it as a PDF again once you are finished.
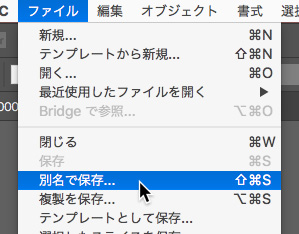
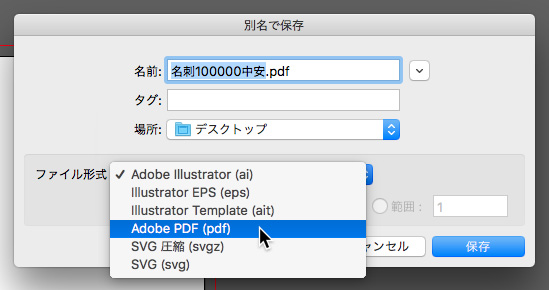
Select File > Save As.
Change the file format to Adobe PDF.
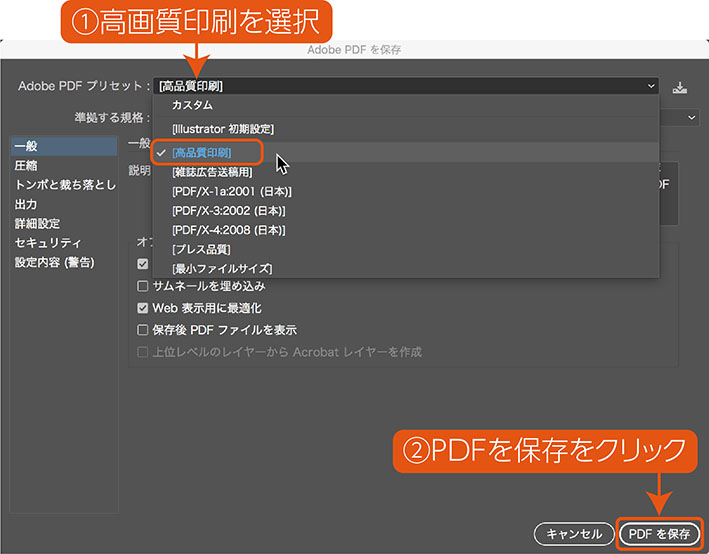
In the settings shown below, change the Adobe PDF preset to “High-Quality Printing” and click the “Save PDF” button in the lower-right corner.
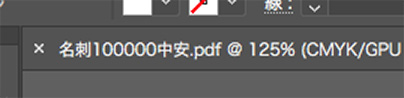
Verify that the name in the upper-left corner of the document window has been changed.
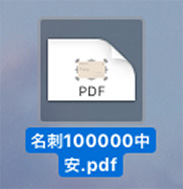
Make sure the PDF file is saved on your desktop.
10. Data Submission
Click Applications > Shared.app.
Double-click the shared folder on your desktop.

Drag and drop your files into the specified folder.