EOS Kiss X7i Basics
Updated: 2012-01*

This article was written in 2012. It is kept here as an archive — the content is outdated and some links may no longer work.
1. About These Lecture Notes
These lecture notes introduce the basic operations under the following conditions.
① Shooting Mode: Program AE (P)
② Focus: Manual
③ Flash: Off
④ Image Quality: S2 (1920×1280)
⑤ Aspect Ratio: 3:2 (Default)
⑥ ISO Sensitivity: Auto
⑦ Exposure Compensation: 0 (Default)
For information on other features, refer to the “User’s Manual,” “Quick Guide,” and “Canon EOS Kiss X7i: Basic & Advanced Photography Guide—Ready to Use” included in the camera bag.

2. SD Card Slot

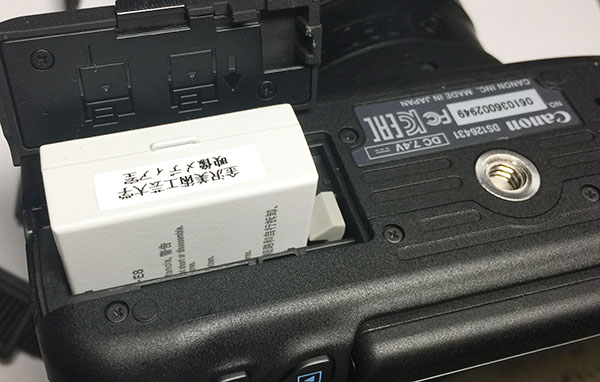
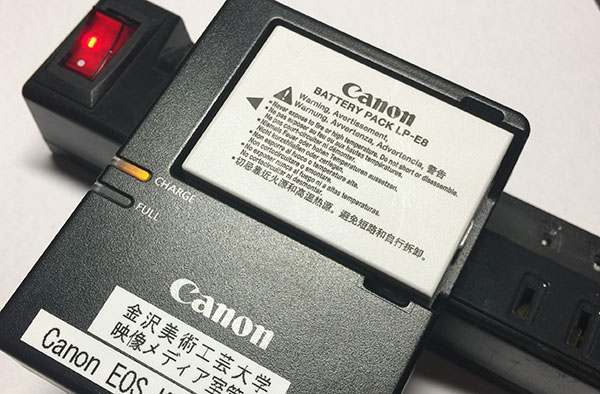
3. Battery Replacement and Charging
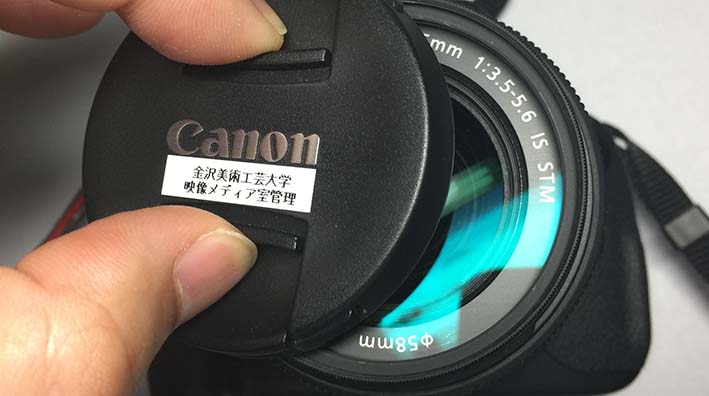
4. Remove the lens cap
Lens caps are easy to lose, so put them in your camera bag after removing them.
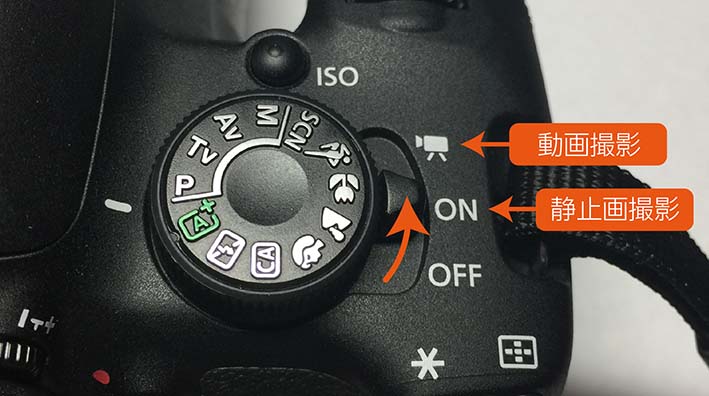
5. Turn on the power
Turn the lever to the ON position.
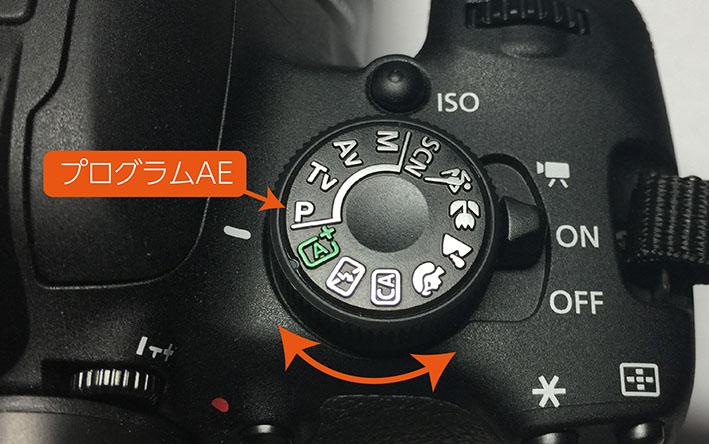
6. Shooting Mode (Program AE)
Turn the mode dial and align the P mark (Program AE) with the white indicator.
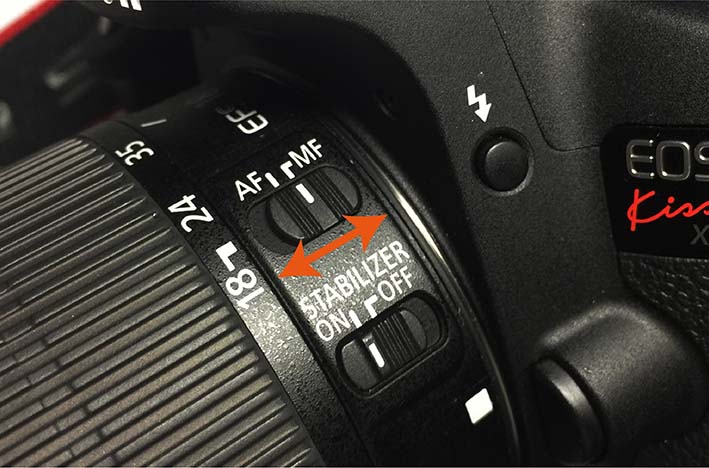
7. Manual Focus Settings
Slide it to the MF (Manual Focus) side.
8. Adjusting the Orientation of the LCD Monitor
The EOS Kiss X7i features a vari-angle LCD monitor, allowing you to adjust the monitor’s angle to shoot from a variety of positions.
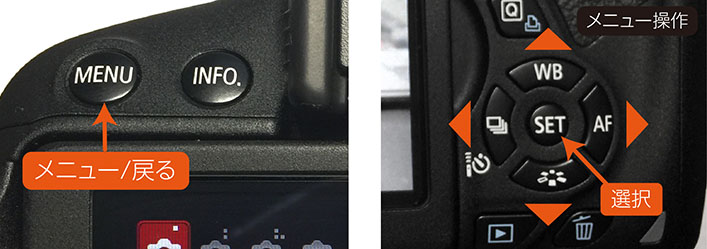
9. Changing Various Settings (LCD Panel)
Press the MENU button to change various settings while viewing the LCD panel. Use the button in the lower right corner of the LCD (see right in the figure below) to navigate and select menu items. Press the MENU button to return to the previous menu.
10. Change the image quality to S2
In this exercise, change the image resolution to S2 (1920×1280).
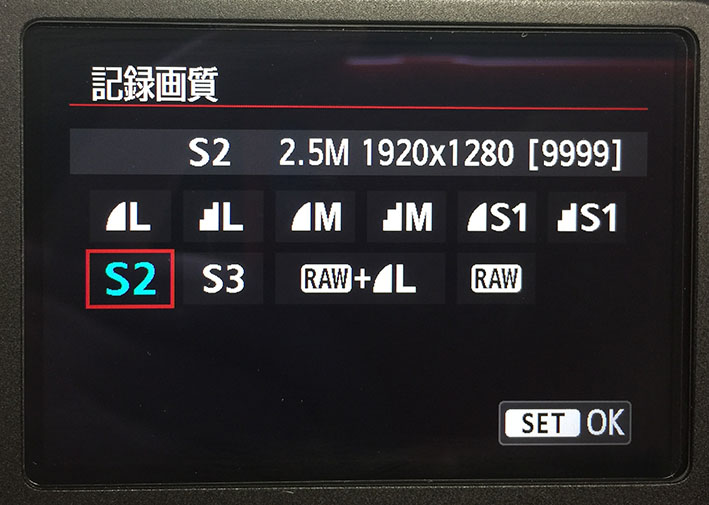
Select the recording quality on the screen shown below.
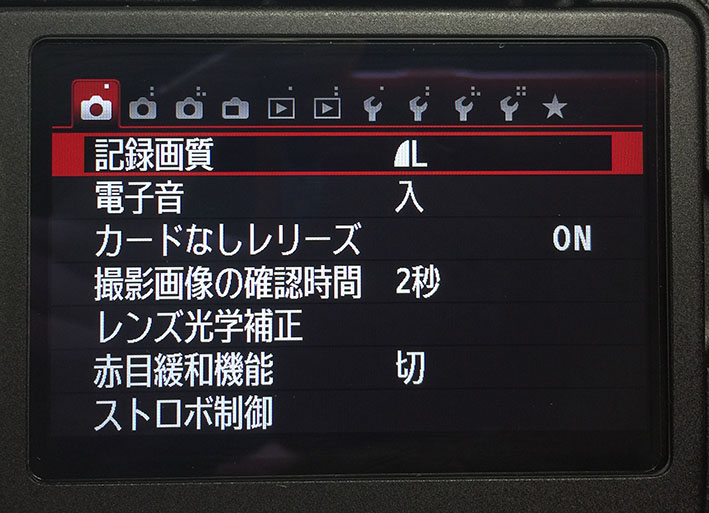
Select S2 on the recording quality screen.
11. Turning Off the Flash
Since the flash fires automatically when taking photos in dark places, disable the flash.
Select “Strobe Control” on the screen below.
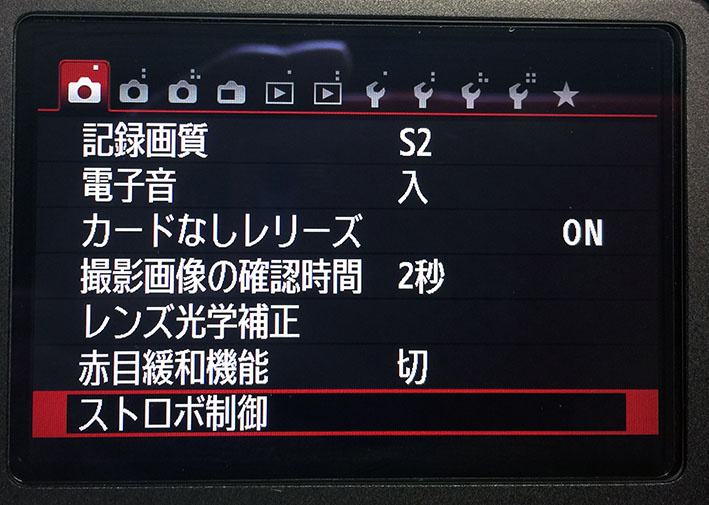
On the flash control screen, select “Do not fire.”

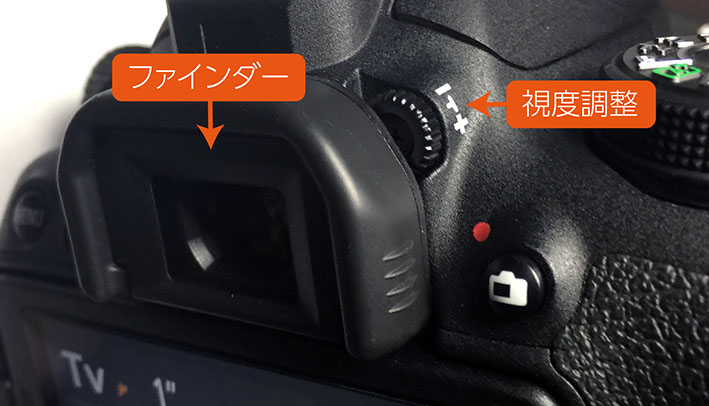
12. Shooting Through the Viewfinder
When shooting through the viewfinder, adjust the diopter setting to match your eyesight. Adjust it based on the display that appears when you half-press the shutter button.
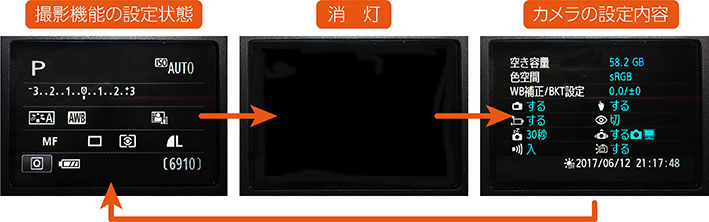
About the INFO Button

When you press the INFO. button while shooting through the viewfinder, the display cycles through the shooting mode settings → turns off → displays the camera settings, as shown below. The display may turn off accidentally; if this happens, press the INFO. button or turn the camera back on. For information on the display during playback, refer to page 270 of the user manual.
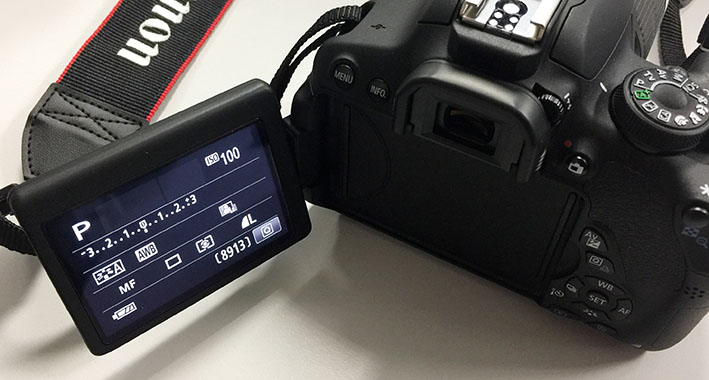
13. Live View Shooting
Press the Live View button to shoot while viewing the image on the LCD screen. Press the INFO. button to display various status information. The display format changes depending on how many times you press the button.
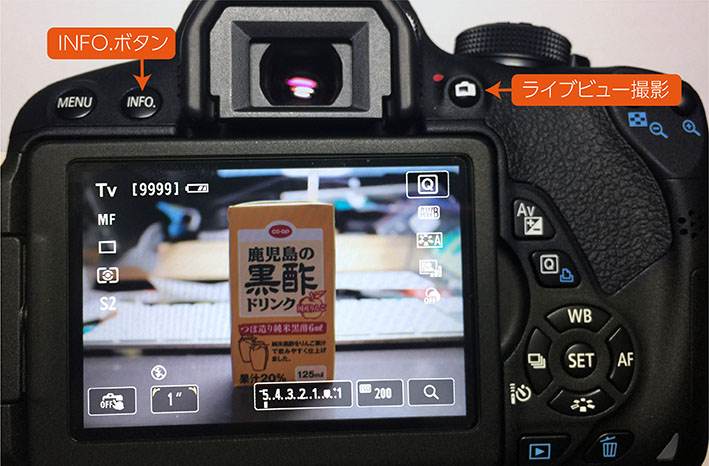
When the camera automatically turns off or you turn it off, it returns to viewfinder shooting mode, so press the Live View shooting button again. If you find this inconvenient, turn off the auto power-off feature.
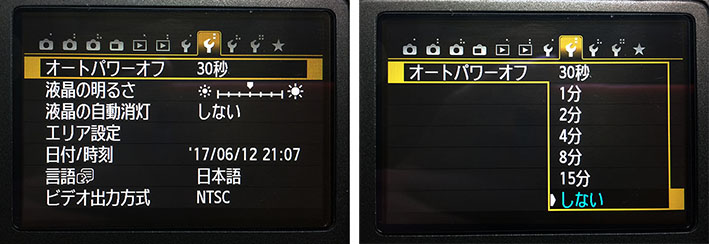
14. Changing the Auto Power Off Settings
To conserve power, the EOS Kiss X7i automatically enters sleep mode after a certain period of time (30 seconds by default). To wake the camera, press the shutter button halfway or the MENU button. To change the time before the camera enters sleep mode, follow the instructions in the figure below.
15. How to Hold the Camera
Hold the camera with your hand on the lens, as shown in the illustration below.
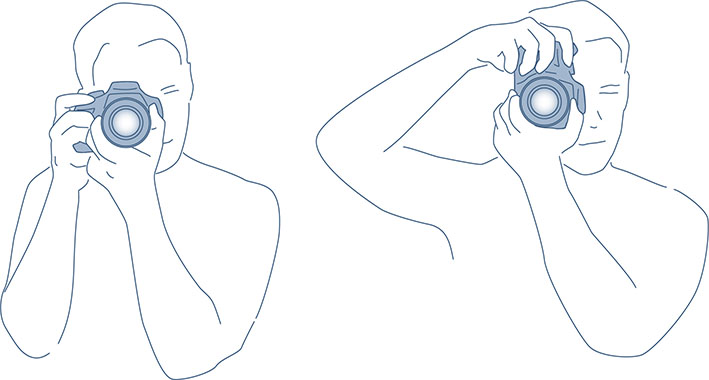
See page 30 of the “Canon EOS Kiss X7i: Basic & Advanced Photography Guide” for tips you can use right away.
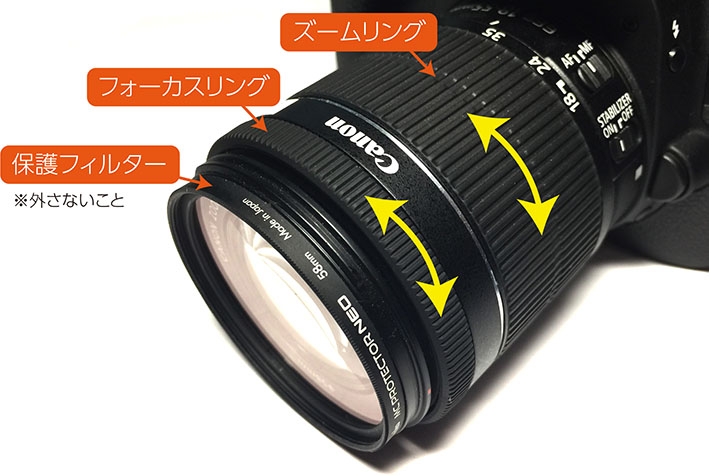
16. Zoom and Focus
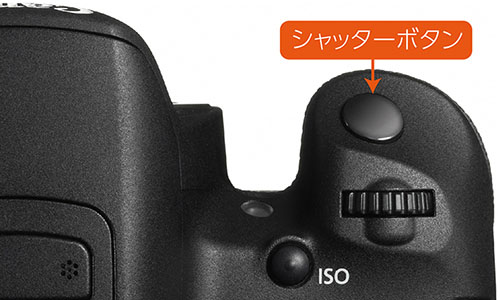
17. Shutter Button
On a DSLR, the shutter button has two stages; pressing it halfway performs the following actions.
・Lock focus during autofocus.
・Lock exposure settings (aperture, shutter speed, ISO) based on the shooting mode.
・Resume operation after auto power-off.
Operation may vary depending on the camera settings.
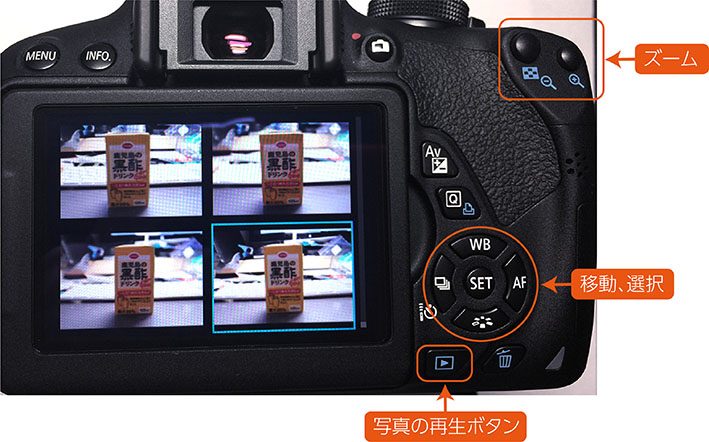
18. Reviewing Photos
19. Shooting in Aperture Priority Mode
When taking portraits of people, it is common to blur the background to make the subject stand out. To blur the background, you need to shoot with a shallow depth of field.
A simple way to do this is to switch the mode to Aperture Priority (Av) and take the photo.
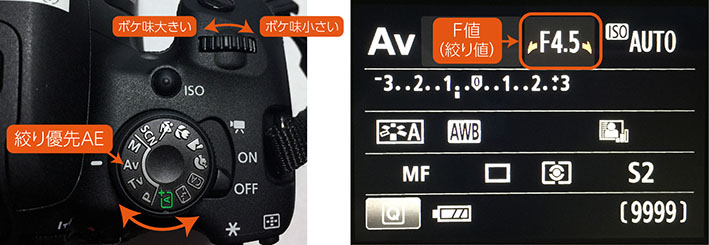
Let’s compare photos taken with the aperture set to its narrowest setting (all the way to the right) and its widest setting (all the way to the left).
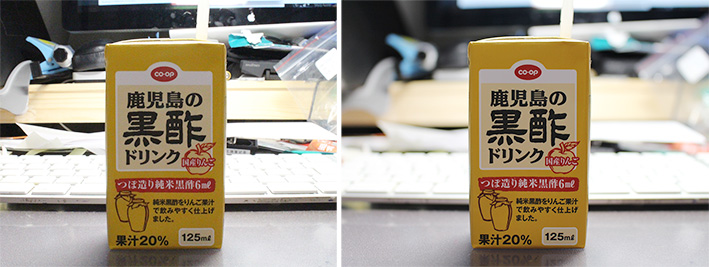
Since you can’t check the bokeh effect while shooting, you’ll need to play back the footage to see it.
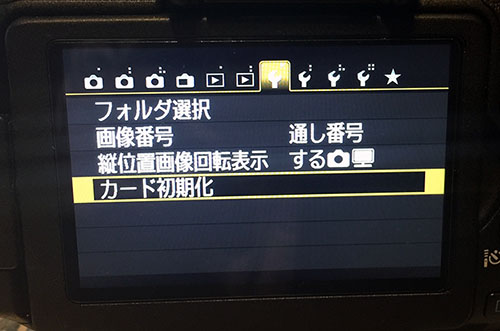
20. Delete All Data from the SD Card
Before returning the camera, delete all data from the SD card. Be sure to back up any necessary data before doing so.
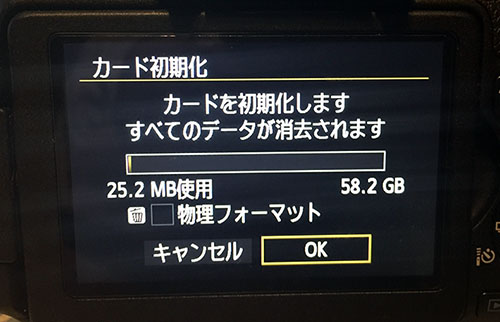
Press the MENU button on the camera, navigate to the screen shown below, and select “Initialize Card.”
Press OK on the card initialization screen.
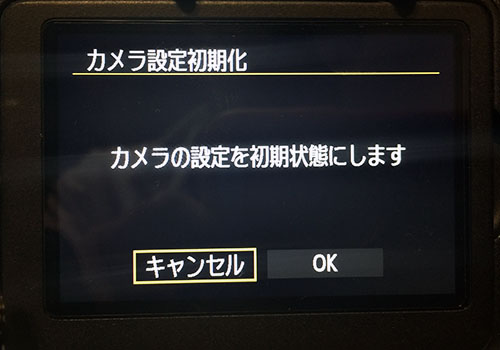
21. Reset All Settings
When returning the camera, reset all settings to their defaults for the next user.
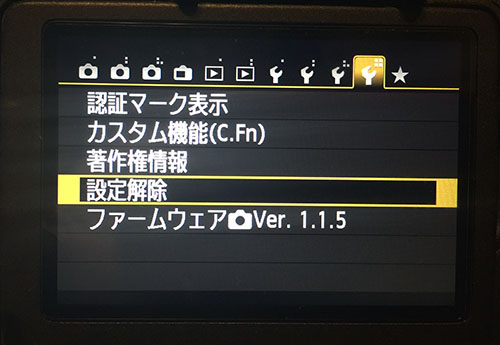
Press the MENU button on the camera to go to the screen shown below, then select “Cancel Settings.”
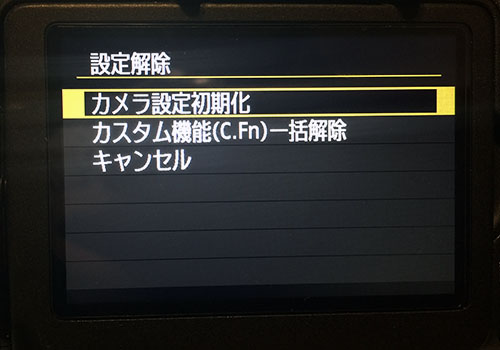
On the settings reset screen, select “Reset Camera Settings.”
Press OK on the camera settings reset screen.